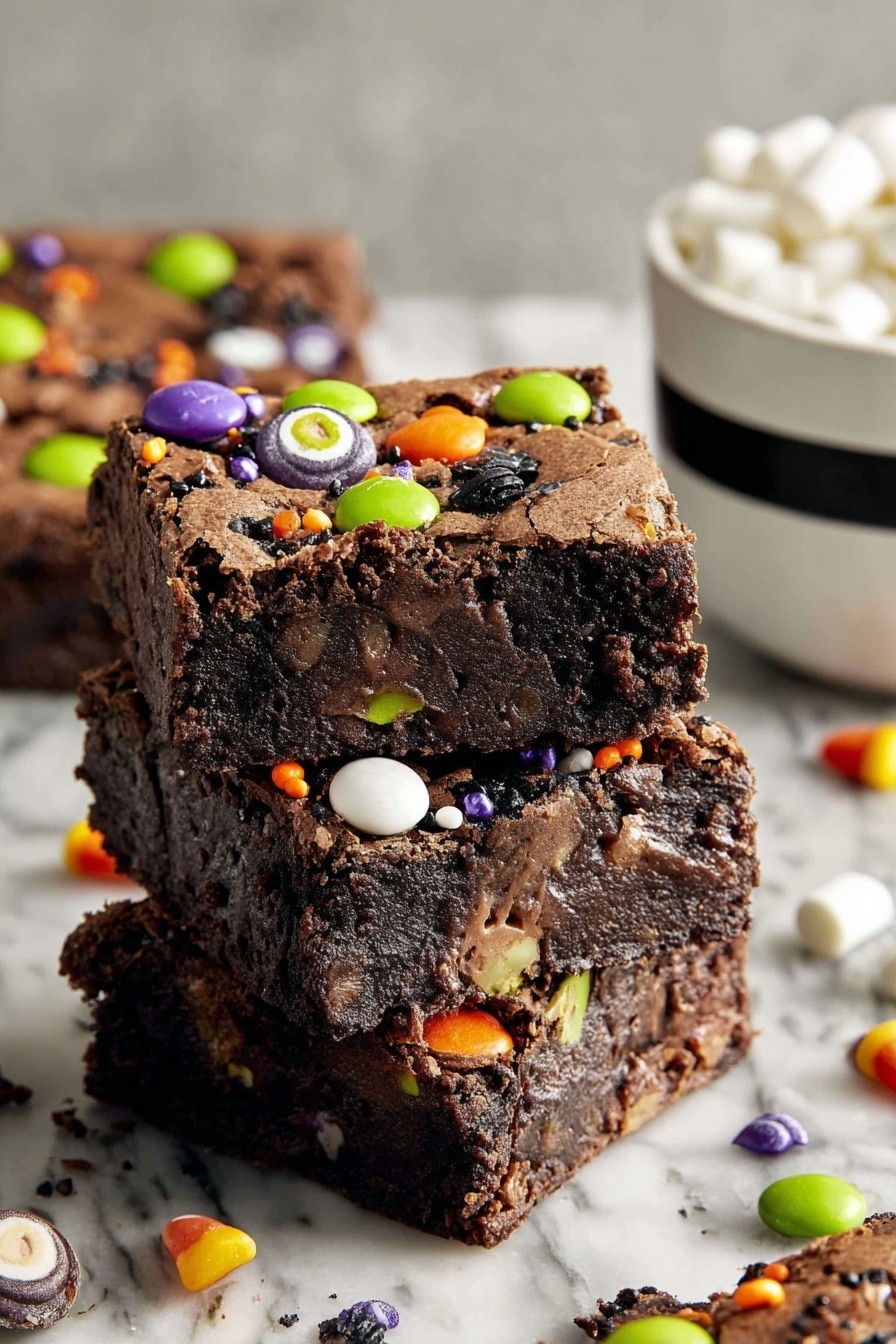
The Best Halloween Brownies Recipe
If you’re looking for a treat that perfectly captures spooky season vibes and melts deliciousness in your mouth, boy, do I have a gem for you. I’m excited to share The Best Halloween Brownies Recipe—a rich, fudgy, and festive dessert that’s guaranteed to impress your party guests or satisfy your seasonal sweet tooth. These brownies have that fantastic chewy-crumb texture I love, balanced with deep chocolate flavor and fun Halloween toppings that bring on the spirit. Trust me, once you make these, You’ll want to keep this recipe in your holiday rotation forever.
Why This Recipe Works
- Perfect Balance of Fudgy and Cake-Like: Thanks to the combination of butter, oil, and cornstarch, these brownies hold just the right chewy yet tender texture.
- Deep, Intense Chocolate Flavor: Using quality cocoa powder paired with dark chocolate chips creates a rich and decadent taste that’ll satisfy any chocolate lover.
- Festive and Fun Toppings: Adding Halloween M&Ms and candy eyeballs not only looks adorable but offers contrasting textures that make each bite exciting.
- Easy and Quick to Whip Up: With just a few simple steps and ingredients, you can get these brownies in the oven fast, making it perfect for last-minute holiday baking.

Ingredients & Why They Work
Each ingredient plays a star role to give you the moist, rich, and satisfying brownies you crave. I like to prioritize quality cocoa and chocolate chips to boost the flavor, and the mix of butter and vegetable oil keeps the texture just right without being greasy. Here’s a little scoop on what makes each thing special.
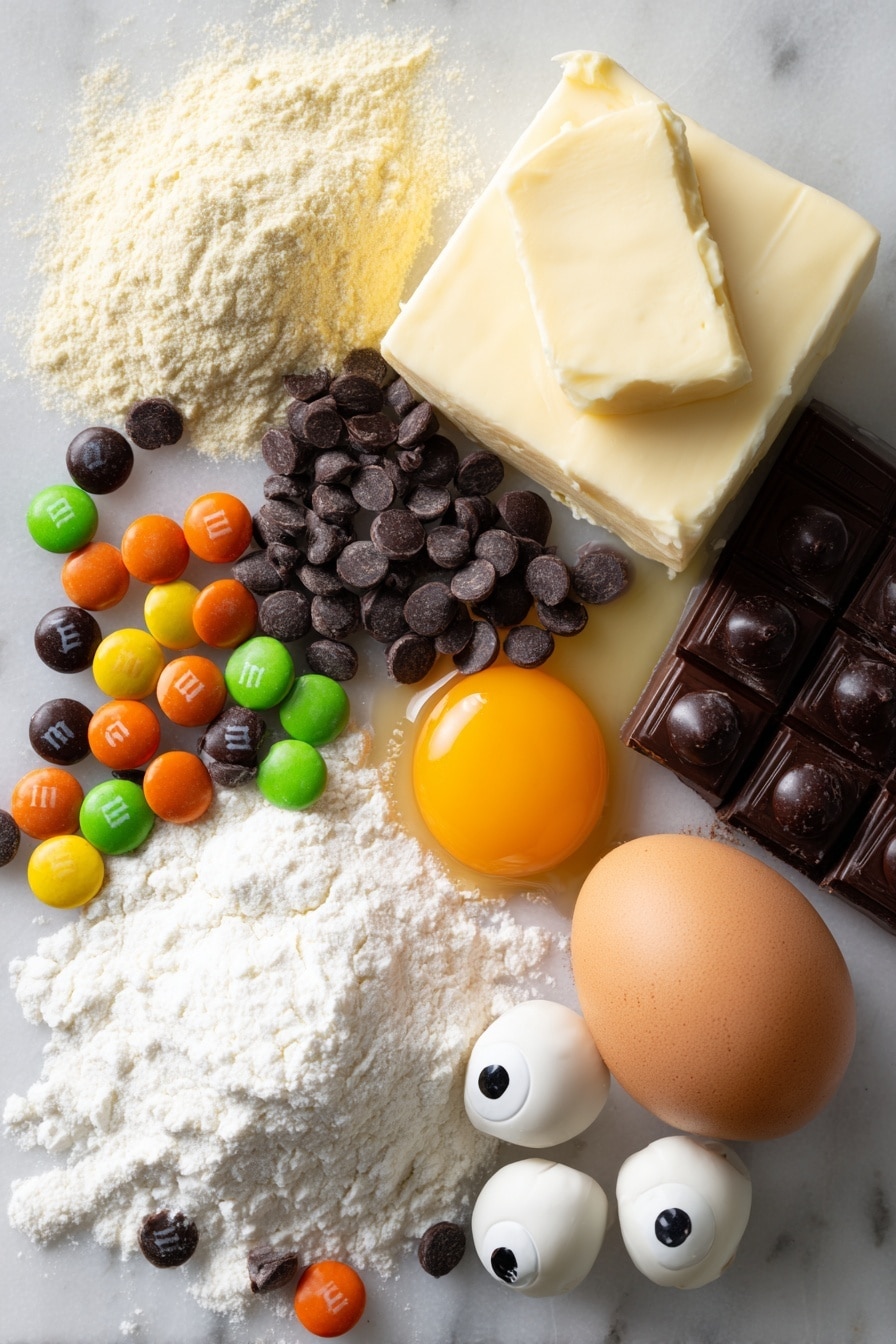
- Unsalted Butter: Melting butter provides a buttery richness and helps bind the sugar for a glossy, chewy texture. Using unsalted lets you control the salt precisely.
- Granulated Sugar: Sweetens and helps create a tender crumb. I find the sugar also adds a nice caramelized hint to the crust.
- Vegetable Oil: Adding oil ensures a moist brownie that stays soft even after cooling.
- Eggs: Eggs bind everything together and add structure without making it cakey.
- Vanilla Extract: Brings warmth and enhances the chocolate flavor—never skip this!
- All-Purpose Flour: Provides the base structure; make sure to measure by spooning and leveling for accuracy.
- Cocoa Powder: Use a good-quality unsweetened cocoa powder and sift it if it’s lumpy to avoid clumps.
- Cornstarch: A secret weapon that tenderizes the brownies and makes them softer and more chewy.
- Dark Chocolate Chips: Melting pockets of gooey chocolate are what dreams are made of—don’t skimp here!
- Sea Salt: A touch of salt balances out the sweetness and amplifies the chocolate flavor.
- Halloween M&Ms & Candy Eyeballs (Topping): They add a fun seasonal flair and textural contrast that makes these brownies party-ready.
Make It Your Way
One of the reasons I adore The Best Halloween Brownies Recipe is how easy it is to tweak for your taste or dietary needs. I’ve played around with different mix-ins and flavor twists and found they still turn out amazing—so feel free to make it your own!
- Variation: I sometimes swap dark chocolate chips for white chocolate or peanut butter chips, depending on the candy stash I’m working with—each gives a fun new vibe.
- Diet-Friendly Option: You can use coconut oil instead of vegetable oil for a dairy-free edge, and try almond or oat flour for a gluten-free twist—just expect slight texture changes.
- Seasonal Flavors: Add a teaspoon of pumpkin pie spice or cinnamon for an autumnal touch without overpowering the chocolate.
Step-by-Step: How I Make The Best Halloween Brownies Recipe
Step 1: Get Your Oven and Pan Ready
First, preheat your oven to 325°F (163°C). This lower temperature helps the brownies bake evenly, keeping that fudgy texture without drying out. Line an 8×8-inch baking pan with foil or parchment, and spray it lightly with nonstick cooking spray so your brownies pop out easily after baking. Trust me, this little step saves you from sadness and breakage.
Step 2: Melt Butter and Mix Sugars
Pop the butter and granulated sugar into a microwave-safe bowl and heat for about 1 minute until the butter melts. Stir in the vegetable oil until everything is smooth and glossy. This step kickstarts the luscious texture you’ll love in the finished brownies.
Step 3: Whisk in Eggs and Vanilla
Add the eggs one at a time, whisking well after each to ensure a smooth mixture that holds air and structure. Then stir in the vanilla extract for that comforting, warming flavor.
Step 4: Add Dry Ingredients Carefully
Sift the flour and cocoa powder to avoid lumps (I never skip this!). Add the cornstarch and sea salt, then gently fold everything together until just combined. The key here is not to overmix, or your brownies might turn cakey when you want fudgy perfection.
Step 5: Fold in Chocolate Chips and Spread Batter
Gently fold in the dark chocolate chips for gooey bites throughout. Spread the batter evenly in your prepared pan, smoothing the top so the toppings sit nicely.
Step 6: Add the Fun Halloween Toppings
Scatter your Halloween M&Ms and candy eyeballs over the top—this is the moment your brownies start looking irresistible and party-ready. Press the toppings lightly into the batter so they stick during baking.
Step 7: Bake and Cool Completely
Bake for about 30 minutes until the brownies are set but still moist in the middle; test with a toothpick that should come out with moist crumbs attached. The cooling step is crucial, so let them cool fully in the pan to set perfectly—don’t rush this or you’ll lose that ideal fudgy bite.
Tips from My Kitchen
- Don’t Skip Sifting: Cocoa powder often clumps, and sifting makes sure your batter is smooth without any bitter pockets.
- Watch the Bake Time: Ovens vary, so start checking at 28 minutes; you want moist crumbs, not dry brownies!
- Cool Completely Before Cutting: This step locks in fudginess and keeps your brownies tidy when slicing.
- Press Toppings Lightly: It keeps candies from falling off after baking—no wasted sprinkles here!
How to Serve The Best Halloween Brownies Recipe
Garnishes
I love adding extra candy eyeballs or little Halloween-themed edible glitter just before serving to dial up the spooky factor. Sometimes I drizzle a bit of white chocolate on top for contrast, which looks amazing and tastes incredible.
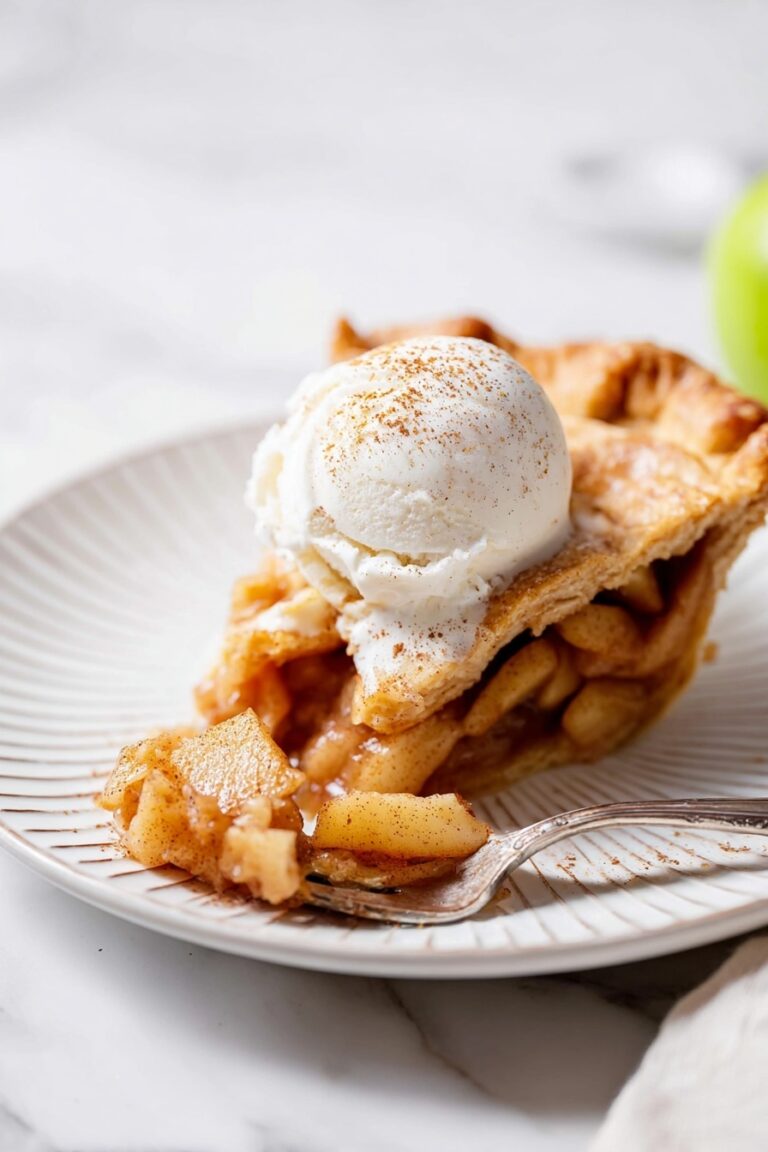
Side Dishes
These brownies pair wonderfully with a scoop of vanilla bean ice cream or a simple glass of cold milk. For parties, I like setting out some whipped cream or pumpkin-spiced coffee to complement the chocolatey goodness.
Creative Ways to Present
At a Halloween bash, I’ve served these brownies on a platter lined with autumn leaves and tiny pumpkin decorations. You can cut them into fun shapes using cookie cutters or stack them as mini brownie towers topped with candy eyes for a fun, spooky display.
Make Ahead and Storage
Storing Leftovers
Once cooled, I store these brownies in an airtight container in the fridge, and they stay perfectly moist for up to 2-3 days. This recipe makes enough to share, but if you’re anything like me, leftovers are guaranteed.
Freezing
I’ve had great luck freezing the brownies without toppings wrapped tightly in plastic wrap and then in a freezer bag. They keep beautifully for up to 3 months—just add fresh decorations when you thaw and serve!
Reheating
To reheat, I pop a brownie in the microwave for about 10-15 seconds to warm it up, which revives that soft and gooey texture. It’s almost like freshly baked each time.
FAQs
-
Can I use a different size pan for this recipe?
Sure! An 8×8 inch pan is ideal, but if you only have a 9×9 inch pan, your brownies will be a bit thinner and might bake slightly faster. Start checking around 25 minutes to avoid overbaking.
-
What makes these brownies different from other recipes?
This recipe uses both butter and oil plus cornstarch to achieve that perfect chewy yet tender texture. The addition of festive toppings also makes them stand out as the ultimate Halloween treat.
-
Can I make these gluten-free?
Yes! Substitute the all-purpose flour with a 1-to-1 gluten-free baking flour blend. Just keep an eye on bake time and texture since gluten-free flours can behave differently.
-
What’s the best way to decorate for kids?
Use themed sprinkles, colorful Halloween M&Ms, and large candy eyeballs. You can even set up a DIY brownie decorating station for a fun, interactive party activity.
Final Thoughts
Honestly, The Best Halloween Brownies Recipe has become my go-to for every spooky celebration because it delivers that perfect blend of rich chocolate, fun presentation, and foolproof method. I love how it brings a little magic to my kitchen and smiles to my family’s faces every time. If you want a crowd-pleaser that’s easy, festive, and downright delicious, give this recipe a try—you’ll be so glad you did, and it just might become your holiday favorite too!
Print
The Best Halloween Brownies Recipe
- Prep Time: 5 minutes
- Cook Time: 30 minutes
- Total Time: 35 minutes
- Yield: 12 servings
- Category: Dessert
- Method: Baking
- Cuisine: American
Description
These rich and fudgy Halloween brownies are the perfect festive treat, topped with colorful Halloween M&Ms, sprinkles, and fun candy eyeballs. Moist and decadent, they are easy to make and sure to delight all ages during the spooky season.
Ingredients
Base Ingredients
- 1/2 cup unsalted butter (1 stick)
- 1 1/4 cups granulated sugar
- 1/3 cup vegetable oil
- 3 large eggs
- 2 teaspoons vanilla extract
Dry Ingredients
- 3/4 cup all-purpose flour
- 3/4 cup cocoa powder (sifted if lumpy)
- 1 tablespoon cornstarch
- 3/4 teaspoon sea salt
Add-ins and Topping
- 3/4 cup dark chocolate chips
- Halloween M&Ms sprinkles
- Candy eyeballs
Instructions
- Preheat and Prepare Pan: Preheat your oven to 325 degrees F (163 degrees Celsius). Line an 8×8-inch baking pan with foil or parchment paper and spray it with nonstick cooking spray to ensure easy removal.
- Melt Butter and Sugar: In a microwave-safe bowl, combine the butter and granulated sugar. Microwave for about 1 minute until the butter is melted, then add vegetable oil and stir until well combined.
- Add Eggs and Vanilla: Whisk in the eggs and vanilla extract until the mixture is smooth and well blended.
- Combine Dry Ingredients: Sift together the all-purpose flour, cocoa powder, cornstarch, and sea salt. Gradually add these dry ingredients to the wet mixture, stirring gently until just combined. Do not overmix to keep the brownies tender.
- Fold in Chocolate Chips: Carefully fold in the dark chocolate chips to evenly distribute throughout the batter.
- Pour and Top Batter: Spread the brownie batter evenly into the prepared baking pan. Top the surface with Halloween M&Ms, sprinkles, and candy eyeballs for a festive touch.
- Bake: Bake in the preheated oven for 30 minutes or until the brownies are set and a cake tester or toothpick inserted in the center comes out with moist crumbs attached. Avoid overbaking to maintain fudginess.
- Cool Completely: Remove the pan from the oven and let the brownies cool completely in the pan before slicing to ensure clean cuts and perfect texture.
- Store: Store the brownies in an airtight container in the refrigerator for up to 2-3 days to keep them fresh.
Notes
- Ensure the cocoa powder is sifted to avoid lumps in the batter.
- Do not overmix the batter after adding flour to keep brownies soft and fudgy.
- Letting the brownies cool completely before cutting prevents crumbling.
- You can substitute vegetable oil with an equal amount of melted coconut oil for a slight coconut flavor.
- For a gluten-free version, substitute regular flour with a gluten-free all-purpose flour blend.
- Use parchment paper instead of foil for easier removal of the brownies from the pan.
Nutrition
- Serving Size: 1 serving
- Calories: 280 kcal
- Sugar: 25 g
- Sodium: 120 mg
- Fat: 15 g
- Saturated Fat: 6 g
- Unsaturated Fat: 8 g
- Trans Fat: 0 g
- Carbohydrates: 34 g
- Fiber: 3 g
- Protein: 3 g
- Cholesterol: 60 mg


