Oreo Spiders Recipe
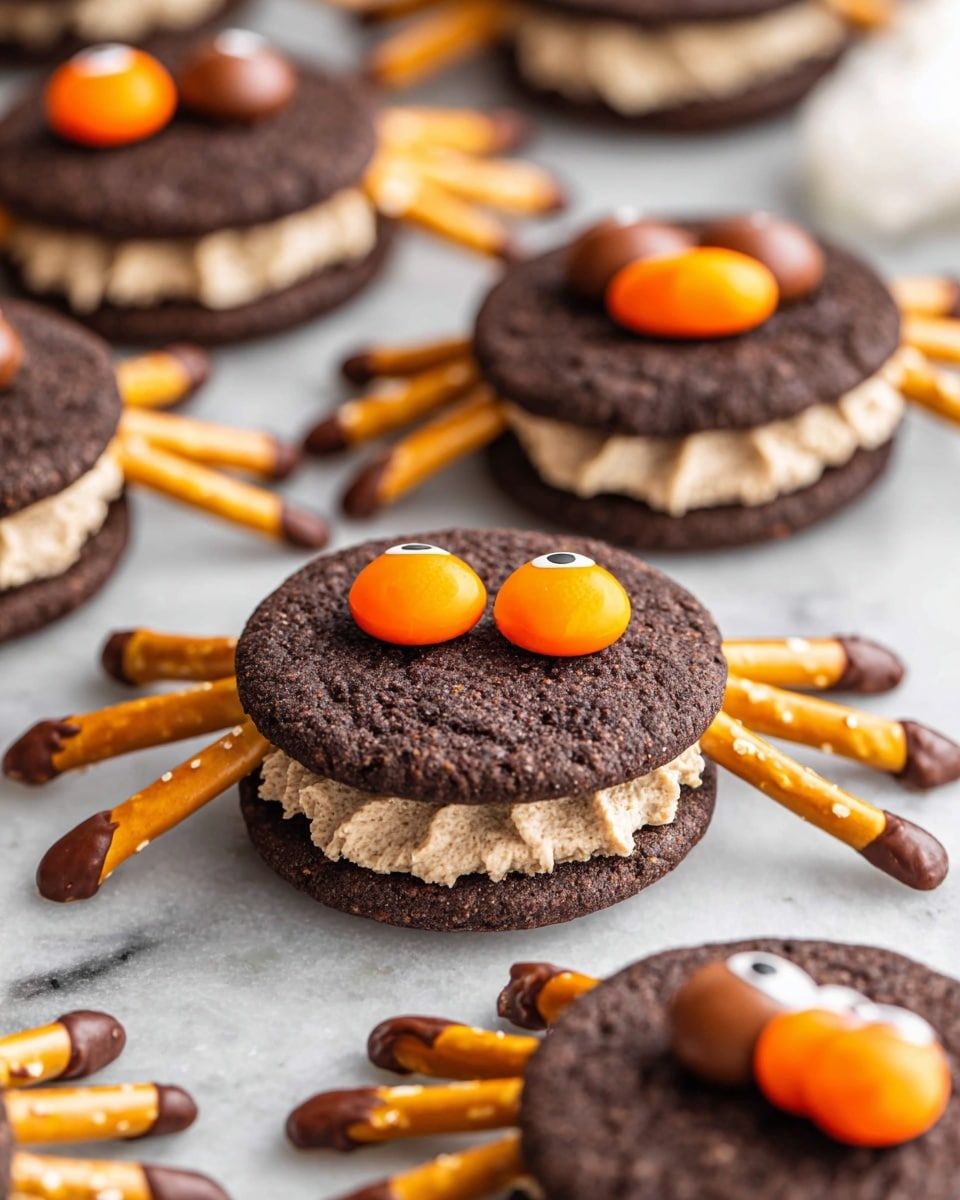
If you’re looking for a fun, spooky, and insanely cute treat to wow your friends or family, you’re in the right place. This Oreo Spiders Recipe is one of my absolute favorites to whip up, especially around Halloween or anytime you want a playful dessert that’s both simple and super impressive. Imagine crunchy peanut butter Oreos transformed into creepy-crawly little spiders, complete with pretzel legs and chocolatey eyes—trust me, these will disappear fast once you bring them out!
Why This Recipe Works
- Sweet & Salty Balance: Combining peanut butter Oreos with salty pretzels and rich dark chocolate adds that perfect contrast in every bite.
- No-Bake Simplicity: You don’t need an oven for this—great for quick snack prep or involving kids in the kitchen safely.
- Creative Fun: Turning classic ingredients into cute little spiders makes it a hit at parties or Halloween gatherings.
- Customizable & Adaptable: Easy swaps and mix-ins let you tailor the recipe to your taste and pantry.
Ingredients & Why They Work
The magic of the Oreo Spiders Recipe lies in its simple yet perfectly coordinated ingredients. Each component brings a texture or flavor that complements the other, creating a playful and delicious snack. When shopping, look for good-quality peanut butter Oreos and dark chocolate chips that melt smoothly—that’s key for the “glue” holding these spiders together.
- Peanut Butter Oreo Cookies: These are the “spider body,” so use your favorite peanut butter Oreos to give that creamy, nutty kick.
- Dark Chocolate Chips: I find dark chocolate melts better and tastes richer, giving a nice contrast to the sweet Oreos.
- Pretzel Sticks: These form the spider legs and add a subtle crunch and saltiness—breaking them in half makes leg assembly easier.
- Reese’s Pieces Candies: Cut in half, they make adorable spider eyes with a pop of color.
Make It Your Way
While I love this Oreo Spiders Recipe as is, it’s a lot of fun to put your own twist on it. Maybe you want to jazz up the eyes or give the spiders a different kind of leg. You can totally make it your own and still keep that spooky charm!
- Variation: I once swapped peanut butter Oreos for classic chocolate Oreos and used mini gummy worms as extra creepy legs—it was a hit at a kids’ party!
- Dietary Twist: For a gluten-free version, you can try gluten-free sandwich cookies and gluten-free pretzel sticks. Just double-check the chocolate chips, too!
Step-by-Step: How I Make Oreo Spiders Recipe
Step 1: Get Your Oreos Ready
Line a baking sheet with parchment paper and spread out your peanut butter Oreos—these will be the spider bodies, so give them some space. It helps keep everything organized and makes cleanup a breeze. I always like starting here so the assembly flows easily.
Step 2: Melt That Chocolate Smoothly
Pour your dark chocolate chips into a microwave-safe bowl and heat in 45-second bursts. Stir well between each heating to help the chocolate melt evenly and avoid burning. If it needs more time, heat in short 10-15 second intervals. Smooth, fully melted chocolate is your glue to keep those pretzels and eyes firmly attached.
Step 3: Build the Spider Legs
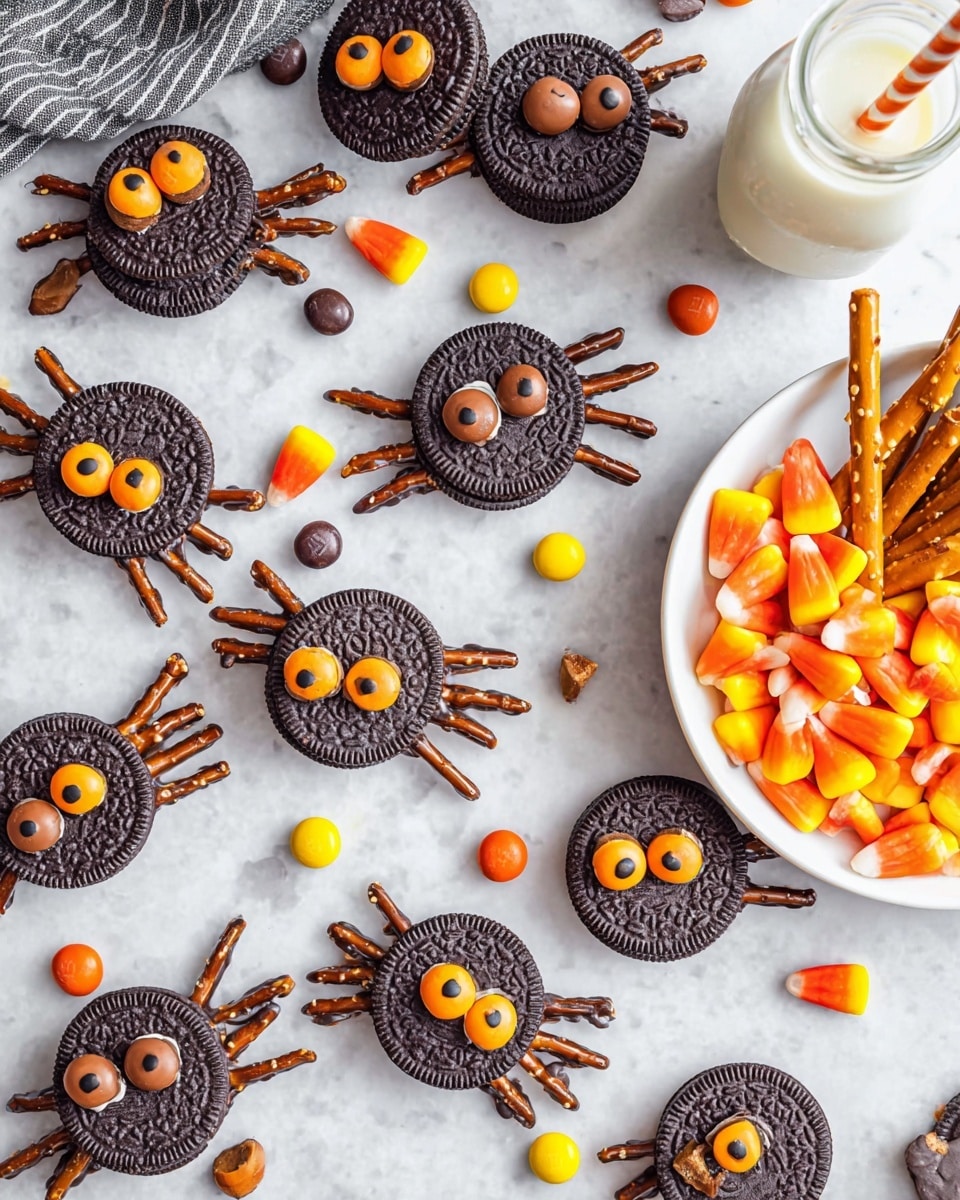
Dip the ends of four halved pretzel sticks into the melted chocolate, then gently press them into one side of the Oreo. Repeat on the other side with four more pretzel halves—you want eight legs total, just like real spiders. Be gentle so you don’t crack the cookie, and work fairly quickly before the chocolate sets.
Step 4: Add the Creepy Eyes
Use a toothpick to spread a bit of melted chocolate onto the cut (flat) sides of two halved Reese’s Pieces candies, then stick them cut side down at the top of the Oreo. This forms the bright spider eyes and adds a fun, colorful finish. Repeat for all your Oreo spiders.
Step 5: Secure the Legs & Finish Feet
Once the legs are in place, if they don’t feel firmly set yet, pop the Oreo spiders in the fridge for about 10-15 minutes. Meanwhile, reheat more chocolate if needed. Then, dip the bottom ends of the pretzel legs into melted chocolate to create the spider’s “feet,” adding extra hold and cuteness. Place them back on the sheet and let everything set completely—about 30 minutes at room temperature or 15 minutes in the fridge.
Tips from My Kitchen
- Use Room Temp Oreos: Cold cookies can cause the chocolate to set too fast while you’re working, so take them out ahead of time.
- Microwave Chocolate Carefully: Chocolate burns quickly, so stir after every short burst to keep it smooth and glossy.
- Finger Protection Trick: If you find the pretzels slippery to handle, dip a toothpick in chocolate to help position the legs without making a mess.
- Set in Refrigerator: Let the spiders chill so legs stick well and don’t fall off, especially if you plan to transport them somewhere.
How to Serve Oreo Spiders Recipe
Garnishes
I love adding a little edible glitter or sprinkles dusted around the Oreo spiders on the serving plate for some extra Halloween flair. Sometimes I toss a few mini marshmallows or cut-out spider web shapes from parchment nearby. It just brings the whole spooky presentation together and kids especially go wild for it.
Side Dishes
To balance the sweetness, I often serve these with a simple fruit platter—think sliced apples or grapes. A cold glass of milk or chocolate milk is my go-to drink pairing because it complements the rich chocolate and peanut butter perfectly.
Creative Ways to Present
For a Halloween party, I’ve arranged the Oreo spiders on a large “web” made with piped icing on a big platter, with edible spider rings scattered around. Another time, I presented them inside small clear treat bags tied with black and orange ribbons, which made wonderful party favors.
Make Ahead and Storage
Storing Leftovers
I store leftover Oreo spiders in an airtight container at room temperature if it’s cool and dry, but if your kitchen is warm, the fridge helps the chocolate stay firm. Just be sure to bring them back to room temp before serving for best flavor and texture.
Freezing
Freezing isn’t my favorite for this recipe because the chocolate and pretzels can get a bit soggy after thawing. However, if you must freeze, wrap them tightly in plastic wrap, place them in a freezer-safe container, and thaw gently in the fridge.
Reheating
Since this treat is best served cool and firm, reheating doesn’t really apply here. If the chocolate loses its sheen, just let them rest at room temperature to regain a bit of softness — but avoid heat to keep the spider shapes intact!
FAQs
-
Can I use regular Oreos instead of peanut butter Oreos for the Oreo Spiders Recipe?
Absolutely! While peanut butter Oreos add that extra nutty flavor, classic Oreos work just fine and give a deep chocolate flavor. You might want to pair them with a different candy for eyes to add some color contrast.
-
How do I prevent the pretzel legs from falling off?
The key is using plenty of melted chocolate as glue and allowing the legs to set well in the fridge or at room temperature before moving the spiders around. Re-dipping the pretzel ends to create “feet” in chocolate adds extra hold.
-
Can kids help with this Oreo Spiders Recipe?
Definitely! This recipe is perfect for involving kids—just have an adult supervise the chocolate melting part. Kids love dipping pretzels and placing the candy eyes, making it a fun and interactive activity.
-
What’s the best way to store these Oreo spiders for a party?
Keep them in an airtight container at room temperature or chilled slightly if your party venue is warm. Prepare them the day before and chill so they stay fresh and legs remain firmly attached.
Final Thoughts
This Oreo Spiders Recipe holds a special place in my heart because it turns simple ingredients into such a whimsical, crowd-pleasing treat with very little fuss. I love how it sparks creativity and brings smiles to the table, especially during spooky season. Give it a try—you’ll enjoy the process as much as the delicious, adorable results. Trust me, once you make these, they’ll become a seasonal favorite you’ll want to share every year!
Print
Oreo Spiders Recipe
- Prep Time: 1 hour
- Cook Time: 0 minutes
- Total Time: 1 hour 30 minutes
- Yield: 24 spiders
- Category: Snack
- Method: No-Cook
- Cuisine: American
Description
Create spooky and fun Oreo Spiders perfect for Halloween or themed parties with peanut butter Oreos, dark chocolate, pretzel legs, and Reese’s Pieces eyes. These adorable treats combine sweet and salty flavors with a creative presentation that’s sure to delight kids and adults alike.
Ingredients
Main Ingredients
- 24 Peanut Butter Oreo Cookies
- 1 cup Dark Chocolate Chips (170 grams)
- 96 Pretzel Sticks halved
- 24 Reese’s Pieces Candies halved
Instructions
- Prepare the Base: Place the 24 peanut butter Oreo cookies on a large, parchment-lined baking sheet to work on a clean surface.
- Melt the Chocolate: Pour 1 cup of dark chocolate chips into a microwave-safe bowl and heat for 45 seconds. Stir well and reheat in 10-15 second intervals, stirring in between until the chocolate is fully melted and smooth.
- Attach the Legs: Dip the ends of four halved pretzel sticks in the melted chocolate and gently press them into one side of an Oreo cookie. Repeat with four more pretzel halves on the opposite side of the Oreo, creating the spider body with 8 legs total.
- Create the Eyes: Using a toothpick, spread melted chocolate on the cut side of two halved Reese’s Pieces candies and place them, cut side down, onto the top of each Oreo to form the spider’s eyes. Repeat for all spiders.
- Set the Legs: Allow the legs to set firmly into the Oreos. If needed, chill the baking sheet in the refrigerator for 10-15 minutes to help the chocolate harden.
- Make the Feet: Check if the chocolate is still melted; reheat briefly if necessary. Coat the bottom of each pretzel leg’s ends in melted chocolate to create spider feet and place them back on the baking sheet.
- Final Cooling: Let the Oreo spiders cool completely until the chocolate is set, approximately 30 minutes at room temperature or 15 minutes in the refrigerator.
Notes
- Use peanut butter Oreos for an extra flavor twist, but regular Oreos work as well.
- To ensure the pretzel legs stick well, make sure the chocolate is fully melted and warm while attaching.
- If the chocolate hardens too quickly, reheat gently in short bursts to maintain a smooth consistency.
- Store the Oreo spiders in an airtight container at room temperature for up to 2 days to keep pretzel legs crispy.
- For a dairy-free version, substitute dark chocolate chips with a vegan chocolate alternative.
Nutrition
- Serving Size: 1 spider
- Calories: 180 kcal
- Sugar: 14 g
- Sodium: 110 mg
- Fat: 10 g
- Saturated Fat: 4 g
- Unsaturated Fat: 5 g
- Trans Fat: 0 g
- Carbohydrates: 20 g
- Fiber: 1 g
- Protein: 2 g
- Cholesterol: 0 mg

