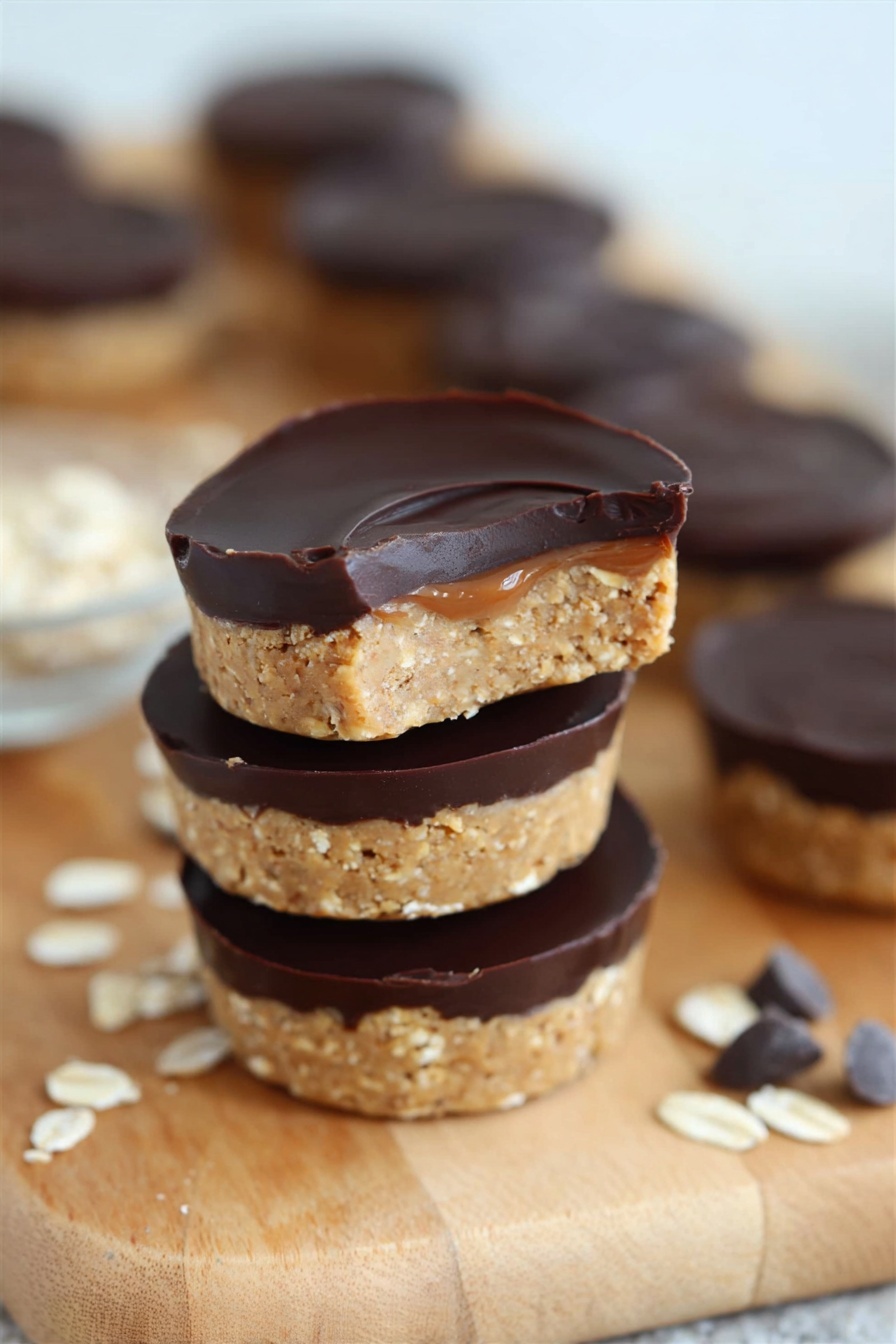
No Bake Peanut Butter Oat Cups Recipe
If you love quick, wholesome treats that don’t require firing up the oven, you’re going to adore this No Bake Peanut Butter Oat Cups Recipe. I first stumbled upon this gem on a hectic afternoon when I just needed something satisfying but fuss-free—these cups came through like a dream. They’re chewy, nutty, and lightly sweetened, making them perfect for breakfast on-the-go, a post-workout snack, or just a little pick-me-up during the day. Stick around, because I’m going to share everything you need to know to nail this recipe every time!
Why This Recipe Works
- Simplicity: Just a handful of staple ingredients come together in under 10 minutes—no oven, no mess.
- Texture Balance: The finely processed oats create a chewy base that holds with creamy peanut butter and a luscious chocolate topping.
- Customizable: You can easily tweak sweetness, add mix-ins, or swap nut butters for your taste and diet.
- Kid-Friendly: Naturally sweetened with maple syrup, these cups are a hit with kids and adults alike—perfect for lunchboxes or snack time.

Ingredients & Why They Work
Each ingredient in this No Bake Peanut Butter Oat Cups Recipe plays its part in crafting a snack that’s flavorful, wholesome, and holds together beautifully. When shopping, look for natural peanut butter without added sugars or oils, and pick rolled oats that you can easily blitz into flour at home.
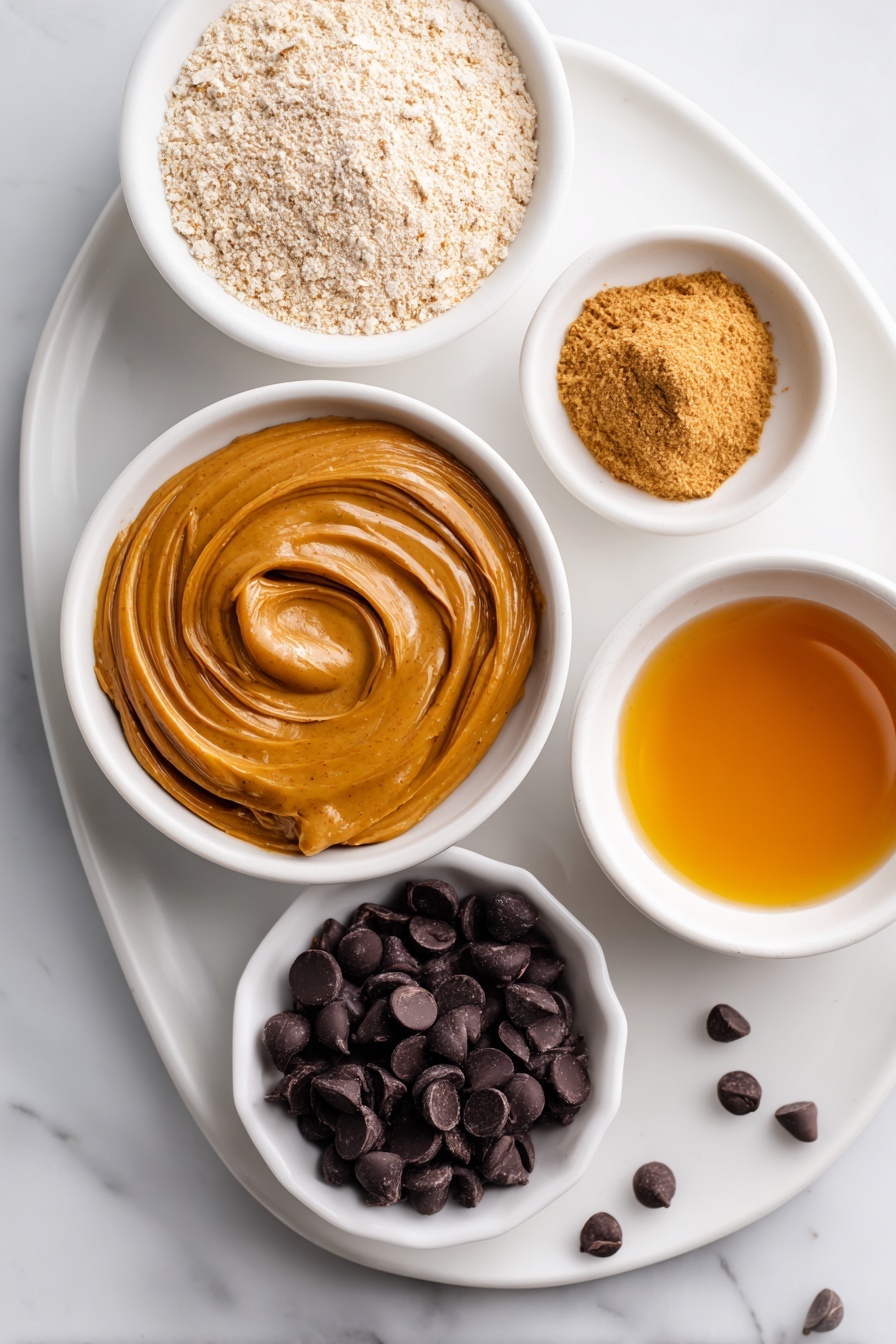
- Peanut Butter: Opt for creamy natural peanut butter; it blends smoothly and gives the cups a rich, nutty flavor that keeps every bite satisfying.
- Rolled Oats: Grinding these into oat flour helps bind the mixture and adds fiber and a subtle nuttiness without being gritty.
- Maple Syrup: This natural sweetener adds a lovely caramel note and helps hold everything together without making it overly sweet.
- Chocolate Chips: Melting them on top adds a decadent layer, balancing the earthiness of oats and peanut butter.
- Coconut Oil (optional): A small amount melts into the chocolate for a glossy finish and smoother texture.
Make It Your Way
I love that this No Bake Peanut Butter Oat Cups Recipe is incredibly adaptable, so I often tweak it depending on what I have in the pantry or my mood. Don’t hesitate to experiment—it’s one of those recipes where a little creativity can go a long way.
- Variation: When pumpkin season rolls around, I swap in 1/3 cup pumpkin puree and a bit of pumpkin spice for a cozy twist that’s become a family favorite.
- Nut Butter Swap: Almond or cashew butter work just as well—just remember the consistency might change, so adjust sweetener or oats accordingly.
- Sweetener Switch: If you prefer honey or agave syrup, those options blend well, too; just note that sweetness and texture may vary slightly.
- Add-ins: Toasted coconut flakes, chopped nuts, or dried fruit stirred into the mixture can add exciting textures and flavors.
Step-by-Step: How I Make No Bake Peanut Butter Oat Cups Recipe
Step 1: Transform Oats Into Oat Flour
Begin by pulsing your rolled oats in a food processor or a high-speed blender until you get a fine, flour-like texture. This is a game changer—it helps the bars bind together better than if you use whole oats. Trust me, it results in a more uniform, chewable bite without that coarse, crumbly issue.
Step 2: Warm and Whisk Peanut Butter with Maple Syrup
Pop your peanut butter and maple syrup into a microwave-safe bowl and heat it for 40 to 60 seconds. Take it out and stir well until the mixture is smooth and fully combined. Warming it just a bit makes mixing in the oat flour way easier and prevents lumps—you don’t want to skip this step!
Step 3: Combine Oat Flour and Peanut Butter Mixture
Gradually fold the oat flour into your peanut butter and syrup mixture. It’ll feel pretty thick and require some muscle to mix. If you find it too crumbly or dry, gently add a teaspoon of extra maple syrup or peanut butter at a time to help everything come together. I sometimes add a little pumpkin puree here for moisture and a seasonal flavor boost, which makes these cups extra tender.
Step 4: Fill Your Muffin Pan
Line a muffin tin with cupcake liners or use a silicone muffin pan for easy removal—I’ve tried both, and silicone pans do simplify things. Scoop the mixture evenly into the wells and press down firmly with your fingers so the cups hold their shape nicely.
Step 5: Melt Chocolate and Top Each Cup
In a small bowl, combine your chocolate chips and optional coconut oil, then microwave in 30-second bursts until smooth, stirring in between so the chocolate doesn’t burn. Pour a generous layer over each peanut butter oat cup and smooth out gently with the back of a spoon. For an extra touch, sprinkle with flaky sea salt or mini chocolate chips before the top hardens.
Step 6: Chill and Set
Pop your pan into the fridge for 2 to 3 hours so the cups firm up perfectly. Once set, carefully peel or pop them out and store them in an airtight container in the fridge. These keep delicious and fresh for up to five days—if they last that long in your house!
Tips from My Kitchen
- Grinding Oats: Make sure you grind the oats finely but not into powder; a little texture helps the cups hold.
- Mixing Effort: Don’t be shy to get your hands in there—the mixture is thick, and a little elbow grease really helps!
- Chocolate Layer: Add the coconut oil to chocolate for a glossy top that sets beautifully and isn’t brittle.
- Storage Location: Because the cups use fresh syrup and no preservatives, always store them in the fridge to keep them fresh and firm.
How to Serve No Bake Peanut Butter Oat Cups Recipe
Garnishes
I often sprinkle flaky sea salt on the chocolate just before it sets—that little salty punch balances the sweetness and feels indulgent. Sometimes, I add crushed peanuts or a few mini chocolate chips on top for an extra layer of texture and visual appeal. It’s a simple touch that never fails to impress guests.
Side Dishes
These oat cups shine on their own, but they’re fantastic paired with a fresh fruit salad or a dollop of Greek yogurt for breakfast. They also make a great side to a smoothie bowl if you want to amp up your morning fuel without turning on the stove.
Creative Ways to Present
For birthdays or casual get-togethers, I arrange these No Bake Peanut Butter Oat Cups on a pretty platter with colorful paper liners and garnish each with a little edible gold dust or sprinkles. Mini cupcake pans make bite-sized versions perfect for sharing, and they look so festive when stacked in a pyramid shape. It’s a party-ready treat with zero baking stress.
Make Ahead and Storage
Storing Leftovers
After making these, I store leftovers in an airtight container in the fridge. They keep their chewy texture beautifully for about five days. If you’re packing them for lunches, I recommend a sturdy container and keeping them cold until snack time for best enjoyment.
Freezing
If you want to keep these beauties longer, they freeze wonderfully. Just place them in a single layer on a baking sheet to freeze solid, then transfer to a freezer-safe container or bag. When you want a snack, pop one or two in the fridge overnight—or let them thaw at room temperature for about 30 minutes. The texture holds up really well after freezing!
Reheating
Since these cups are best enjoyed cold or at room temperature, I don’t recommend microwaving them. Instead, just let them come to room temperature on the counter for a few minutes so that the chocolate softens slightly but the base remains chewy and delicious.
FAQs
-
Can I use other nut butters instead of peanut butter?
Absolutely! Almond or cashew butter are great alternatives. Just keep in mind that thicker or thinner nut butters may affect the consistency, so adjust the oats or syrup a little to get the right moldable texture. I’ve found almond butter adds a milder flavor, which is delicious if you prefer less peanut-forward taste.
-
How do I prevent the oat cups from falling apart?
Grinding the oats finely into oat flour is key to binding. Also, don’t skip warming the peanut butter and maple syrup mixture before adding oats—that helps everything mix well. If the mixture feels too dry, add a teaspoon or so extra maple syrup or peanut butter until it holds together firmly but remains moldable.
-
Can I make these gluten-free?
Yes! Just use certified gluten-free rolled oats to avoid cross-contamination. This way, the No Bake Peanut Butter Oat Cups Recipe remains safe and delicious for anyone avoiding gluten.
-
Can I add protein powder or other mix-ins?
Definitely! Adding a scoop of your favorite protein powder can boost nutrition. Just expect the texture to be a little different—it might need a bit more maple syrup or peanut butter to bring it together. Other mix-ins like chia seeds, flaxseed, or chopped nuts add nice texture and nutrition, too.
Final Thoughts
This No Bake Peanut Butter Oat Cups Recipe is one of my go-to no-fuss snacks that feels like a little gift to myself after a busy day. It’s humble but satisfying, and honestly, I love how it fits into any moment—whether it’s a quick breakfast or an afternoon treat. I hope you try making these at home and find the same joy I do in their simplicity and taste. Trust me, once you have a batch chilling in your fridge, it’s incredibly hard to stop at just one!
Print
No Bake Peanut Butter Oat Cups Recipe
- Prep Time: 10 minutes
- Cook Time: 0 minutes
- Total Time: 3 hours 10 minutes
- Yield: 12 servings
- Category: Snack
- Method: No-Cook
- Cuisine: American
- Diet: Vegetarian
Description
These No Bake Peanut Butter Oat Cups are a delicious and easy-to-make snack featuring a blend of peanut butter, finely processed oats, and sweet maple syrup, topped with a smooth layer of melted chocolate. Perfect for a quick treat without any baking required, they set beautifully in the fridge and can be customized with optional pumpkin puree for extra moisture and flavor.
Ingredients
Main Ingredients
- 1.5 cups peanut butter
- 1.5 cups rolled oats, processed finely in a food processor to make oat flour
- 1/4 cup maple syrup
- 1 cup chocolate chips
- 1 tsp coconut oil, optional
Instructions
- Prepare oat flour: Blend the rolled oats in a high-speed blender or food processor until they reach a fine oat flour consistency.
- Mix peanut butter and syrup: In a medium-sized microwave-safe bowl, combine peanut butter and maple syrup, then microwave for 40-60 seconds. Stir thoroughly until completely combined and smooth.
- Add oat flour: Slowly add the blended oat flour to the peanut butter mixture, mixing well. The mixture should be thick but moldable. If too dry and crumbly, add more maple syrup or peanut butter teaspoon by teaspoon. Optionally, add 1/4 to 1/3 cup pumpkin puree for moisture.
- Prepare muffin pan: Line a muffin pan with cupcake liners or use a silicone muffin pan for easy removal.
- Scoop mixture: Evenly scoop the peanut butter oat mixture into the prepared muffin pan cavities and press down firmly to compact.
- Melt chocolate: Place chocolate chips and coconut oil (if using) in a microwave-safe small bowl. Heat in 30-second intervals, stirring between sessions until smooth and completely melted.
- Top with chocolate: Pour a layer of melted chocolate over each muffin cup, smoothing the surface with the back of a spoon. Optionally, sprinkle flaky salt, sprinkles, or mini chocolate chips before chocolate hardens.
- Refrigerate: Place the muffin pan in the refrigerator for 2-3 hours until the cups have fully set.
- Serve and store: Remove the peanut butter oat cups carefully from the muffin liners or silicone pan. Store them in an airtight container in the refrigerator for up to 5 days to maintain freshness.
Notes
- For a pumpkin-flavored variation, add 1/3 cup pumpkin puree and 1 1/2 teaspoons pumpkin spice to the mixture.
- If mixture is too dry, gradually add more maple syrup or peanut butter to achieve the right consistency.
- Using silicone muffin pans makes removal easier and avoids the need for liners.
- Store these cups in the refrigerator because they use fresh maple syrup and are not baked.
Nutrition
- Serving Size: 1 cup
- Calories: 210 kcal
- Sugar: 9 g
- Sodium: 90 mg
- Fat: 16 g
- Saturated Fat: 4 g
- Unsaturated Fat: 11 g
- Trans Fat: 0 g
- Carbohydrates: 14 g
- Fiber: 2 g
- Protein: 6 g
- Cholesterol: 0 mg


