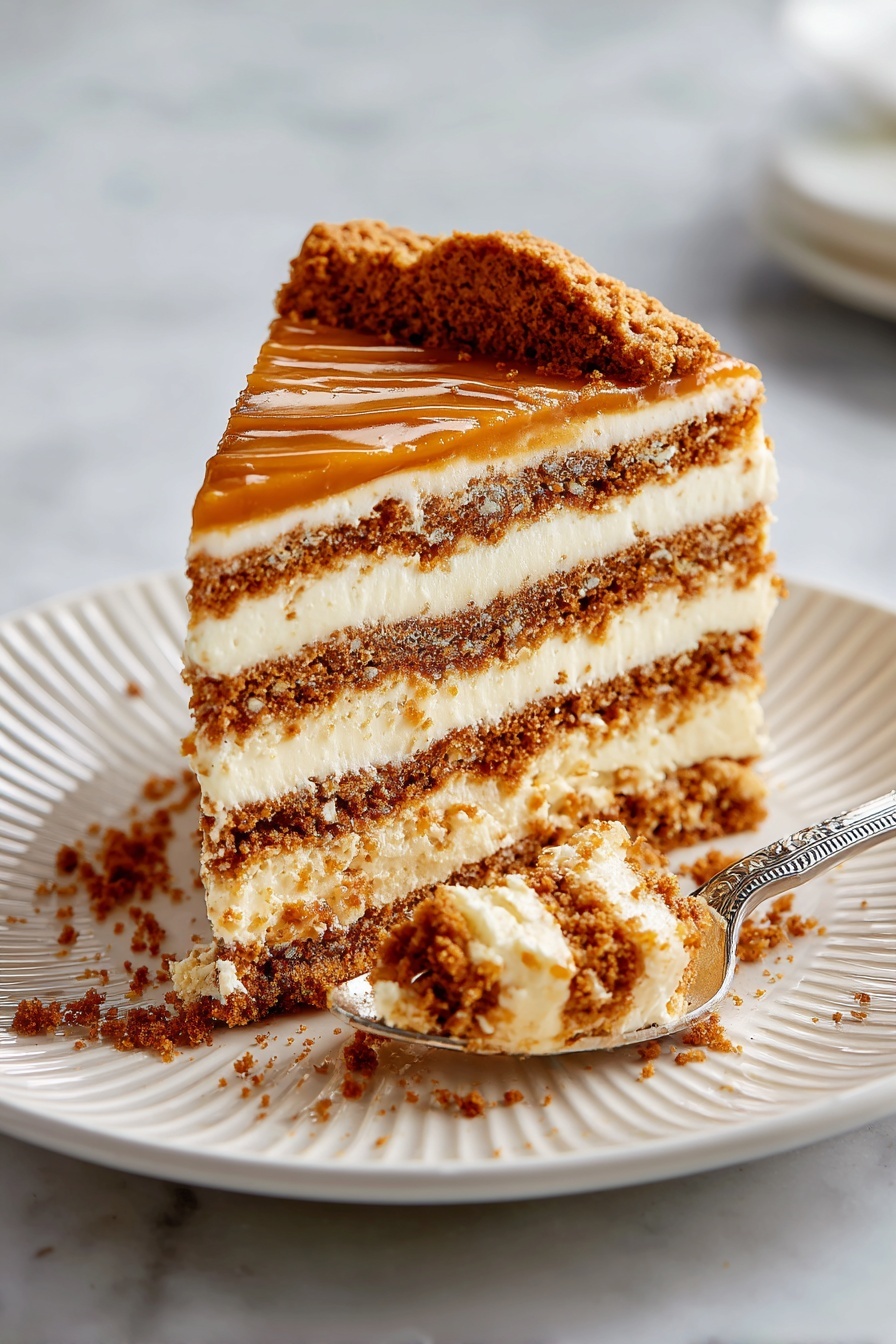
No-Bake Cookie Butter Icebox Cake Recipe
If you’ve been searching for a dessert that’s effortlessly impressive and downright addictive, you’re going to love this No-Bake Cookie Butter Icebox Cake Recipe. It’s creamy, crunchy, and layered with that irresistible cookie butter flavor that keeps you coming back for just one more bite. Trust me, once you try it, you’ll want to make it again and again—especially because it’s so simple to whip up without turning on your oven!
Why This Recipe Works
- Layered Texture: The alternating crunchy Biscoff cookies and creamy cookie butter filling create a delightful contrast that keeps each bite interesting.
- No-Bake Convenience: Whip this up quickly without turning on the oven, making it perfect for warm days or last-minute dessert plans.
- Make-Ahead Magic: It chills overnight so the cookies soften just right, giving you a cake that slices beautifully and tastes extraordinary.
- Rich, Yet Balanced Flavor: Combining mascarpone with cookie butter and vanilla adds depth without overwhelming sweetness.

Ingredients & Why They Work
Each ingredient in my No-Bake Cookie Butter Icebox Cake Recipe plays a role in building that perfect harmony between creaminess and spice. Choosing quality ingredients will elevate this dessert, so I’m sharing a few tips to help you shop smart and get the best results.
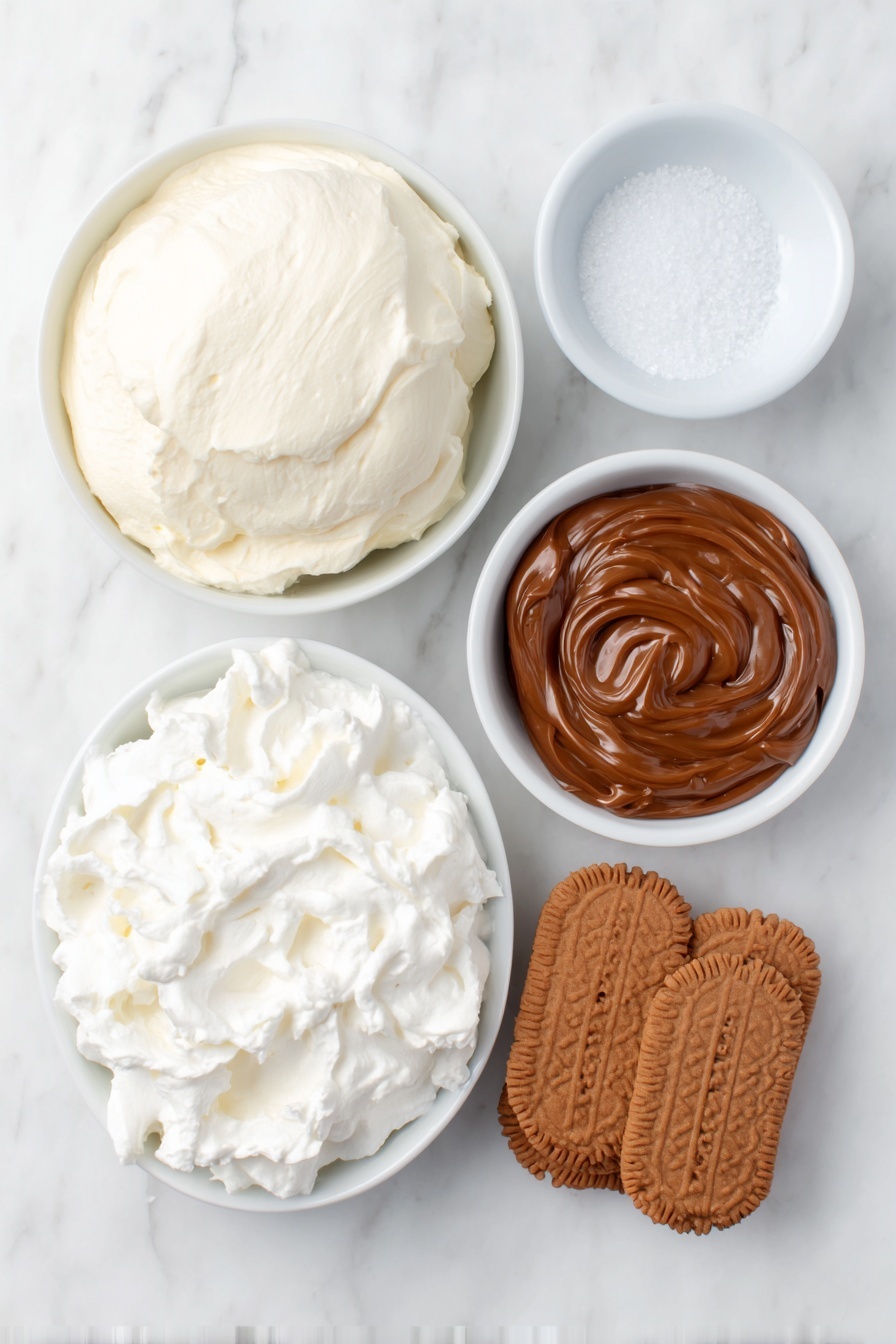
- Heavy cream: This is your base for the luscious whipped topping—make sure it’s cold so it whips up nice and fluffy every time.
- Lotus Biscoff spread: The star of the show, delivering that caramelized cinnamon flavor; warming some makes a perfect drizzle finish.
- Mascarpone cheese: Adds silkiness and richness to balance the sweetness without heaviness.
- Pure vanilla extract: Enhances all the flavors with a warm, aromatic touch.
- Kosher salt: Just a pinch brightens and rounds out the sweet elements.
- Confectioner’s sugar: Helps stabilize the whipped cream and adds delicate sweetness.
- Lotus Biscoff cookies: These crispy, spiced cookies soak up moisture during chilling while still keeping a bit of crunch—essential for that iconic icebox cake texture.
Make It Your Way
One of the reasons I adore this No-Bake Cookie Butter Icebox Cake Recipe is how adaptable it is. I often tweak it depending on my mood or what ingredients I have on hand, and you’ll enjoy making it uniquely yours too!
- Variation: I sometimes swap the mascarpone for cream cheese to give the filling a slightly tangier edge—delicious if you like contrast in desserts.
- Make it vegan: Use coconut whipped cream and choose dairy-free mascarpone alternatives; just pick vegan spiced cookies to keep the cookie butter vibe alive.
- Add a crunch layer: Toasted nuts or crushed pretzels between layers provide an unexpected textural delight.
- Mini versions: Try layering this in individual glasses for easy portioning and a beautiful presentation.
Step-by-Step: How I Make No-Bake Cookie Butter Icebox Cake Recipe
Step 1: Whip Your Cream to Medium Peaks
Start by chilling your heavy cream really well—cold cream whips faster and holds its shape better. Using a stand mixer fitted with the whisk attachment, whip the 2 cups of cream on medium-high speed until you see medium peaks form. This means when you lift the whisk, the cream holds a soft, slightly droopy peak. Avoid whipping too far to stiff peaks or butter forms, which can affect the texture of your filling.
Step 2: Fold in Cookie Butter, Mascarpone, and Flavorings
Next, add your ½ cup of Lotus Biscoff spread, the mascarpone, vanilla, salt, and confectioner’s sugar right into the whipped cream. I like to soften the mascarpone slightly at room temperature so it blends smoothly. Fold everything gently but thoroughly—be patient here. You want a homogenous cream without deflating the whipped cream. This creates that luxuriously silky layer that pairs perfectly with the cookies.
Step 3: Assemble the Layers in Your Loaf Pan
Line your loaf pan with plastic wrap to make removing the cake easier later. Start with a single layer of Biscoff cookies laid flat at the bottom. Then spread an even layer of your cookie butter cream about the same thickness as your cookie layer. Repeat this until you reach the top—ending on a cookie layer for that classic crunch on top.
Step 4: Chill and Let the Magic Happen
Wrap the loaf pan loosely with plastic wrap and pop it into the fridge for at least 24 hours. This chill time lets the cookies absorb moisture from the cream so they soften while still holding their layers—a key feature of any icebox cake. When it’s time to serve, carefully unmold your cake onto a plate and drizzle with some warmed cookie butter, maybe sprinkle a few crushed cookies on top for extra oomph.
Tips from My Kitchen
- Chill Your Equipment: For best whipping results, place your mixing bowl and whisk in the fridge for 10-15 minutes before whipping the cream.
- Plastic Wrap Hack: Let the wrap hang over the edge of the pan so you can easily pull the cake out without breaking it.
- Cookie Butter Drizzle: Warm the cookie butter in short microwave bursts and stir well to avoid overheating or burning.
- Avoid Overcrowding Layers: Give space for each cookie and cream layer to settle naturally for even soaking and that perfect texture.
How to Serve No-Bake Cookie Butter Icebox Cake Recipe
Garnishes
I love topping my icebox cake with a warm drizzle of extra cookie butter for that shiny, inviting glaze. Then, sprinkling some crushed Biscoff cookies or even a few toasted nuts adds a little crunch contrast. Sometimes, I add a sprig of fresh mint just for a pop of color—it makes the presentation feel special without overpowering the flavors.
Side Dishes
This dessert is satisfying enough to stand on its own, but if you want a little accompaniment, I enjoy serving it with a scoop of vanilla ice cream or a fresh berry salad for a refreshing twist. The tartness of berries complements the spiced sweetness perfectly.
Creative Ways to Present
For birthdays or gatherings, I’ve layered this cake in a glass trifle bowl—it looks so stunning with the distinct cookie and cream layers visible. You can also make individual parfaits layered in mason jars for gifts or picnic-ready desserts. Adding edible flowers or gold leaf can elevate the look if you’re feeling fancy, but honestly, the simplicity here is part of the charm!
Make Ahead and Storage
Storing Leftovers
I store leftovers in the same loaf pan wrapped tightly with plastic wrap to keep the moisture locked in—it lasts beautifully for up to 3 days in the fridge without drying out or getting soggy. Just be sure to cover it well to avoid picking up other fridge odors.
Freezing
If you want to freeze your No-Bake Cookie Butter Icebox Cake Recipe, wrap it tightly in plastic wrap then place it in a freezer-safe container. I’ve frozen slices before with great success, then thawed them overnight in the fridge. While the cookies soften a bit further, the cake’s texture stays enjoyable and the flavor actually develops more depth.
Reheating
This dessert is best served chilled, so reheating isn’t necessary. If you do like the warm cookie butter drizzle, though, just heat that separately in the microwave and add it fresh when serving to keep the cake cool and fresh.
FAQs
-
Can I use other cookies instead of Lotus Biscoff for this icebox cake?
While Biscoff cookies are classic for their spicy caramel flavor that complements the cookie butter, you can experiment with other spiced cookies like ginger snaps or graham crackers. The texture matters though—choose cookies that soften without turning mushy after chilling.
-
How long does it take for the cookies to soften in the icebox cake?
Typically, the cookies soak up moisture and soften beautifully after at least 24 hours in the fridge. You can prepare the cake up to 3 days ahead without losing texture or flavor, which makes it super convenient for entertaining.
-
What if I can’t find Lotus Biscoff spread?
You can substitute with other cookie butter spreads available in your area, or even try almond butter mixed with a bit of cinnamon and sugar for a different spin. Just keep in mind that the unique caramelized spice profile of Biscoff is what really makes this recipe special.
-
Can I make this dessert ahead of time and freeze it?
Absolutely! Freezing works well for this No-Bake Cookie Butter Icebox Cake Recipe. Just wrap it tightly to prevent freezer burn and thaw overnight in the fridge before serving. It’s a great way to prep in advance for busy days.
-
How do I get clean slices while serving the icebox cake?
Use a sharp knife warmed under hot water, then wiped dry, to slice through the layers cleanly. Cut slowly and wipe the knife between cuts to keep those neat edges.
Final Thoughts
This No-Bake Cookie Butter Icebox Cake Recipe is honestly one of my favorite desserts to prepare when I want to impress with minimal effort. The blend of creamy mascarpone, luscious whipped cream, and that spiced cookie butter flavor hits all the right notes every time. Plus, it plays well for a casual treat or something special. I encourage you to give it a try—invite a friend over, share a slice, and see how quickly it becomes a family favorite in your kitchen!
Print
No-Bake Cookie Butter Icebox Cake Recipe
- Prep Time: 15 minutes
- Cook Time: 0 minutes
- Total Time: 1 day 15 minutes
- Yield: 8 servings
- Category: Dessert
- Method: No-Cook
- Cuisine: American
- Diet: Vegetarian
Description
A creamy, no-bake icebox cake featuring layers of crunchy Lotus Biscoff cookies and luscious cookie butter mascarpone cream, chilled to perfection for a delightful dessert.
Ingredients
Cream Mixture
- 2 cups heavy cream
- ½ cup (150 g) Lotus Biscoff spread
- ⅓ cup (80 g) mascarpone cheese
- 1 tsp pure vanilla extract
- Pinch of Kosher salt
- 2 Tbsp confectioner’s sugar
Cookies
- 2 packages Lotus Biscoff cookies (32 cookies per package)
Instructions
- Whip the heavy cream: Pour 2 cups of heavy cream into the bowl of a stand mixer fitted with a whisk attachment and whisk until medium peaks form.
- Add cookie butter mixture: Add ½ cup (150 g) of Lotus Biscoff spread, ⅓ cup (80 g) mascarpone cheese, 1 tsp pure vanilla extract, a pinch of Kosher salt, and 2 Tbsp confectioner’s sugar to the whipped cream, then mix until well combined.
- Assemble the icebox cake: Line a loaf pan with plastic wrap. Place a single layer of Biscoff cookies along the bottom, then spread an even layer of the Biscoff cream mixture over the cookies, matching the thickness of the cookie layer. Repeat layering until the pan is filled, finishing with a layer of cookies on top.
- Refrigerate: Loosely wrap the loaf pan with plastic wrap and refrigerate for 24 hours to allow the cake to set and flavors to meld.
- Serve: Unmold the cake onto a plate or tray. Drizzle with warmed Biscoff spread (warm ⅓ cup in the microwave in 30-second increments) and garnish with crushed Biscoff cookies before serving.
Notes
- Nutrition facts are estimated based on using 45 cookies.
- Loaf pan sizes vary; a straight-sided pan uses about 9 cookies per layer. Adjust cookie quantity accordingly if pan tapers.
- To melt cookie butter, heat in 30-second increments in a microwave-safe bowl, stirring between each until warm and smooth.
- Icebox cakes can be made up to 3 days in advance; chill at least 24 hours before serving.
- Store leftovers airtight in the loaf pan or container for up to 3 days.
- For freezing, wrap tightly in plastic wrap, place in a freezer-safe container, and thaw overnight in the fridge before serving.
Nutrition
- Serving Size: 1 slice
- Calories: 350 kcal
- Sugar: 25 g
- Sodium: 150 mg
- Fat: 22 g
- Saturated Fat: 13 g
- Unsaturated Fat: 7 g
- Trans Fat: 0 g
- Carbohydrates: 30 g
- Fiber: 1 g
- Protein: 4 g
- Cholesterol: 80 mg


