Lime Bars Recipe
Okay, let me tell you about this **Lime Bars Recipe** that instantly became one of my all-time favorite sweet treats. These bars perfectly balance tart lime with a buttery crust that’s downright addictive. If you love that fresh citrus zing but crave something creamy and indulgent, keep reading — you’re gonna want to make these ASAP.
Why This Recipe Works
- Perfect balance of tart and sweet: The fresh lime juice and zest give a bright tang that’s cut with just the right amount of sugar.
- Buttery, tender crust: Made with simple ingredients but baked just right for a golden, crumbly base that holds everything together.
- Easy and quick prep: You don’t need fancy kitchen tools or hours to pull these bars off; I love how straightforward this is!
- Versatile and customizable: You can tweak the lime intensity, add food coloring, or swap crust flavors — it’s a great canvas for your creativity.

Ingredients & Why They Work
Before you dive in, let’s chat about the ingredients you’ll be using and why this mix is so great together. The crust and filling each play a big role in the overall texture and flavor.
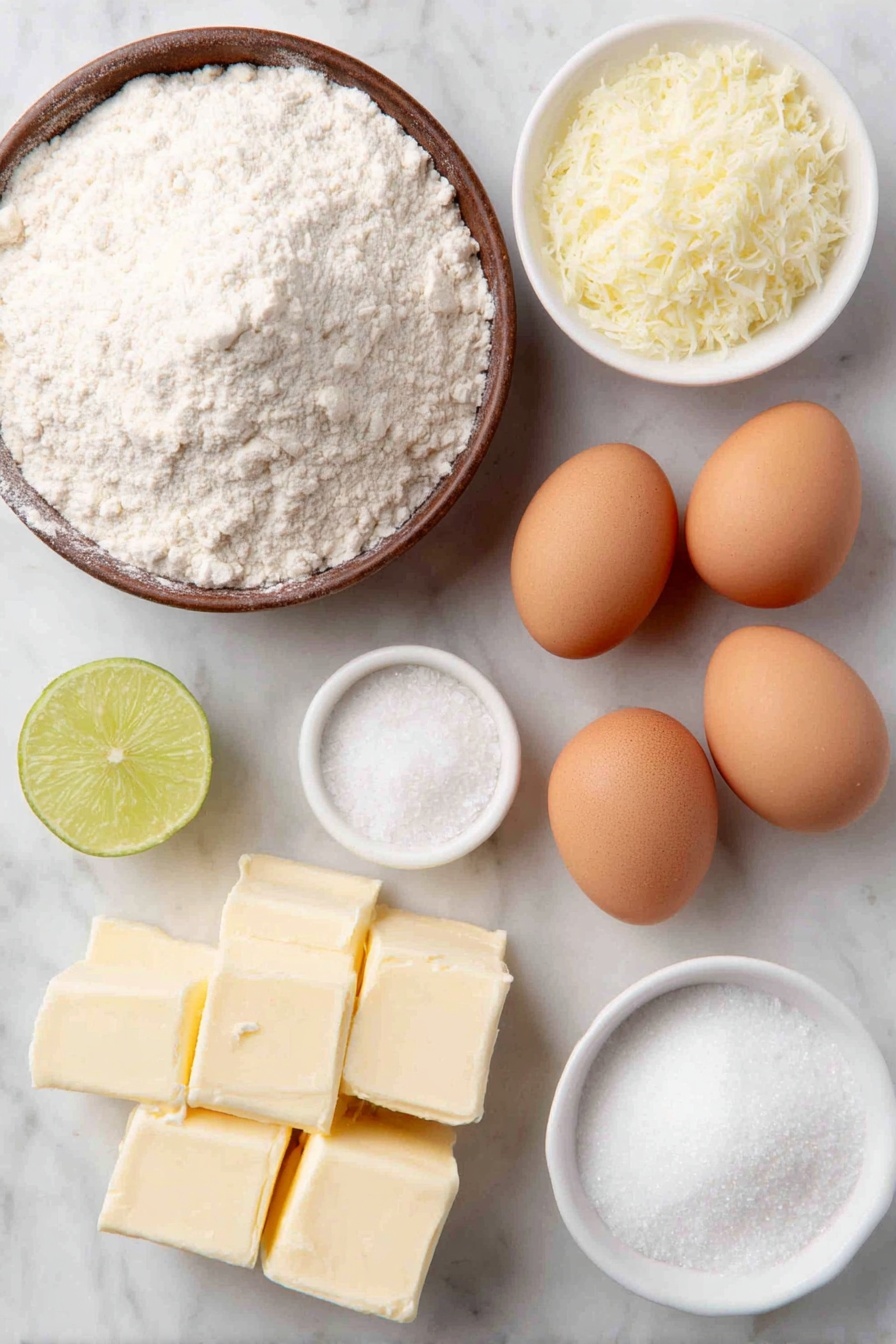
- All-purpose flour: The backbone of the crust and the filling’s thickening agent, making sure there’s structure without toughness.
- Powdered sugar: For the crust, it blends smoother than granulated sugar, giving a tender crumb without grit.
- Butter: The star of that buttery crust—cold and cut into pieces so you can pulse it to the perfect crumbly texture.
- Granulated sugar: Sweetens the filling, balancing out the lime’s acidity beautifully.
- Eggs: They do double duty binding the filling ingredients and helping it set to that creamy, dense finish.
- Lime zest and juice: The soul of the recipe—zesty lime oils and fresh juice bring bright, refreshing flavor that wakes up your taste buds.
- Salt: Just a pinch, but enough to highlight all those flavors without being salty.
- Optional food coloring: Adds a pop of fun green (sometimes mixed with a touch of yellow) if you want your bars to look as vibrant as they taste.
Make It Your Way
I love how flexible this Lime Bars Recipe is. You can dial up or down the lime zing depending on your mood or even make it kid-friendly by cutting back on the tartness. Plus, switching up the crust or adding a little extra texture can be a fun experiment!
- Variation: I once swapped half the butter in the crust for coconut oil—gave the crust a subtle tropical note that paired beautifully with the lime filling.
- Diet-friendly swaps: For a gluten-free version, I use almond flour for the crust, which adds a lovely nutty depth and holds up well.
- Seasonal changes: In winter, I sometimes sprinkle a bit of crushed peppermint candy over the bars before chilling—such a delightful twist!
- Difficulty tweaks: If you’re in a hurry, you can press crushed store-bought graham crackers for the crust instead, but the homemade crust is worth the extra minute.
Step-by-Step: How I Make Lime Bars Recipe
Step 1: Prepping the Crust
Start by preheating your oven to 350°F. Then, mix the flour, powdered sugar, salt, and cold butter pieces in a food processor. I like pulsing in short bursts until the mixture looks like fine, sandy crumbs. Once it feels just right, press it evenly into your pan lined with parchment paper (make sure you have an overhang so you can lift out the bars easily later!). Pop this in the oven for about 18-20 minutes until it turns a gorgeous golden brown. Don’t rush this—your crust should be crisp but not burnt!
Step 2: Whisking Up the Filling
While the crust bakes, whisk together the granulated sugar and flour in a bowl. Add the eggs one at a time, whisking well after each addition—that makes a big difference in getting a smooth texture. Then fold in your fresh lime zest, lime juice, and if you want to get fancy, a drop of green and yellow food coloring. This part is optional but I find it makes the bars look irresistible, like little bites of sunshine.
Step 3: Baking the Bars
When your crust is done, immediately pour the luscious lime filling over the warm crust. Slide it back into the oven for another 18-20 minutes. The key is to watch the filling: when it’s set and no longer jiggles when you gently shake the pan, it’s done. Let it cool at room temp for about an hour before moving on.
Step 4: Chill and Serve
Once cooled, pop the whole pan in the fridge for 1-2 hours to let those flavors settle and the texture firm up to that perfect creamy-but-firm lime bar. Use the parchment paper overhang to lift out the block, cut into squares, and get ready to wow your taste buds.
Tips from My Kitchen
- Don’t Overmix the Crust: Pulse just until crumbly to avoid a dense, tough base.
- Fresh Lime is a Must: Bottled juice just doesn’t have the same vibrant flavor.
- Watch the Filling Closely: The jiggle test is key; overbaking dries it out, underbaking makes it runny.
- Chill Thoroughly: Letting the bars chill completely is what makes them slice cleanly and taste so refreshing.
How to Serve Lime Bars Recipe
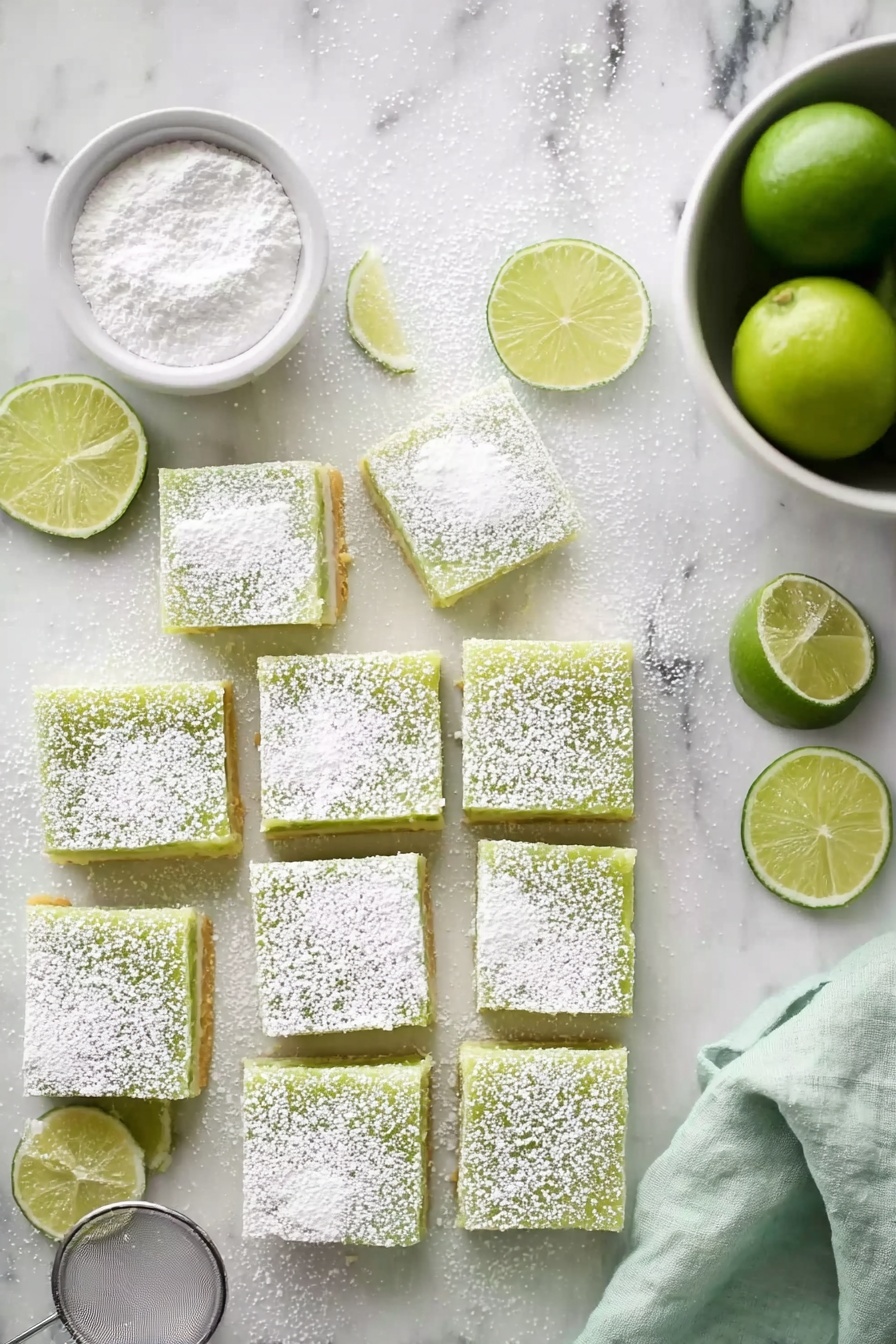
Garnishes
I usually keep it simple with just a light dusting of powdered sugar or a thin slice of lime on top. Sometimes, if I’m feeling fancy, I sprinkle tiny toasted coconut flakes or fresh mint leaves for a beautiful pop of color and extra zing.
Side Dishes
These bars shine as a stand-alone dessert, but they’re also fantastic paired with a cup of hot tea or a scoop of vanilla ice cream. For brunch, they’re a hit alongside fresh fruit or even a creamy cheesecake for the ultimate citrus dessert party.
Creative Ways to Present
For parties, I like to cut the bars into tiny bite-sized squares and serve them on a decorated platter with edible flowers. Another favorite is layering the bars with whipped cream and crushed graham crackers in individual jars—a cute no-fuss dessert everyone loves.
Make Ahead and Storage
Storing Leftovers
I store leftover lime bars tightly covered in the fridge, either in the pan wrapped with plastic or sealed in an airtight container. They keep well for up to 4 days without drying out or losing that fresh lime punch.
Freezing
Freezing lime bars works great too! I wrap individual bars in plastic wrap and place them in a freezer-safe bag. When you want a treat, just thaw them overnight in the fridge—they still taste surprisingly fresh and have that perfect texture.
Reheating
I prefer to enjoy lime bars cold, but if you want a slightly softer texture, let them sit at room temperature for 15-20 minutes before serving. Avoid microwaving as it can make the crust greasy and the filling too soft.
FAQs
-
Can I use bottled lime juice instead of fresh?
While you technically can, fresh lime juice offers a brighter, more vibrant flavor that really makes this Lime Bars Recipe stand out. Bottled juice tends to be more muted and sometimes has preservatives that can alter the taste. For the best results, always reach for fresh limes.
-
How do I know when the lime bars are done baking?
The best way is the “jiggle test.” When you gently shake the pan, the filling should no longer wobble or jiggle—it should be set and firm to the touch. If it’s still too soft, give it a few more minutes, but be careful not to overbake or it can become dry.
-
Can I make these lime bars gluten-free?
Absolutely! Try substituting the all-purpose flour in the crust with almond flour or a gluten-free flour blend. The texture might be slightly different, but they’ll still be delicious, and the crust will hold up well.
-
What’s the best way to cut lime bars without them crumbling?
After chilling your bars thoroughly in the fridge for at least one hour, use a sharp knife to cut them. For cleaner slices, run the knife under hot water, wipe it dry, and then cut—it helps to glide through perfectly without crumbling.
Final Thoughts
This Lime Bars Recipe has truly won me over because it’s just so darn delicious and easy to make with ingredients you probably already have on hand. Whether you’re baking for a party, a cozy treat at home, or a summer picnic, these bars bring sunny flavor and a smile every time. Give them a shot—once you taste that tangy, buttery goodness, I promise you’ll be hooked like me!
Print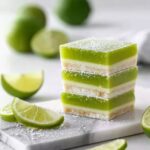
Lime Bars Recipe
- Prep Time: 10 minutes
- Cook Time: 40 minutes
- Total Time: 2 hours 50 minutes
- Yield: 12 servings
- Category: Dessert
- Method: Baking
- Cuisine: American
- Diet: Vegetarian
Description
These zesty lime bars feature a buttery, crumbly crust topped with a smooth and tangy lime filling. Perfectly balanced with fresh lime juice and zest, they are a refreshing dessert ideal for any occasion. Chilled to set, these bars offer a bright citrus flavor in every bite.
Ingredients
Crust:
- 1 cup (120 g) all-purpose flour
- ¼ cup (30 g) powdered sugar
- ¼ tsp salt
- ½ cup (113 g) butter, cut into 8 pieces
Filling:
- 1 ¼ cup (250 g) granulated sugar
- ¼ cup (30 g) all-purpose flour
- 4 large eggs
- 2 tsp lime zest
- ⅔ cup (159 ml) fresh lime juice
- drop of green and yellow food coloring, optional
Instructions
- Preheat Oven: Preheat your oven to 350 degrees Fahrenheit. Lightly grease or line an 11×7-inch baking dish with parchment paper that overhangs 2 inches on both sides for easy removal.
- Make the Crust: In a food processor, combine the flour, powdered sugar, salt, and butter. Pulse until the mixture resembles fine crumbs. Press this mixture evenly into the prepared baking dish. Bake for 20 minutes or until the crust is golden brown.
- Prepare the Filling: While the crust bakes, whisk together the granulated sugar and flour in a bowl. Add the eggs one at a time, whisking thoroughly after each addition. Then add the lime zest, fresh lime juice, and a drop of green and yellow food coloring if desired. Mix until smooth and combined.
- Bake the Filling: Pour the lime filling evenly over the hot crust. Return the baking dish to the oven and bake for another 20 minutes, or until the filling is set and no longer jiggles.
- Cool and Chill: Remove the pan from the oven and let the bars cool completely in the pan for about 1 hour. Then refrigerate for an additional 2 hours to fully chill and set.
- Serve: Use the parchment paper overhang to lift the bars from the pan. Cut into squares and serve cold. Store any leftovers in the refrigerator.
Notes
- Use fresh lime juice for the best bright and tangy flavor.
- Food coloring is optional and purely for appearance; omit if you prefer a natural look.
- Make sure to chill the bars well to achieve clean, firm slices.
- The crust can be made a day ahead and refrigerated before adding the filling.
- Substitute butter with a non-dairy margarine for a dairy-free version, though texture may vary slightly.
Nutrition
- Serving Size: 1 bar
- Calories: 230 kcal
- Sugar: 22 g
- Sodium: 90 mg
- Fat: 12 g
- Saturated Fat: 7 g
- Unsaturated Fat: 4 g
- Trans Fat: 0 g
- Carbohydrates: 28 g
- Fiber: 1 g
- Protein: 3 g
- Cholesterol: 75 mg
