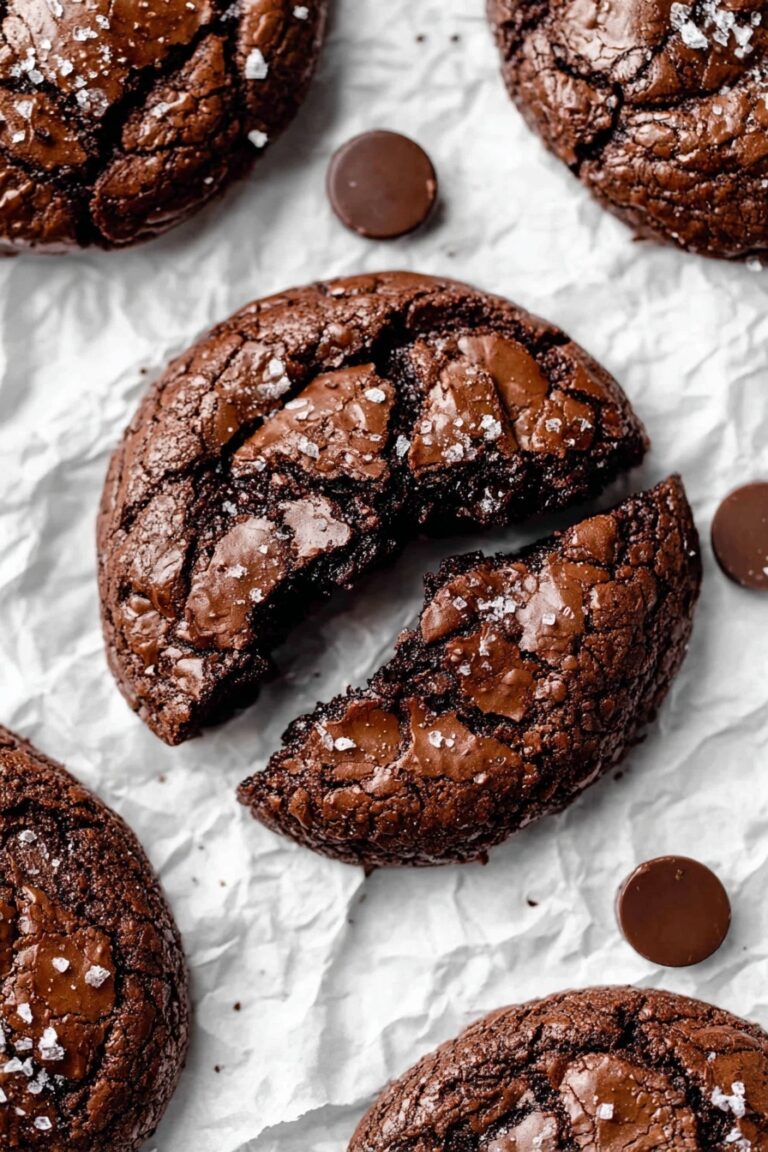
Homemade Hot Chocolate Bombs Recipe
If you’ve ever wanted to bring a little magic to your cozy nights, trust me, this Homemade Hot Chocolate Bombs Recipe will do just that. There’s something so delightful about cracking open one of these chocolate spheres and watching that rich, velvety cocoa powder and mini marshmallows burst into your warm milk. I’m excited to walk you through my tried-and-true method — it’s surprisingly easy, and the results? Absolutely fan-freaking-tastic!
Why This Recipe Works
- Simple Ingredients: Combines pantry staples into something delightful without mystery spices or hard-to-find items.
- Perfect Chocolate Shell: Melting and molding the chocolate creates a crisp shell that melts beautifully when hot milk is poured over.
- Balance of Flavor & Texture: The homemade chocolate milk powder blends sweetness and cocoa perfectly, while marshmallows add that classic creaminess.
- Fun to Make and Serve: It’s an interactive experience that brings smiles and warmth, making it perfect for gifting or cozy nights in.

Ingredients & Why They Work
The magic behind this Homemade Hot Chocolate Bombs Recipe lies both in the ingredients and how they come together. The homemade chocolate milk powder keeps things fresh and adjustable — plus, making it yourself means you control the sweetness and richness. Choosing quality chocolate chips is essential for that smooth, glossy shell.
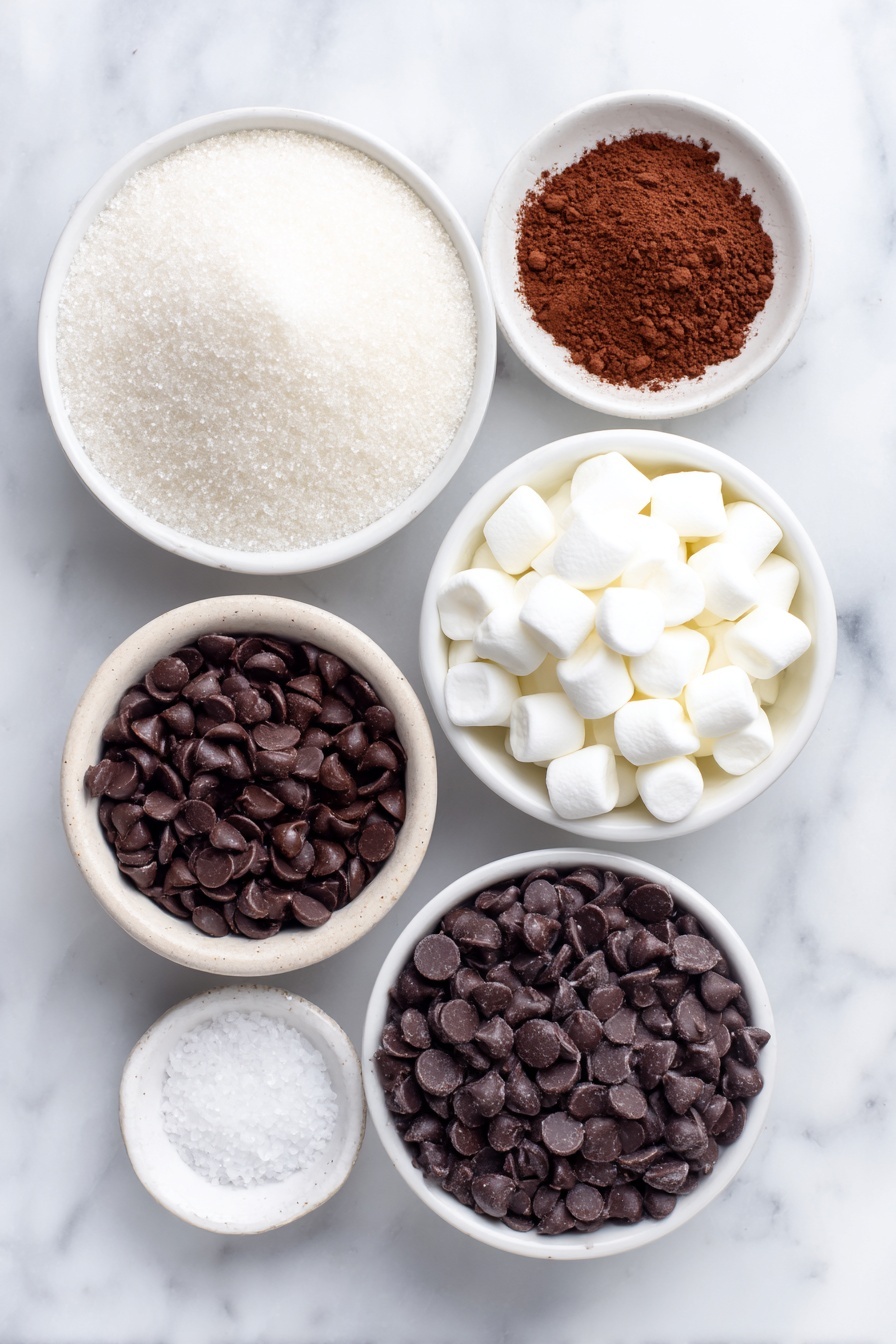
- Granulated Sugar: It sweetens the chocolate milk powder just right without overpowering the cocoa.
- Cocoa Powder: Unsweetened and rich, it gives depth and chocolate flavor to the powder blend.
- Kosher Salt: Just a pinch enhances all the flavors and balances the sweetness.
- Semi-Sweet Chocolate Chips: These form the hard shell; picking good quality chips ensures smooth melting and crisp formation.
- Mini Marshmallows: Tiny bursts of gooeyness that melt into the milk adding sweetness and texture.
- Silicone Chocolate Bomb Mold: Makes shaping the bombs easy and fun, plus it’s reusable for making batches.
Make It Your Way
One of my favorite things about this Homemade Hot Chocolate Bombs Recipe is how easy it is to tweak it to suit your taste. Whether you want a more decadent drink or a kid-friendly version, a little creativity goes a long way.
- Variation – White Chocolate Bombs: I once swapped semi-sweet chips for high-quality white chocolate, which was a bit trickier but gave a lovely sweet twist.
- Dairy-Free Version: I’ve also used dairy-free chocolate and non-dairy marshmallows for friends who need it — still just as fun and tasty!
- Flavored Twist: Adding a pinch of cinnamon or cayenne to the chocolate milk powder mix gives a warming depth.
Step-by-Step: How I Make Homemade Hot Chocolate Bombs Recipe
Step 1: Whip Up the Chocolate Milk Powder
Start by combining granulated sugar, cocoa powder, and a pinch of kosher salt. I like to use a food processor, but if that’s not handy, shake them vigorously in a sealed jar until mixed well. This powder is your base, so taste it to make sure it’s just right—adjust sweetness if you like. Storing it in an airtight container keeps it fresh for your bombs and any other hot cocoa you fancy later.
Step 2: Melt Your Chocolate the Right Way
Melt those chocolate chips using a double boiler method — this gentle heat keeps the chocolate smooth and glossy. I place a glass bowl just touching the simmering water, stirring often with a rubber spatula. When it’s silky and completely melted, you’ll know you’re ready to mold. If your kitchen’s warm, be quick or the chocolate might become too soft.
Step 3: Coat the Molds with Chocolate
Spoon generous amounts of melted chocolate into each silicone mold cup and spread it evenly up the sides — no bare spots allowed! This step is crucial because your bomb needs a sturdy shell to hold all the goodies inside. I freeze the molds for about 10 minutes to firm the shells up, making them easier to pop out without cracks.
Step 4: Fill and Seal Your Hot Chocolate Bombs
Flip half your chocolate shells and fill them with the chocolate milk powder and mini marshmallows — this is the fun part! I scoop in about two tablespoons of powder and a tablespoon of marshmallows. Next, gently warm the rims of the empty halves over low heat (I use the steam above warm water), then carefully seal them together with the filled halves. Wearing gloves helps avoid fingerprints, keeping your bombs glossy and smooth.
Step 5: Decorate and Store
The finishing touch is decorating with any leftover melted chocolate or sprinkles you adore. Personally, I go for edible glitter or crushed peppermint for a festive pop! Once done, store them at room temperature and try to enjoy within 24 hours for the best experience — they’re totally worth it!
Tips from My Kitchen
- Avoid Overheating Chocolate: Keep the heat low when melting chocolate to prevent it from seizing or getting grainy.
- Smooth Shells Take Patience: I find spreading two even layers of chocolate—freezing in between—gives a stronger shell that’s less prone to cracking.
- Seal With Steam, Not Microwave: Using the steam from warm water gently melts the chocolate edges better than a microwave and avoids overheating.
- Work Quickly But Carefully: Don’t let the chocolate shells stay out too long before filling; they melt easily in warm hands.
How to Serve Homemade Hot Chocolate Bombs Recipe

Garnishes
I love topping my mugs with whipped cream and a sprinkle of cinnamon or cocoa powder. Sometimes, I add a few mini marshmallows or crushed peppermint candies right on top for a festive treat. It’s those little touches that make the experience extra special and Instagram-worthy!
Side Dishes
Pair your hot chocolate bombs with buttery shortbread cookies or cinnamon rolls for a truly indulgent treat. I often keep it simple with biscotti or even a slice of banana bread — the cozy flavors complement the rich hot chocolate perfectly.
Creative Ways to Present
For holidays or special occasions, I pack these bombs in clear boxes tied with ribbons — they make a wonderful gift! Another favorite is placing the bombs on decorative spoons or small bowls alongside a festive mug for a charming hot chocolate gift set. Kids especially love personalized options with their favorite sprinkles or colors on top.
Make Ahead and Storage
Storing Leftovers
Store your finished hot chocolate bombs in a cool, dry place away from direct sunlight—room temperature works well. I keep mine in an airtight container on the counter and they stay fresh for a week or so. Just be mindful of humidity, as dampness can cause the chocolate to sweat or soften.
Freezing
You can freeze hot chocolate bombs to keep them longer. Wrap each bomb individually in plastic wrap and place them in a freezer-safe container. When I do this, I find they hold their shine and flavor nicely, ready to unfreeze in just a few minutes at room temp before use.
Reheating
Rather than reheating, I like to dissolve my bombs directly in hot milk for serving—no reheating needed. If your cocoa powder starts to separate or clump, a quick stir with a whisk usually brings it right back to silky smooth.
FAQs
-
Can I use white chocolate instead of semi-sweet for the bombs?
Yes, you can! Just make sure to use a high-quality white chocolate because it melts better and sets more firmly. White chocolate tends to be sensitive to heat, so melt it gently and avoid overheating to prevent graininess.
-
How long do homemade hot chocolate bombs last?
Stored properly at room temperature in an airtight container, your hot chocolate bombs will be good for about a week. Freezing them can extend their life up to a few months.
-
What should I do if the chocolate cracks when unmolding?
Cracks often happen if the chocolate layer is too thin or if the temperature fluctuates. To prevent this, apply at least two coats of chocolate, freezing between layers, and handle the molds gently. If cracks occur, seal them with a little melted chocolate before assembling.
-
Can I make the chocolate milk powder ahead of time?
Absolutely! The homemade chocolate milk powder stores beautifully in an airtight container for several weeks, so you can make batches ahead and have it ready for quick hot chocolate whenever you want.
-
How do I serve a hot chocolate bomb?
Simply place the chocolate bomb in your favorite mug, then pour about 1½ cups of hot milk slowly over it. Stir as the shell melts and the cocoa and marshmallows release, creating a rich and creamy drink that’s ready to enjoy.
Final Thoughts
This Homemade Hot Chocolate Bombs Recipe has become my go-to treat whenever I want to amp up the cozy vibes. It’s such a rewarding project — fun to make, beautiful to look at, and absolutely delicious when served. I hope you find as much joy in crafting and sipping these as I do. Trust me, once you try it, you’ll want to gift them to everyone on your list or keep them all for yourself! So grab your chocolate, marshmallows, and mold, and let’s get cozy.
Print
Homemade Hot Chocolate Bombs Recipe
- Prep Time: 20 minutes
- Cook Time: 10 minutes
- Total Time: 30 minutes
- Yield: 6 servings
- Category: Dessert
- Method: Stovetop
- Cuisine: American
- Diet: Vegetarian
Description
Delicious homemade hot chocolate bombs filled with chocolate milk powder and mini marshmallows. These fun treats are perfect for cozying up with a warm mug of milk, melting to create a rich, indulgent hot chocolate.
Ingredients
Chocolate Milk Powder
- 2/3 cup (133 g) granulated sugar
- 1/3 cup (39 g) cocoa powder
- 1 pinch kosher salt
Chocolate Bombs
- 1 cup (168 g) semi-sweet chocolate chips
- 6 tablespoons chocolate milk powder, divided
- 3 tablespoons mini marshmallows, divided
- 1 silicone chocolate bomb mold
Instructions
- Make Chocolate Milk Powder: Combine the granulated sugar, cocoa powder, and kosher salt in a jar with a lid or a food processor. Shake vigorously in the sealed jar or pulse in the processor until fully mixed. Store in a sealed container in a cool, dry place until use.
- Melt Chocolate Using Double Boiler: Fill a medium pot halfway with water and bring to a simmer over low heat. Place a heat-safe bowl on top of the pot, ensuring it doesn’t touch the water. Add the semi-sweet chocolate chips to the bowl and stir gently with a rubber spatula until completely smooth. Remove from heat but keep the water simmering for later use.
- Coat Chocolate Molds: Spoon a heaping amount of melted chocolate into each of the six cavities of the silicone mold. Spread the chocolate evenly up the sides of each cavity to coat completely. Reserve leftover chocolate for later use. Freeze the molds for 10 minutes or until the chocolate is fully set.
- Remove and Prepare Molds for Filling: Carefully pop the chocolate cups out of the molds onto a parchment-lined baking sheet. Flip over three of these halves to fill them.
- Fill and Seal Chocolate Bombs: Add 2 tablespoons of chocolate milk powder and 1 tablespoon of mini marshmallows into each of the three flipped chocolate halves. Warm the rims of the other three halves by placing their mold sheet over the simmering water to slightly melt the edges. Using gloves, place the melted rims halves seam-side down on the filled halves and gently press to seal.
- Decorate: Use any extra melted chocolate, sprinkles, or candies to decorate the sealed bombs as desired. Let set or use immediately. Store at room temperature and consume within 24 hours for best flavor and texture.
- Make Hot Chocolate: Place one hot chocolate bomb in a mug. Slowly pour 1 1/2 cups of hot milk over the bomb. Stir until melted completely and enjoy your rich, creamy hot chocolate.
Notes
- Use high-quality white chocolate if opting for white chocolate bombs, as it tends to be more sensitive to melting and tempering.
- Handling chocolate with gloves prevents fingerprints and keeps the finish shiny.
- Store bombs at room temperature away from heat and humidity to maintain shape and texture.
- You can customize fillings with different types of marshmallows, flavored powders, or small candies.
- Ensure the chocolate coating is thick enough to avoid breakage when filled.
Nutrition
- Serving Size: 1 bomb
- Calories: 200 kcal
- Sugar: 25 g
- Sodium: 30 mg
- Fat: 9 g
- Saturated Fat: 5 g
- Unsaturated Fat: 3 g
- Trans Fat: 0 g
- Carbohydrates: 30 g
- Fiber: 3 g
- Protein: 2 g
- Cholesterol: 0 mg
