Halloween Candy Melt Oreo Chocolate Molded Treats Recipe
If you’re looking to wow your guests this spooky season, you’ve got to try this fan-freaking-tastic Halloween Candy Melt Oreo Chocolate Molded Treats Recipe. These treats combine the classic crunch of Oreos with smooth, colorful candy melts, and they’re perfect for Halloween parties, school treats, or just a fun kitchen project. Trust me, once you make these, you’ll want to keep a stash on hand for every fall gathering!
Why This Recipe Works
- Simple & Fun: You don’t need fancy tools or ingredients, just Oreos and candy melts, making it accessible for any home cook or baking newbie.
- Visually Stunning: The vibrant candy melts allow you to customize colors and decorations to match your Halloween vibe perfectly.
- Perfect Texture Combo: The creamy chocolate coating pairs with the crunchy Oreo to create a treat that’s both indulgent and satisfying.
- Easy to Personalize: From candy eyes to sprinkles to spooky faces, you can get creative with the decorating process, making these a pet project for kids and adults alike.

Ingredients & Why They Work
Each ingredient in the Halloween Candy Melt Oreo Chocolate Molded Treats Recipe plays an important role in flavor, texture, and presentation. I always recommend using high-quality candy melts and classic Oreos for the best melt and crunch combo.
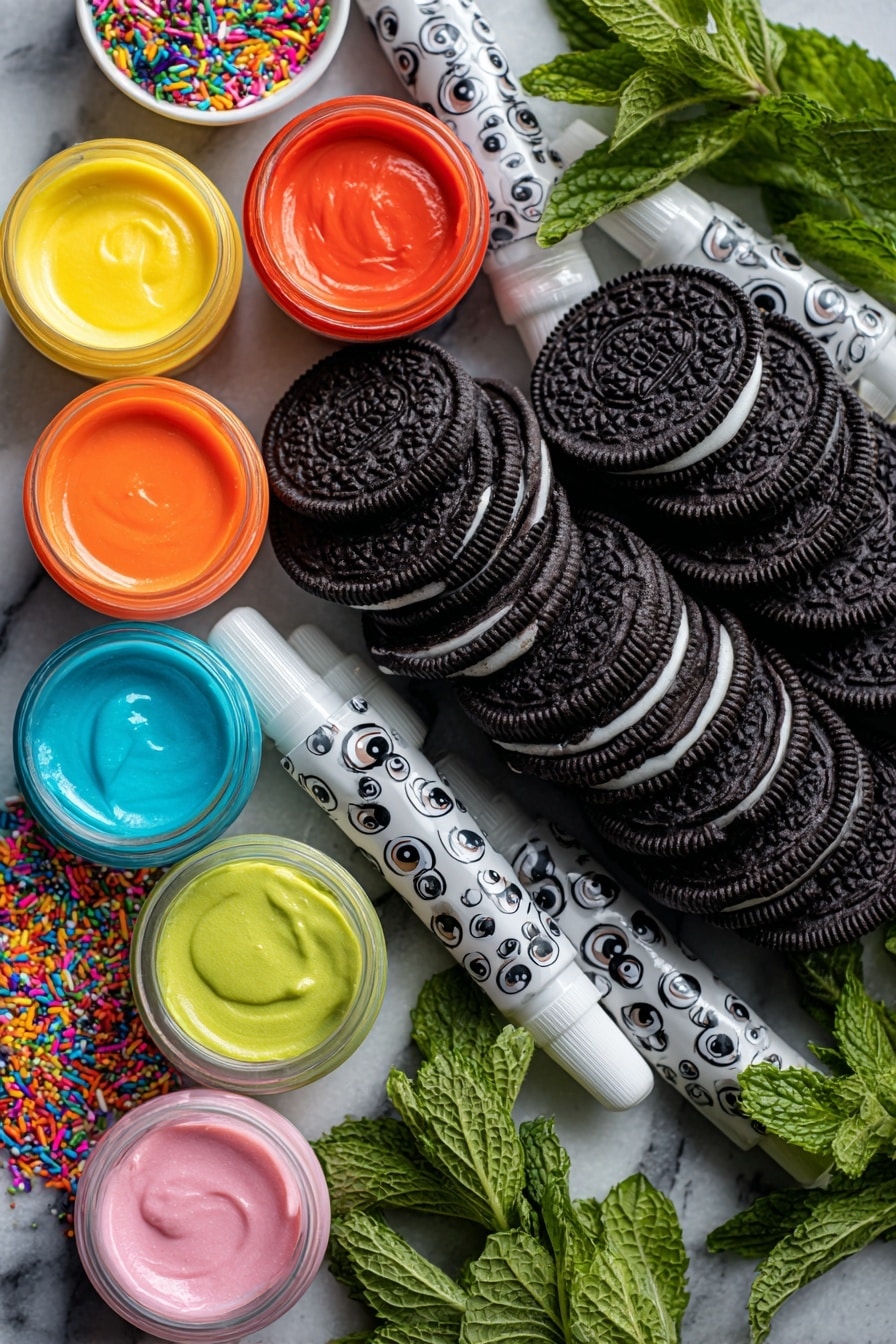
- Oreos: These iconic cookies are the perfect base with their distinct crunch and creamy filling. I suggest classic Oreos, but double stuff works great if you want extra gooey inside.
- Candy Melts: Candy melts give you a smooth, easy-to-work-with chocolate coating that hardens quickly. Choose bright Halloween colors to amp up the festivity.
- Sprinkles, Candy Eyes, Gel Coloring: These fun toppings add personality and detail to your treats. I love mixing in candy eyes for that spooky look and sprinkles for texture.
Make It Your Way
One of the things I absolutely love about the Halloween Candy Melt Oreo Chocolate Molded Treats Recipe is how easy it is to personalize. Whether you want to tweak colors or add your own spooky flair, there are tons of ways to make this recipe your own.
- Variation: I once swapped classic Oreos for mint-flavored ones—super tasty and unexpected! You can even swap in gluten-free Oreos if you want this treat to be keto-friendly or allergy-conscious.
- Seasonal Twist: While Halloween colors are a must, you could totally adapt the same technique for Christmas candies using red, green, and white melts, making it a year-round trick.
- Dietary Modifications: Use vegan candy melts and dairy-free Oreos to make it allergy-friendly without giving up on the fun.
Step-by-Step: How I Make Halloween Candy Melt Oreo Chocolate Molded Treats Recipe
Step 1: Prep Your Candy Melts and Mold
First, melt your candy melts according to the package instructions. I like to do this in paper Dixie bowls—it’s an easy cleanup hack and keeps the chocolate from burning in the microwave. Stir every 30 seconds until smooth and creamy. If it feels too thick, add just a tiny splash (like ½ teaspoon) of vegetable oil to loosen it up—this trick saved me when I used craft store melts before!
Step 2: Layer the Treats in the Mold
Next, spoon about a tablespoon of melted candy into the bottom of each mold cavity. Place an Oreo on top, then cover it with more melted candy. Don’t worry if the candy smooshes a bit — that means it’s going to be wrapped up nicely. Just tap the mold gently on the counter to settle it all evenly. Pop the mold in the fridge to chill for about an hour until fully set.
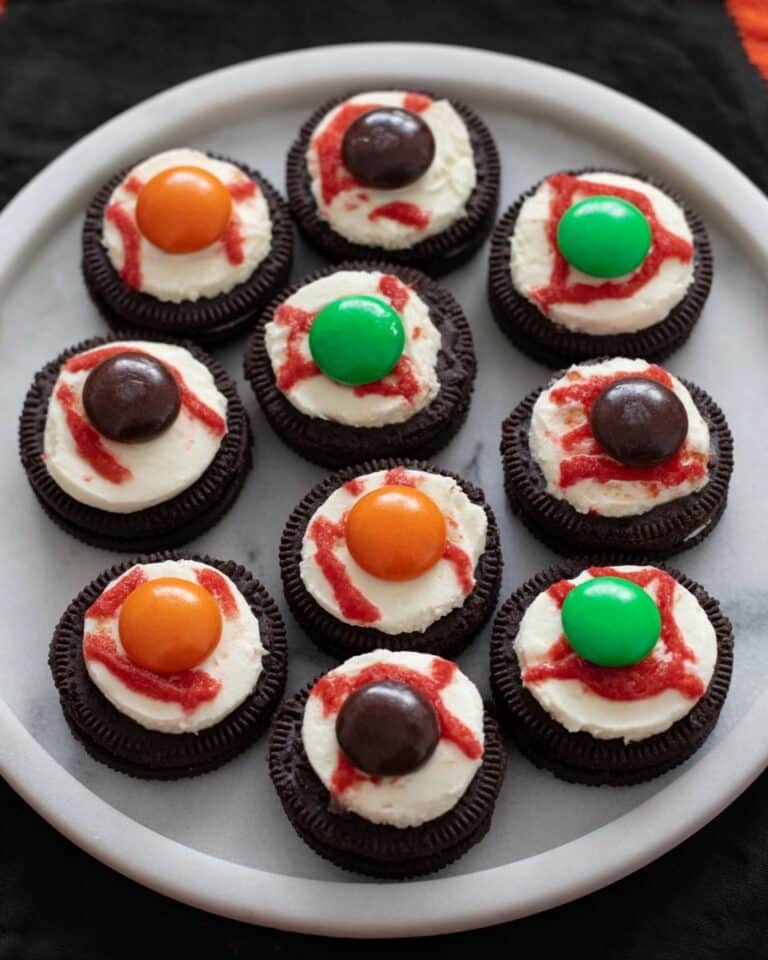
Step 3: Decorate Your Halloween Candy Melt Oreo Chocolate Molded Treats Recipe
Once the treats are solid, carefully pop them out of the mold. Now it’s time for my favorite part—decorating. Melt some additional candy melts in complementary colors and either drizzle over the top or use a piping bag to create jack-o’-lantern faces. If you want to get fancy, pipe eyes and mouths with dark chocolate or a black food coloring pen. Sprinkle on candy eyes, festive sprinkles, or any fun decorations you love, then chill again to set everything. I always keep my decorating simple but bold—it makes these treats pop on any dessert table.
Tips from My Kitchen
- Use Quality Candy Melts: I swear by the smoother melting experience of brands like Ghirardelli—your treats will look and taste better.
- Don’t Skip Tapping the Mold: It helps the candy melt settle evenly, ensuring you get a clean release and no air pockets.
- Measure Your Candy Melt Layers: About a tablespoon under and over the Oreo creates the perfect chocolate shell thickness.
- Chill Properly: Don’t rush the chilling step—waiting for the candy to harden completely keeps your treats from melting in your hands later.
How to Serve Halloween Candy Melt Oreo Chocolate Molded Treats Recipe

Garnishes
I love finishing these treats with cute candy eyes or spooky sprinkles for an instant Halloween vibe, but you can also go with edible glitter or even mini Halloween-themed edible confetti. They not only look adorable but add a bit of texture so each bite keeps things interesting.
Side Dishes
Because these treats are rich and chocolaty, pairing them with a simple side like fresh fruit or lightly salted nuts keeps your snack table balanced. For parties, I often serve them alongside pumpkin spice latte or a chilled apple cider to amp up the fall flavors.
Creative Ways to Present
One fun idea I tried was placing these treats in mini cupcake liners inside a larger decorative box lined with tissue paper—it made them perfect little party favors. You can also arrange them on a Halloween-themed platter with fake spider webs or mini pumpkins to create an irresistibly festive centerpiece.
Make Ahead and Storage
Storing Leftovers
After making these Halloween Candy Melt Oreo Chocolate Molded Treats Recipe, I store any leftovers in an airtight container in the fridge. They stay fresh and maintain their crispness for about 5 days, which is usually plenty of time because they tend to disappear fast!
Freezing
Freezing works surprisingly well. I place the treats in a single layer on a baking sheet, freeze until solid, then transfer to a freezer-safe container. When you’re ready, thaw in the fridge overnight to keep their shape and texture perfect.
Reheating
These treats are best served chilled or at room temperature. They’re not really meant to be reheated since the candy melts will soften and lose their signature crunch. If you want that melty chocolate experience, try warming them slightly in your hands or with a quick 5-second zap in the microwave.
FAQs
-
Can I use other cookies besides Oreos in this recipe?
Absolutely! While Oreos are classic for this, you can substitute with similar sandwich cookies like Golden Oreos, or gluten-free versions. Just make sure the cookies are sturdy enough to hold up to the candy coating.
-
How do I prevent candy melts from becoming too thick or grainy?
Melting candy melts slowly in short bursts and stirring often is key. If they get too thick, adding a small bit of vegetable oil (about ½ teaspoon) can smooth them out without affecting flavor.
-
Can kids help with this recipe?
Definitely! This recipe is very kid-friendly, especially the decorating part. Just make sure an adult handles melting the candy to avoid burns, and the little ones can go wild with sprinkles and designs.
-
What molds work best for these treats?
I use silicone chocolate molds with Halloween shapes because they’re flexible and make popping out the treats easy. If you don’t have molds, you can make these on a parchment-lined tray, but careful when handling since they won’t have a defined shape.
Final Thoughts
This Halloween Candy Melt Oreo Chocolate Molded Treats Recipe has become a favorite in my kitchen because it’s easy, festive, and endlessly customizable. It really makes me smile to see friends and family’s faces light up when they bite into that perfect mix of crunchy Oreo and rich candy coating. Give this recipe a try—you’ll find it’s one of those delightful little projects that bring a lot of joy (and a little mess) to your Halloween celebrations. Happy baking and spooky snacking!
Print
Halloween Candy Melt Oreo Chocolate Molded Treats Recipe
- Prep Time: 45 minutes
- Cook Time: 0 minutes
- Total Time: 1 hour 45 minutes
- Yield: 8 servings
- Category: Snack
- Method: No-Cook
- Cuisine: American
Description
This Halloween Oreos recipe transforms classic Oreos into festive, colorful treats perfect for the spooky season. Decorated with vibrant candy melts, sprinkles, and creative designs like jack o’ lantern faces, these no-bake snacks are easy to make and fun to customize for parties or trick-or-treaters.
Ingredients
Main Ingredients
- 12 Oreos
- Candy melts in different colors
- Sprinkles, gel coloring, candy eyes, or anything for decorating
Instructions
- Melt Candy Melts: Melt the candy melts according to package directions, preferably using paper dixie bowls to avoid burning the chocolate in the microwave and for an easy cleanup.
- Fill Mold Cavity: Fill the bottom of each cavity of your mold with about 1 tablespoon of melted candy.
- Add Oreos: Place one Oreo on top of the melted candy in each cavity, then cover with more melted candy to fully encase the cookie.
- Chill to Set: Place the mold in the refrigerator and chill until the candy is fully set, about 1 hour.
- Remove from Mold and Decorate: Carefully remove the set Oreo candies from the molds. Melt additional candy melts in desired colors for decoration.
- Create Jack o’ Lantern Faces: Use dark chocolate or black candy melts, place in a small piping bag with the tip cut off, and pipe eyes and mouth shapes onto the treats; alternatively, use a black food writer pen.
- Apply Sprinkle Decorations: Drizzle the tops with various colored melted candy and immediately sprinkle with your choice of sprinkles before chilling again to harden the decorations.
Notes
- Use high-quality chocolate candy melts like Ghirardelli for better taste and smoother spreading.
- If candy melts from craft stores are too thick, add about 1/2 teaspoon vegetable oil and stir to thin the mixture.
- Refer to tutorials on candy decorating for tips on melting and handling candy melts effectively.
Nutrition
- Serving Size: 1 cookie
- Calories: 120 kcal
- Sugar: 14 g
- Sodium: 85 mg
- Fat: 6 g
- Saturated Fat: 3 g
- Unsaturated Fat: 3 g
- Trans Fat: 0 g
- Carbohydrates: 18 g
- Fiber: 1 g
- Protein: 1 g
- Cholesterol: 0 mg


