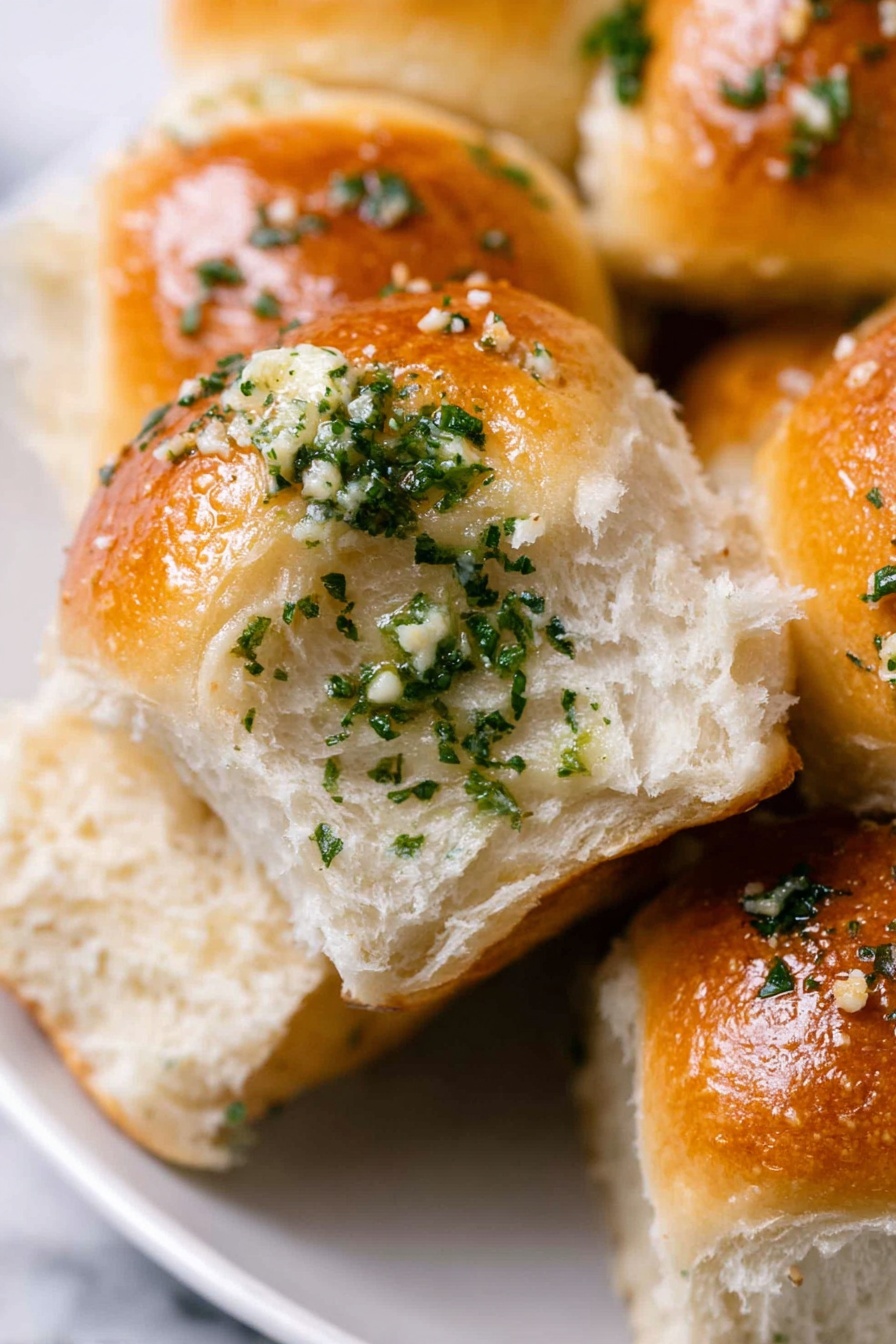
Garlic Bread Rolls Recipe
If you’ve ever wanted to make the coziest, most irresistible bread for your family or next dinner party, you’re going to love this Garlic Bread Rolls Recipe. These rolls come out soft, buttery, and packed with that perfect garlicky punch that keeps everyone coming back for more. Trust me, once you try making your own garlic bread rolls from scratch, you’ll wonder why you ever settled for store-bought!
Why This Recipe Works
- Perfect Garlic Butter Blend: The garlic butter is cooked just enough to release its aroma without turning bitter, infusing each bite with rich flavor.
- Soft, Pillowy Texture: Kneading the dough properly gives these rolls a tender crumb that melts in your mouth.
- Simple, Fresh Ingredients: The recipe uses pantry staples but brightens them up with fresh parsley and homemade garlic butter.
- Flexible Rise Times: You can prep and refrigerate dough overnight, making it great for planning ahead.

Ingredients & Why They Work
Each ingredient in this Garlic Bread Rolls Recipe has a role that’s key to delivering that perfect balance of soft bread and bright garlic flavor. Choosing fresh herbs and measuring your flour right can make a big difference in the final texture.
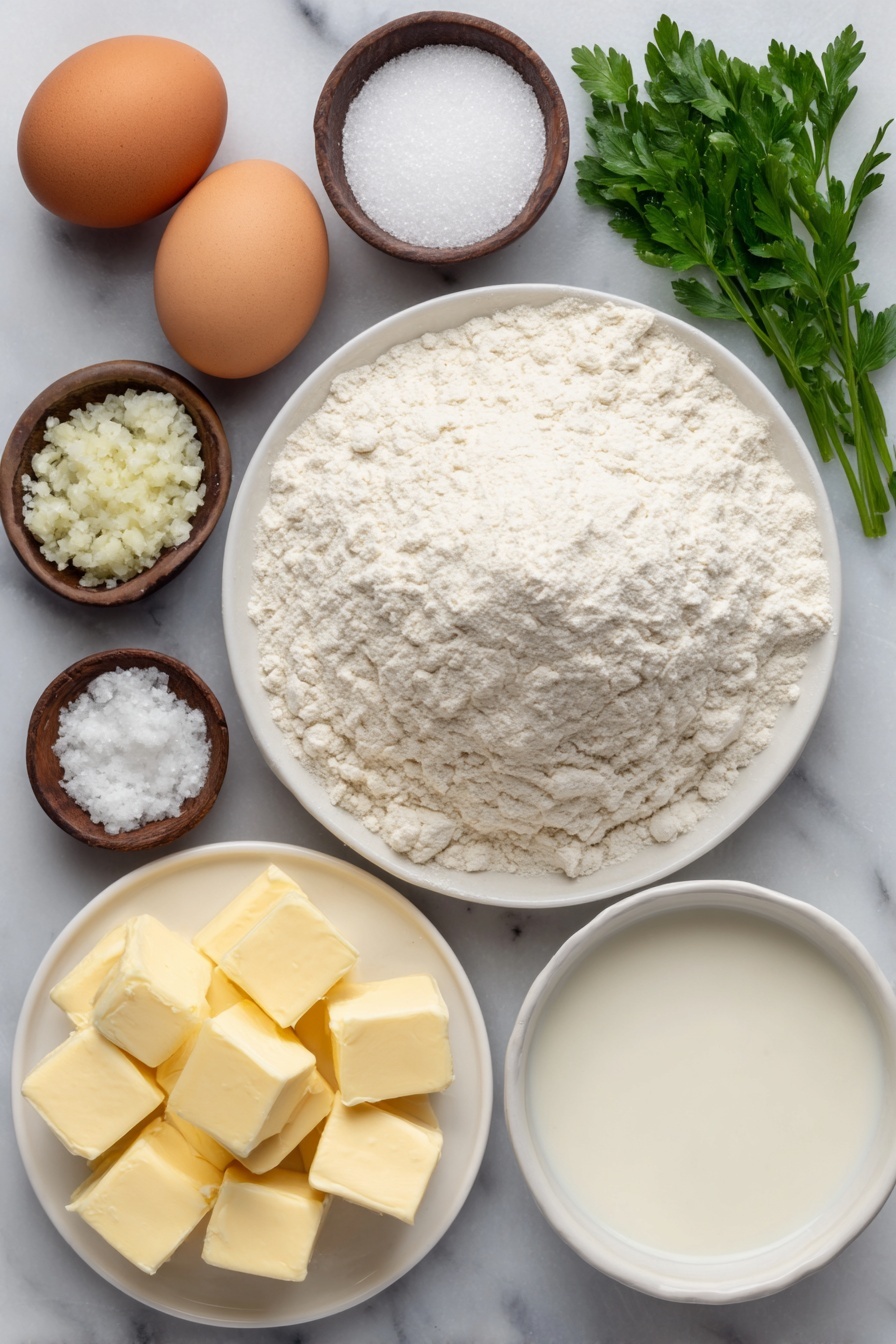
- Unsalted butter: Gives a rich buttery flavor without the unpredictability of salted butter.
- Minced garlic: Fresh garlic provides that vibrant, pungent kick essential for garlic bread.
- All-purpose flour: The backbone of the dough — measuring it accurately ensures a dough that’s soft but not sticky.
- Fresh parsley: Adds a fresh, herbaceous note that balances the garlic’s intensity.
- Granulated sugar: Feeds the yeast and helps the rolls develop a beautiful golden crust.
- Instant yeast: Convenient and reliable, it helps the dough rise beautifully without extra fuss.
- Fine sea salt: Enhances all the flavors without overwhelming the bread.
- Whole or 2% milk: Warmed milk tenderizes the dough and lends a subtle creaminess.
- Large eggs: Provide richness and help bind the dough.
- Beaten egg (for brushing): Gives the rolls a shiny, inviting golden finish.
- Flaky sea salt (optional garnish): Sprinkled on top after baking, it adds delightful texture and flavor bursts.
Make It Your Way
I like to keep things classic, but don’t be afraid to experiment! One of the best parts of this Garlic Bread Rolls Recipe is how easy it is to customize to your household’s tastes or dietary needs.
- Variation: Sometimes, I swap parsley for fresh basil or add a pinch of chili flakes for a little heat—my family loves this twist.
- Dietary Option: You can use olive oil instead of butter for a dairy-free take, but the rolls won’t be quite as rich.
- Make It Ahead: I often refrigerate the shaped dough overnight when I’m short on time, and that slow rise only improves the flavor.
Step-by-Step: How I Make Garlic Bread Rolls Recipe
Step 1: Prepare the Garlic Butter Base
Start by melting the butter gently in a small pot over low heat, then stir in the minced garlic and cook for just 1-2 minutes. You want that garlic to become fragrant without browning or burning it, which can create bitterness. Once it’s smelling amazing, remove it from the heat and let it cool while you prep the dry ingredients.
Step 2: Mix and Knead the Dough
In your stand mixer bowl, whisk together flour, chopped parsley, sugar, instant yeast, and salt. Add the warm milk, the large egg, and the cooled garlic butter. Use your dough hook on low speed to knead everything until the dough is smooth and soft, about 10-12 minutes. It should be tacky but not overly sticky—if it feels wet, sprinkle in a tablespoon of flour at a time.
Step 3: Shape and Proof the Rolls
Divide your dough into 12 even pieces (67 grams each works great if you have a kitchen scale). Roll each piece into tight, smooth balls by pinching the seam on the bottom, so they hold their shape nicely while baking. Place them spaced evenly in a buttered 9×13 pan, cover with plastic wrap or a towel, and set in a warm spot to double in size — this usually takes 1-2 hours. Watching the dough rise is honestly one of my favorite parts!
Step 4: Bake with a Beautiful Egg Wash
Preheat your oven to 350°F (180°C). Once the rolls have puffed up, brush the tops with a beaten egg — this is what gives these garlic bread rolls that irresistible golden sheen. Bake for 20 to 30 minutes, or until they’re a gorgeous golden brown on top.
Step 5: Finish with Garlic Butter and Serve Warm
While the rolls bake, whip up a quick garlic butter topping by melting butter and briefly cooking minced garlic until fragrant, then stirring in fresh parsley. Immediately brush this fragrant butter over the warm rolls once they’re out of the oven. For a little grown-up flair, sprinkle flaky sea salt on top — it adds a lovely crunch.
Tips from My Kitchen
- Flour Measuring Method: I’ve always had better results when spooning flour into the measuring cup rather than scooping—it keeps the dough soft and tender.
- Don’t Skip the Cooling Step: Cooling the garlic butter before adding to the dough ensures you don’t accidentally cook the egg or yeast.
- Use a Kitchen Scale: I can’t recommend this enough—dividing the dough evenly ensures uniform baking and pretty rolls.
- Watch the Rise, Not the Clock: Oven temperature and room humidity vary, so I always check that the dough has doubled rather than sticking strictly to timing.
How to Serve Garlic Bread Rolls Recipe
Garnishes
I usually finish with a sprinkle of flaky sea salt after brushing the warm rolls with garlic butter—it adds just the right little crunch and flavor pop. Fresh parsley on top brightens the look and taste even more. If I’m feeling fancy, a tiny dusting of Parmesan can work wonders too!
Side Dishes
These garlic bread rolls pair wonderfully with almost any meal, but I especially love serving them with a creamy tomato soup, hearty pasta dishes like spaghetti bolognese, or alongside a fresh green salad for a lighter dinner. They also shine next to roasted chicken or even dipped into warm olive oil infused with herbs.
Creative Ways to Present
For special occasions, I like to arrange the rolls in a wreath shape on a baking sheet, so your guests can pull them apart roll by roll. Another fun idea is to stuff the dough balls with a small cube of mozzarella or herbs before baking—talk about a delicious surprise inside!
Make Ahead and Storage
Storing Leftovers
Leftover garlic bread rolls are best eaten the same day, but if you need to save them, store cooled rolls in an airtight container or sealed ziplock bag on your countertop. They’ll stay soft for about 2-3 days, perfect for snacking or warming up later.
Freezing
I freeze the rolls after baking and letting them cool completely, popping them into an airtight container or freezer bag. They keep wonderfully for up to a month. When I want to enjoy them, I just thaw at room temperature for a couple hours before warming.
Reheating
To reheat and keep that fresh-baked flavor, I wrap the rolls in foil and bake them at 350°F (180°C) for about 10-12 minutes until warmed through. Microwaving works, too—20-30 seconds per roll—but it’s less crispy on top. You can always brush a little extra garlic butter before serving.
FAQs
-
Can I use active dry yeast instead of instant yeast in this Garlic Bread Rolls Recipe?
Yes, you can! If using active dry yeast, activate it first by stirring it into the warm milk along with a pinch of the sugar and letting it sit for about 5 minutes until foamy. Then proceed with the recipe. Just be sure to let the dough rise until doubled before shaping and again after shaping, which may take a bit longer than with instant yeast.
-
How do I know if the dough has risen enough?
The dough should roughly double in size and look puffy and soft when it’s ready. A good test is to gently press your finger into the dough—it should leave an indentation that slowly fills back in. If it springs back quickly, it needs more time.
-
Can I make these rolls vegan?
You can! Replace butter with a plant-based margarine or olive oil, use a flax or chia egg substitute, and swap dairy milk for plant-based milk like almond or oat. The texture will change slightly but will still be delicious.
-
What’s the best way to store leftover garlic bread rolls?
Store leftover rolls in an airtight container or ziplock bag at room temperature for 2-3 days. For longer storage, freeze them individually and thaw as needed.
Final Thoughts
This Garlic Bread Rolls Recipe has become a staple in my kitchen because it reliably delivers that warm, toasty comfort we all crave. There’s something so satisfying about pulling apart soft, garlicky rolls fresh from the oven, especially when shared with loved ones. I really hope you give these a try — making homemade bread feels like magic, and these rolls are a beautiful, tasty place to start your journey.
Print
Garlic Bread Rolls Recipe
- Prep Time: 1 hour 30 minutes
- Cook Time: 30 minutes
- Total Time: 2 hours
- Yield: 12 servings
- Category: Side Dish
- Method: Baking
- Cuisine: American
- Diet: Vegetarian
Description
These Garlic Bread Rolls are soft, fluffy, and infused with rich garlic butter flavor. Perfect as a side for dinner or as a warm snack, they are made from scratch using simple ingredients like flour, yeast, butter, and fresh parsley. Brushed with a garlic butter glaze right after baking, these rolls are deliciously aromatic and golden brown.
Ingredients
Dough Ingredients
- 4 1/2 tablespoons unsalted butter
- 2 tablespoons minced garlic
- 3 1/2 cups + 1 tablespoon all-purpose flour
- 3 tablespoons chopped fresh parsley
- 1 tablespoon granulated sugar
- 2 1/4 teaspoons instant yeast
- 1 teaspoon fine sea salt
- 1 cup whole or 2% milk, warmed to 110°F
- 1 large egg, room temperature
- 1 beaten egg, for brushing the tops
Garlic Butter Topping
- 2 tablespoons unsalted butter
- 1 tablespoon minced garlic
- 1 tablespoon chopped fresh parsley
- Flaky sea salt, for finishing
Instructions
- Prepare the Pan: Lightly butter the bottom and sides of a 9×13 inch baking pan and set it aside to prevent sticking.
- Make Garlic Butter for Dough: In a small pot, melt 4 1/2 tablespoons unsalted butter and add 2 tablespoons minced garlic. Cook for 1-2 minutes until the garlic is fragrant, then remove from heat and let cool while gathering other ingredients.
- Mix Dough Ingredients: In a stand mixer bowl, combine 3 1/2 cups + 1 tablespoon all-purpose flour, 3 tablespoons chopped fresh parsley, 1 tablespoon granulated sugar, 2 1/4 teaspoons instant yeast, and 1 teaspoon fine sea salt. Add warmed milk (1 cup), 1 large room temperature egg, and the cooled garlic butter mixture.
- Knead Dough: Using the dough hook attachment on low speed, knead the mixture until the dough is smooth, soft, and slightly tacky, about 10-12 minutes. Add flour one tablespoon at a time if dough is too sticky until workable.
- Shape Rolls: Divide the dough into 12 equal portions (about 67 grams each). Shape each into a smooth ball, pinching the bottom seam tight to hold shape. Place rolls into the prepared baking pan.
- First Rise: Cover the pan with plastic wrap or a clean kitchen towel. Set in a warm place and let the dough rise until doubled in size, about 1 to 2 hours.
- Preheat Oven and Egg Wash: Preheat oven to 350°F (180°C). Brush the tops of the risen rolls with one beaten egg for a glossy finish.
- Bake Rolls: Bake the rolls for 20-30 minutes until the tops are golden brown and cooked through.
- Prepare Garlic Butter Topping: While the rolls bake, melt 2 tablespoons unsalted butter in a small pot, add 1 tablespoon minced garlic and cook for 1-2 minutes until fragrant. Remove from heat and stir in 1 tablespoon chopped fresh parsley.
- Brush Rolls and Serve: Immediately after baking, brush the hot rolls generously with the garlic butter mixture. Sprinkle flaky sea salt on top if desired and serve warm.
Notes
- Measure flour properly using the spoon-level method or a kitchen scale for best results to avoid dense rolls.
- If using active dry yeast instead of instant yeast, activate it by stirring into warm milk with a bit of sugar, let sit for 5 minutes until foamy before adding to dough.
- Dinner rolls are best eaten the day they are made but keep well in an airtight container for 2-3 days at room temperature.
- For longer storage, cool rolls completely then freeze in airtight containers for up to one month.
- To make ahead, shape rolls and refrigerate in the pan covered overnight. Let rise at room temperature until doubled before baking.
- Reheat rolls by covering with foil and baking at 350°F until warmed through or microwave for 20-30 seconds.
Nutrition
- Serving Size: 1 roll
- Calories: 180 kcal
- Sugar: 2 g
- Sodium: 210 mg
- Fat: 7 g
- Saturated Fat: 4 g
- Unsaturated Fat: 3 g
- Trans Fat: 0 g
- Carbohydrates: 25 g
- Fiber: 1 g
- Protein: 4 g
- Cholesterol: 30 mg


