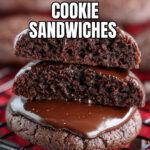
Devil’s Food Cookie Sandwiches Recipe
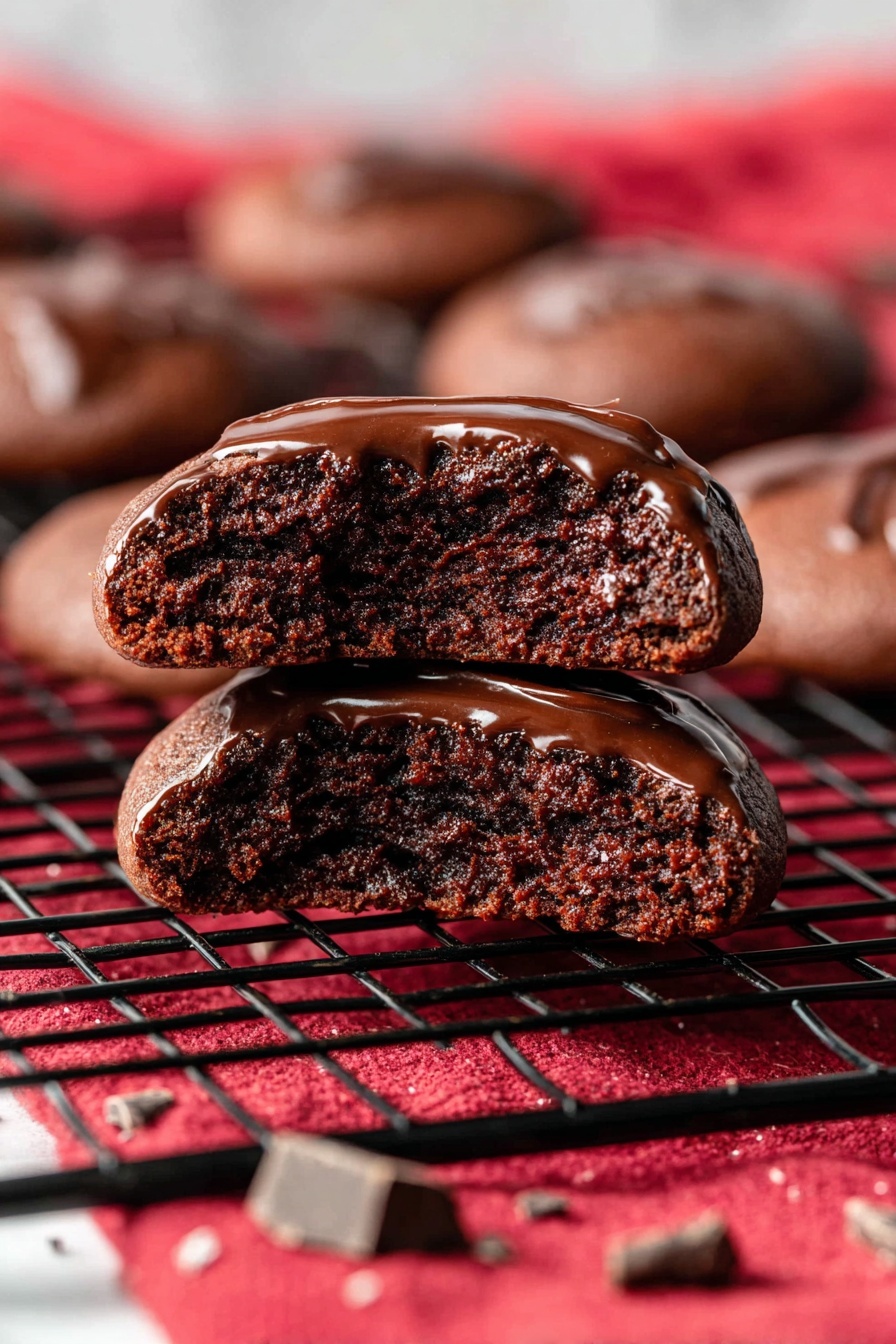
If you’re looking for a show-stopping treat that’s rich, indulgent, and seriously addictive, you’re in for a real delight with this Devil’s Food Cookie Sandwiches Recipe. These aren’t your everyday cookies—they’re fudgy, filled with a dreamy chocolate filling, and topped with a silky ganache that just melts in your mouth. Trust me, once you try making these, they’ll become your go-to dessert to impress friends or treat yourself after a long day.
Why This Recipe Works
- Rich, Moist Texture: Using cake flour and Dutch cocoa powder give these cookies that delicate crumb and deep chocolate flavor that stands apart from typical chocolate cookies.
- Creamy, Chocolatey Filling: The luscious cocoa-infused buttercream inside creates a perfect soft center that feels like a secret little gift with every bite.
- Smooth Ganache Topping: The glossy ganache adds a touch of elegance and extra chocolate richness that ties the whole sandwich together beautifully.
- Simple Chilling Step: Chilling the dough helps the cookies hold their shape and prevents spreading, so your sandwiches look as from-a-bakery perfect as they taste.

Ingredients & Why They Work
This Devil’s Food Cookie Sandwiches Recipe is all about combining rich chocolate and butter in just the right way. Each ingredient is chosen not just to taste amazing, but also to give you that melt-in-your-mouth texture and deep cocoa flavor you crave in a decadent chocolate treat.
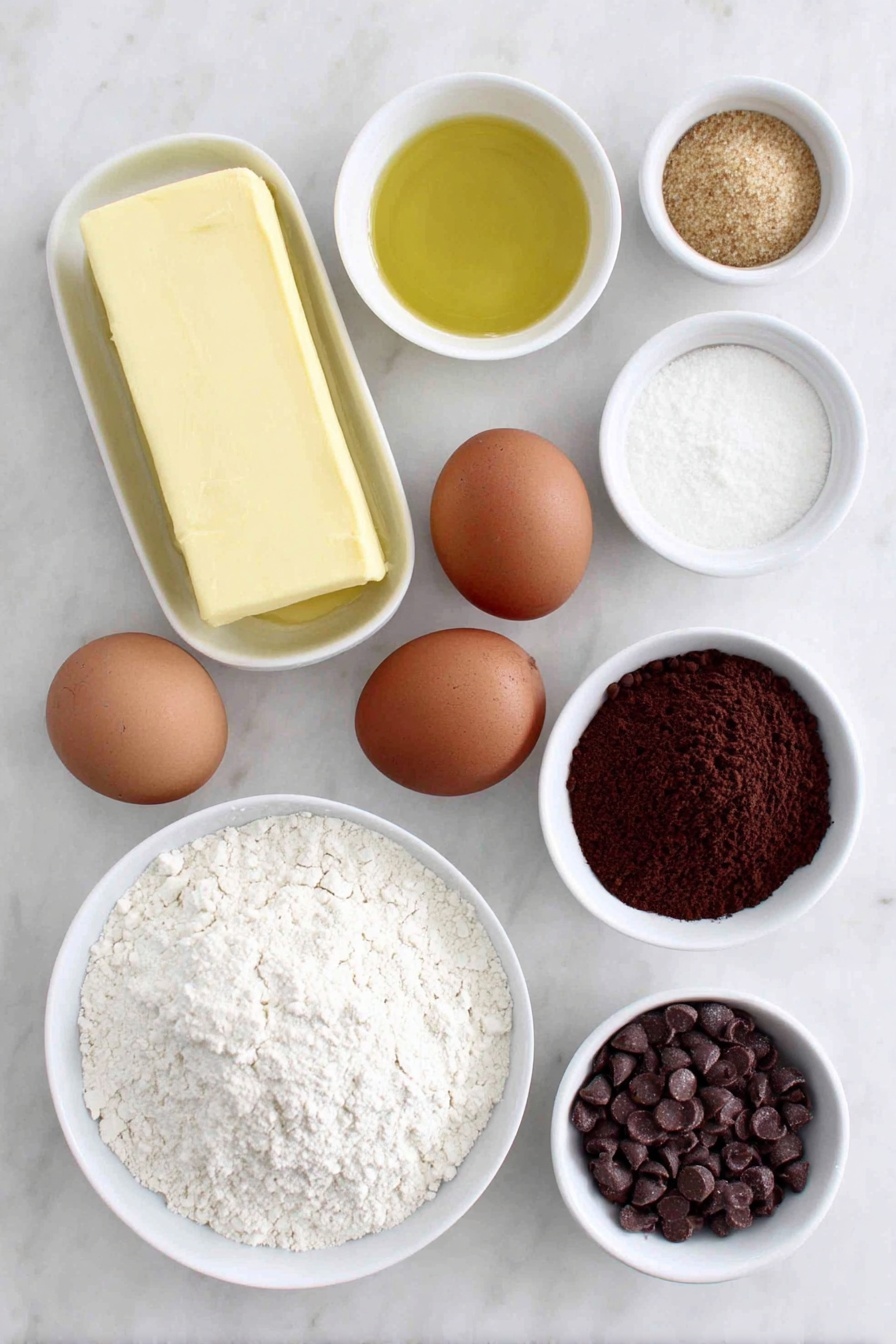
- Unsalted Butter: Using softened butter lets you cream it easily with sugars, creating that perfect light and fluffy cookie base.
- Light Brown Sugar & Granulated Sugar: This combo balances moisture and sweetness with a subtle caramel note from the brown sugar.
- Cooking Oil (Avocado, Canola, or Vegetable): Adds moisture and tenderness to the dough, ensuring your cookies stay soft and chewy.
- Large Eggs: Help bind everything together while adding richness—room temperature eggs mix more evenly.
- Vanilla Extract: Enhances all the chocolate flavors with a warm, sweet undertone.
- Cake Flour: The secret to a tender crumb, cake flour keeps these cookies soft and crumbly instead of dense.
- Dutch Cocoa Powder: Gives that deep, intense chocolate flavor and rich dark color that regular cocoa can’t match.
- Baking Powder & Baking Soda: Help the cookies rise just enough while keeping them soft and tender.
- Salt: Balances the sweetness and intensifies the chocolate notes.
- Powdered Sugar (for filling): Creates a smooth, silky buttercream that’s not grainy like regular sugar might be.
- Semisweet Chocolate Chips & Heavy Cream (for ganache): Together they make a luscious, glossy finish that hardens just right — not too hard, not too soft.
Make It Your Way
One of the things I love about the Devil’s Food Cookie Sandwiches Recipe is how easy it is to make your own. Whether you want to mix up the filling with a hint of espresso or swap the ganache for a peanut butter drizzle, it’s a great base that welcomes creativity.
- Variation: I’ve tried swapping half the Dutch cocoa in the filling for instant espresso powder—it amps up the chocolate depth and adds a bit of an adult twist that’s incredible!
- Dietary tweaks: You can sub vegan butter and use a dairy-free chocolate for a plant-based version that still tastes indulgent.
- Seasonal touches: Adding orange zest to the dough or a sprinkle of sea salt on the ganache makes these feel festive for the holidays.
Step-by-Step: How I Make Devil’s Food Cookie Sandwiches Recipe
Step 1: Creaming Butter and Sugars to Perfection
Start by beating the softened butter with both the light brown and granulated sugars. I like to start slow, then crank up the mixer speed to get that mixture light and fluffy—this usually takes a full couple minutes. This step is key because it traps air into the dough, which helps the cookies rise just right. Don’t rush it! You want a creamy texture, not grainy sugar bits.
Step 2: Adding Oil, Eggs, and Vanilla
Next, add your oil, eggs, and vanilla extract on a low mixer speed. If your eggs are cold, I recommend warming them slightly (just pop in warm water a few minutes before) so they combine evenly without causing the butter to seize up. Once combined, set this mixture aside while you prepare the dry ingredients.
Step 3: Mixing Dry Ingredients and Combining the Dough
Whisk together cake flour, Dutch cocoa powder, baking powder, baking soda, and salt in a separate bowl—that way you avoid clumps and get an even distribution of leavening agents. Gradually mix the dry ingredients into the wet until no streaks remain. The dough will be on the softer side, so chilling it is a must to make it manageable.
Step 4: Chilling the Dough and Preparing Filling
Wrap or cover the dough and pop it in the fridge for about 30 minutes. While it chills, whip up the filling by beating softened butter until creamy. Add powdered sugar gradually, then fold in cocoa powder, vanilla, and a pinch of salt. Use a tablespoon scoop to portion the filling onto wax paper and freeze it while the dough finishes chilling.
Step 5: Shaping the Cookies with Hidden Filling
Once your dough is chilled and no longer sticky, scoop out quarter-cup sized balls. Roll each between your hands and press a deep indent in the center. Place one frozen filling dollop inside, then carefully roll the dough around it until fully enclosed and smooth. This step took me a bit to get right—be gentle but firm to avoid cracking. Space the cookies two inches apart on a parchment-lined baking sheet.
Step 6: Baking Just Right
Bake in a preheated 350°F (175°C) oven for 12 to 14 minutes. The tops might look a little soft or underdone but don’t worry—edges should be firm. Let them cool completely on the baking sheet because warm cookies are very fragile and might break when moved or topped.
Step 7: Making the Ganache and Finishing Touches
For the ganache, gently heat chocolate chips with heavy cream in the microwave, stirring every 15 seconds until smooth. Once the cookies are fully cooled, spread about a tablespoon of ganache over each. Let the ganache set before you dig in—you’ll get that perfect glossy finish with a velvety bite.
Tips from My Kitchen
- Don’t Skip Chilling: I learned the hard way—if the dough isn’t cold before shaping, your cookies spread way too much and lose their sandwich charm.
- Use Cake Flour for Texture: When I swapped to cake flour, the difference was night and day—the cookies were softer and more tender, exactly what I wanted.
- Trust Your Baking Time: Cookies may look underdone on top but edges set means doneness; it keeps them soft inside.
- Ganache Cooling: Let the ganache cool slightly before spreading to avoid melting the cookies but spread it while still pourable so it’s smooth.
How to Serve Devil’s Food Cookie Sandwiches Recipe
Garnishes
I like to sprinkle a tiny pinch of flaky sea salt over the ganache once it’s set—it cuts through the sweetness beautifully and adds a gourmet touch. Sometimes, I dust a bit of cocoa powder or add a few mini chocolate chips on top if it’s a special occasion.
Side Dishes
These cookie sandwiches are delightful with a cold glass of milk or a cup of freshly brewed coffee. For a party, I serve them alongside fresh berries or a scoop of vanilla bean ice cream for a decadent dessert plate.
Creative Ways to Present
For birthdays and holidays, I’ve wrapped individual cookies in clear cellophane tied with a festive ribbon—makes them excellent edible gifts. You can also stack a few on a pretty platter and garnish with edible flowers or chocolate shavings for a party-ready look that really impresses guests.
Make Ahead and Storage
Storing Leftovers
I keep leftover Devil’s Food Cookie Sandwiches in an airtight container in the fridge because of the ganache. They’re best within a week, and I always let them come to room temperature before eating—the flavor and texture get back to that soft, gooey perfection.
Freezing
These cookies freeze wonderfully! I flash freeze the assembled cookies on a baking sheet, then transfer them to a freezer-safe bag. When ready to enjoy, thaw overnight in the fridge and let sit at room temperature for a bit. The git-go, homemade indulgence stays intact, which I adore.
Reheating
If I want a warm cookie sandwich, I pop one in the microwave for about 10 seconds—but be careful! You want it warm, not melty or crumbly. Alternatively, a few minutes in a low-temp oven (around 300°F) works great to warm through evenly without softening the ganache too much.
FAQs
-
Can I use all-purpose flour instead of cake flour for this Devil’s Food Cookie Sandwiches Recipe?
Yes, you can substitute all-purpose flour for cake flour if that’s what you have, but your cookies might turn out slightly denser. A smart tip is to replace 3 cups of all-purpose flour with 2 Tablespoons of cornstarch to mimic the tenderness of cake flour, helping keep the cookies soft and delicate.
-
How do I prevent the filling from leaking during baking?
Chilling both the dough and the filling is essential. Also, when enclosing the filling, make sure to seal the dough completely around it with no cracks or gaps. This keeps the filling neatly inside while baking, producing those perfect pockets of chocolate goodness.
-
Can I make these cookies ahead of time for a party?
Absolutely! You can assemble the cookie dough balls with filling and freeze them unbaked for up to a month. When you’re ready, bake straight from the freezer, adding a minute or two to the baking time. Ganache can be spread after cooling, making these a great make-ahead dessert.
-
What’s the best way to store leftover Devil’s Food Cookie Sandwiches?
Because of the ganache topping, store leftovers in an airtight container in the refrigerator for up to one week. Bring them to room temperature before enjoying for the best chewy texture and rich flavor.
Final Thoughts
This Devil’s Food Cookie Sandwiches Recipe is hands down one of those desserts I find myself coming back to again and again. It feels like a little chocolate celebration every time I bite in. Whether you’re making them for family, friends, or just to treat yourself, I promise this recipe will earn a permanent spot in your baking repertoire. Now get your mixing bowls out—these heavenly, chocolatey delights are waiting for you!
Print
Devil’s Food Cookie Sandwiches Recipe
- Prep Time: 40 minutes
- Cook Time: 14 minutes
- Total Time: 1 hour 24 minutes
- Yield: 14 cookies
- Category: Dessert
- Method: Baking
- Cuisine: American
Description
Delicious and rich Devil’s Food Cookies with a soft, cocoa-flavored dough filled with a creamy cocoa frosting and topped with a smooth chocolate ganache. Perfectly indulgent and moist treats ideal for chocolate lovers.
Ingredients
Cookie Dough
- 1 cup (226 g) unsalted butter softened
- 1 cup (200 g) light brown sugar firmly packed
- ½ cup (100 g) granulated sugar
- 2 Tablespoons cooking oil (avocado, canola, or vegetable oil)
- 2 large eggs room temperature preferred
- 1 ½ teaspoons vanilla extract
- 3 ½ cups (394 g) cake flour
- ⅔ cup (70 g) Dutch cocoa powder
- 2 teaspoons baking powder
- ¼ teaspoon baking soda
- ¾ teaspoon table salt
Filling
- 6 Tablespoons (85 g) unsalted butter softened
- 1 cup (125 g) powdered sugar
- 2 ½ Tablespoons Dutch cocoa powder
- ¾ teaspoon vanilla extract
- Pinch of table salt
Ganache
- 1 cup (170 g) semisweet chocolate chips or couverture chocolate
- ¼ cup (60 ml) heavy cream
Instructions
- Make Cookie Dough: In a large mixing bowl or stand mixer with paddle attachment, beat butter and both sugars on high speed until light and creamy, about 2 minutes. Add oil, eggs, and vanilla extract, stirring on low speed until fully combined.
- Combine Dry Ingredients: In a separate medium bowl, whisk together cake flour, Dutch cocoa powder, baking powder, baking soda, and salt.
- Mix Dough: Gradually add dry ingredients into wet ingredients, mixing until thoroughly combined. Cover with plastic wrap and chill dough in the refrigerator for 30 minutes.
- Prepare Filling: In a medium bowl, beat softened butter until smooth using an electric mixer. Gradually add powdered sugar in parts, beating until smooth. Stir in cocoa powder, vanilla extract, and salt until fully combined. Scoop filling by 1 tablespoon portions onto wax paper-lined sheet and freeze at least 15 minutes.
- Preheat Oven and Prepare Baking Sheet: Preheat oven to 350°F (175°C) and line a baking sheet with parchment paper.
- Assemble Cookies: Once dough and filling are chilled, scoop dough into ¼ cup (75 g) balls. Roll each ball to smooth, make a deep indentation in center, insert one filling dollop, then roll dough around filling to encase it completely. Place on baking sheet spaced at least 2 inches apart.
- Bake: Bake cookies for 14 minutes on center rack. Cookies will look slightly underdone on top but edges should be set. Cool completely on baking sheet before ganache.
- Make Ganache: Combine chocolate and heavy cream in microwave-safe bowl. Microwave for 30 seconds, stir, then continue heating in 15 second increments stirring well until smooth and melted.
- Top Cookies: Spread about 1 tablespoon ganache over each cooled cookie. Allow ganache to solidify before serving.
Notes
- Use cake flour for best texture; alternatively, substitute 3 cups all-purpose flour plus 2 tablespoons cornstarch.
- Store cookies at room temperature in airtight container up to 2 days. Refrigerate if storing longer, up to a week.
- For best flavor, serve cookies warm or set refrigerated cookies out to reach room temperature before enjoying.
Nutrition
- Serving Size: 1 cookie
- Calories: 320 kcal
- Sugar: 24 g
- Sodium: 150 mg
- Fat: 18 g
- Saturated Fat: 10 g
- Unsaturated Fat: 6 g
- Trans Fat: 0 g
- Carbohydrates: 35 g
- Fiber: 3 g
- Protein: 4 g
- Cholesterol: 45 mg


