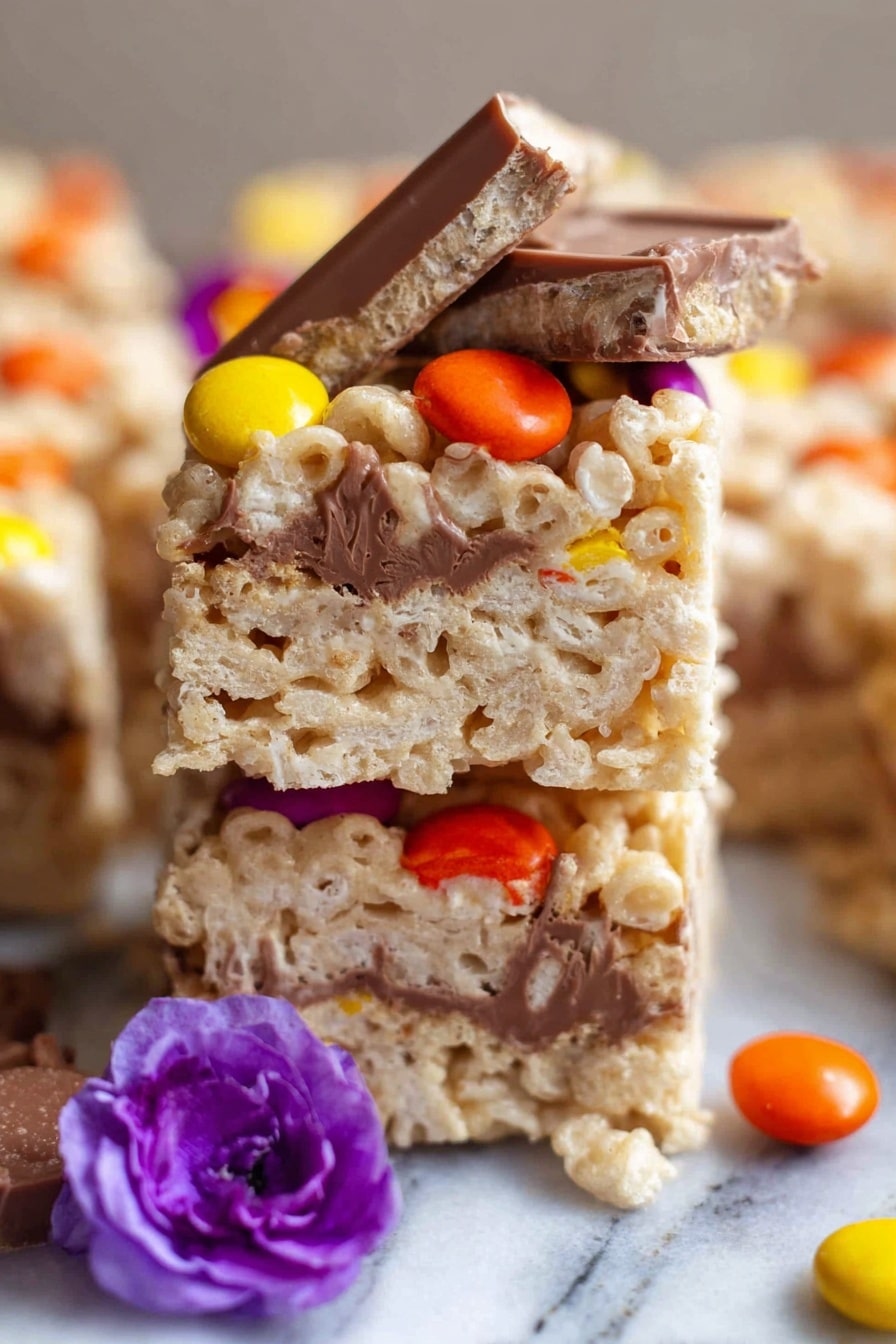
Chocolate Peanut Butter Rice Krispie Treats Recipe
If you love the classic combination of peanut butter and chocolate, you are going to adore this Chocolate Peanut Butter Rice Krispie Treats Recipe. It takes a nostalgic childhood favorite and kicks it up a notch with the rich creaminess of peanut butter, the gooeyness of marshmallows, and the irresistible crunch of peanut butter cups and mini cookies. I first made this on a whim for a family get-together, and it was an absolute hit. Trust me, once you try these, they won’t last long – and you’ll be making them over and over again!
Why This Recipe Works
- Perfect Peanut Butter-Chocolate Balance: The creamy peanut butter melts right into the marshmallows, creating a smooth, rich base that pairs perfectly with chocolate bits.
- Texture Play: Crunchy Rice Krispies, chewy marshmallows, and soft peanut butter cups provide an irresistible mix of textures.
- No-Bake Convenience: Quick to prepare without an oven—perfect for busy days or last-minute treats.
- Customizable Garnishes: Adding Reese’s Pieces and mini Nutter Butter cookies lets you personalize the treats for extra flair and flavor.

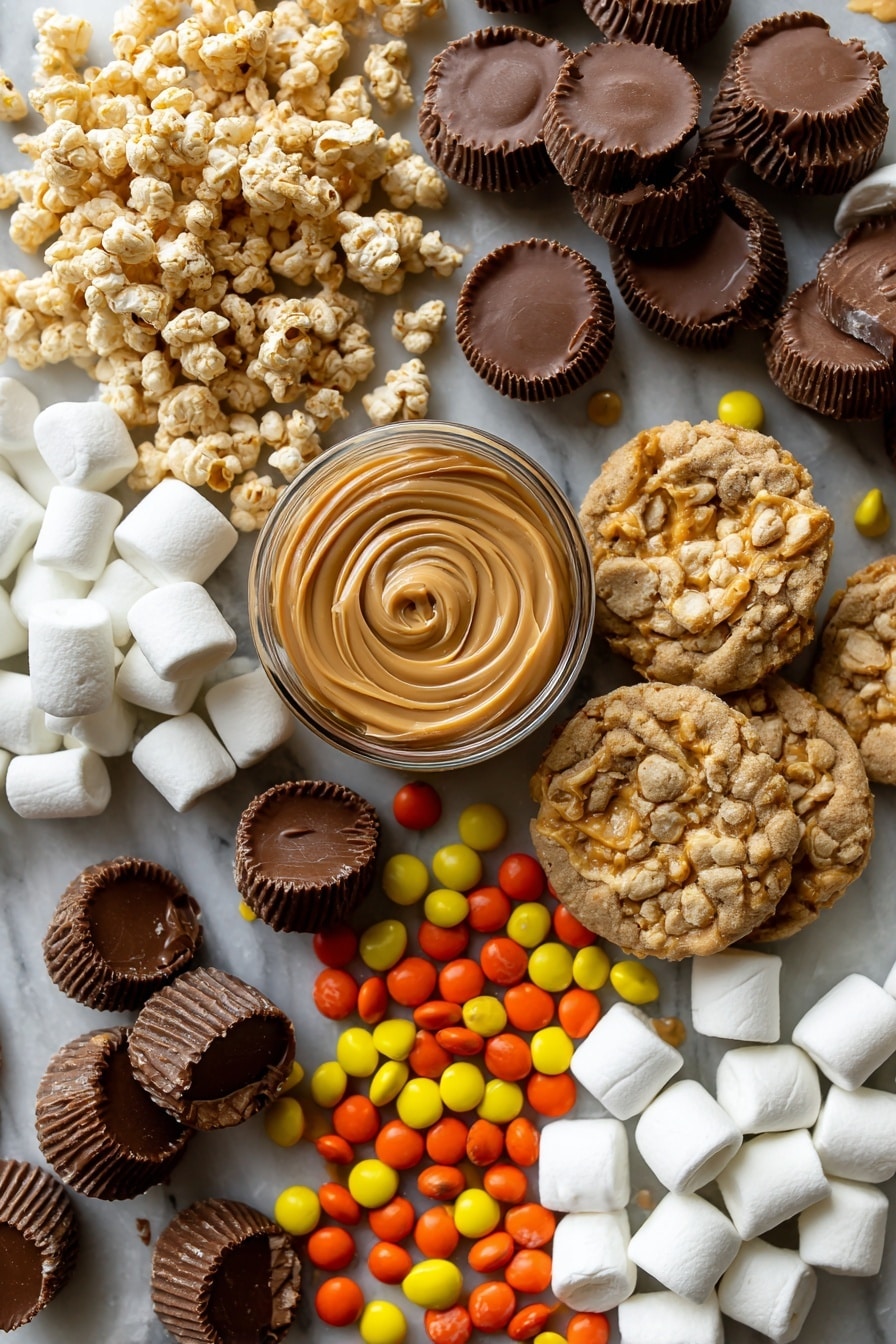
Ingredients & Why They Work
I love how every ingredient in this Chocolate Peanut Butter Rice Krispie Treats Recipe complements each other to build layers of flavor and texture. When shopping, picking fresh, high-quality peanut butter and marshmallows makes a real difference in taste and consistency.
- Unsalted Butter: Melts smoothly and adds richness without overpowering the peanut butter.
- Mini Marshmallows (10 oz): These melt quickly and evenly, giving that classic gooey texture.
- Creamy Peanut Butter: Creamy texture helps bind the mixture and injects that iconic peanut flavor.
- Rice Cereal: The essential crunch to make these treats truly addictive.
- Extra Marshmallows (1 cup): Stirred in last for extra chewiness and to help hold everything together.
- Peanut Butter Cups (6): Adds pockets of melty chocolate and peanut butter goodness throughout.
- Mini Nutter Butter Cookies (8-12): Provides a sweet, nutty crunch and fun visual appeal.
- Reese’s Pieces: Sprinkled on top for color, crunch, and a burst of peanut buttery flavor.
Make It Your Way
This recipe is such a joy to make your own. I’ve found small tweaks can really elevate it depending on your tastes or what you have in the pantry. Feel free to get creative—you really can’t go wrong here.
- Variation: I love swapping mini peanut butter cups for dark chocolate chips sometimes; it brings a little bittersweet contrast to the treat.
- Dietary Mods: For a dairy-free version, I’ve used vegan butter and marshmallows, and honestly, no one noticed the difference.
- Seasonal Touch: Adding festive colored sprinkles or crushed candy canes makes these perfect for holidays and celebrations.
- Extra Crunch: Stir in chopped peanuts or pretzel bits for a salty-sweet combo that will surprise and delight.
Step-by-Step: How I Make Chocolate Peanut Butter Rice Krispie Treats Recipe
Step 1: Melt Butter and Marshmallows Gently
Start by melting your unsalted butter over medium-low heat in a large saucepan. This low heat ensures the butter doesn’t brown, keeping the flavor clean and smooth. Then, add the 10 ounces of mini marshmallows and stir frequently until they’re fully melted and silky. This part is key—take your time here for that perfect gooey base that holds everything together beautifully.
Step 2: Mix in Peanut Butter Off the Heat
Once your marshmallow mixture is smooth, remove the pan from heat and stir in the creamy peanut butter until it’s fully incorporated. Doing this off the heat prevents the peanut butter oils from separating and keeps the texture luscious. You’ll notice that enticing peanut aroma start to fill your kitchen now—pretty amazing.
Step 3: Fold in the Rice Cereal and Extra Marshmallows
Next, add the 5 cups of rice cereal to the peanut butter marshmallow mixture. Gently fold it in with a spatula, making sure every bit of cereal gets coated but without smashing it up. Then stir in the additional 1 cup of mini marshmallows – I like doing this at the end for extra chewiness and little gooey pockets throughout.
Step 4: Create Peanut Butter Cup Pockets
Pour half of the cereal mixture into a greased 9×9-inch baking dish, spreading it evenly. Now, here’s where it gets fun—arrange your peanut butter cups and mini Nutter Butter cookies on top of that base layer. This layering means you get surprise bites of peanut butter goodness and crunch when you dig into the treats.
Step 5: Finish and Chill
Pour the rest of the cereal mixture over the peanut butter cups and cookies, gently pressing down to compact everything. Scatter Reese’s Pieces on top, pushing them down slightly but carefully so they don’t sink in. Let your creation cool completely at room temperature—usually around an hour—before slicing into squares. Patience here pays off with perfectly set, firm treats.
Tips from My Kitchen
- Low Heat Melting: Always melt the butter and marshmallows over low heat to avoid burning and to ensure a smooth mixture.
- Use a Silicone Spatula: It helps scrape the sides cleanly and fold the mixture gently without crushing the cereal.
- Grease Your Dish Generously: This prevents sticking, making it so much easier to slice your treats neatly.
- Cool Completely Before Cutting: Cutting while warm can make the treats fall apart; waiting makes clean slices possible and prettier presentation.
How to Serve Chocolate Peanut Butter Rice Krispie Treats Recipe
Garnishes
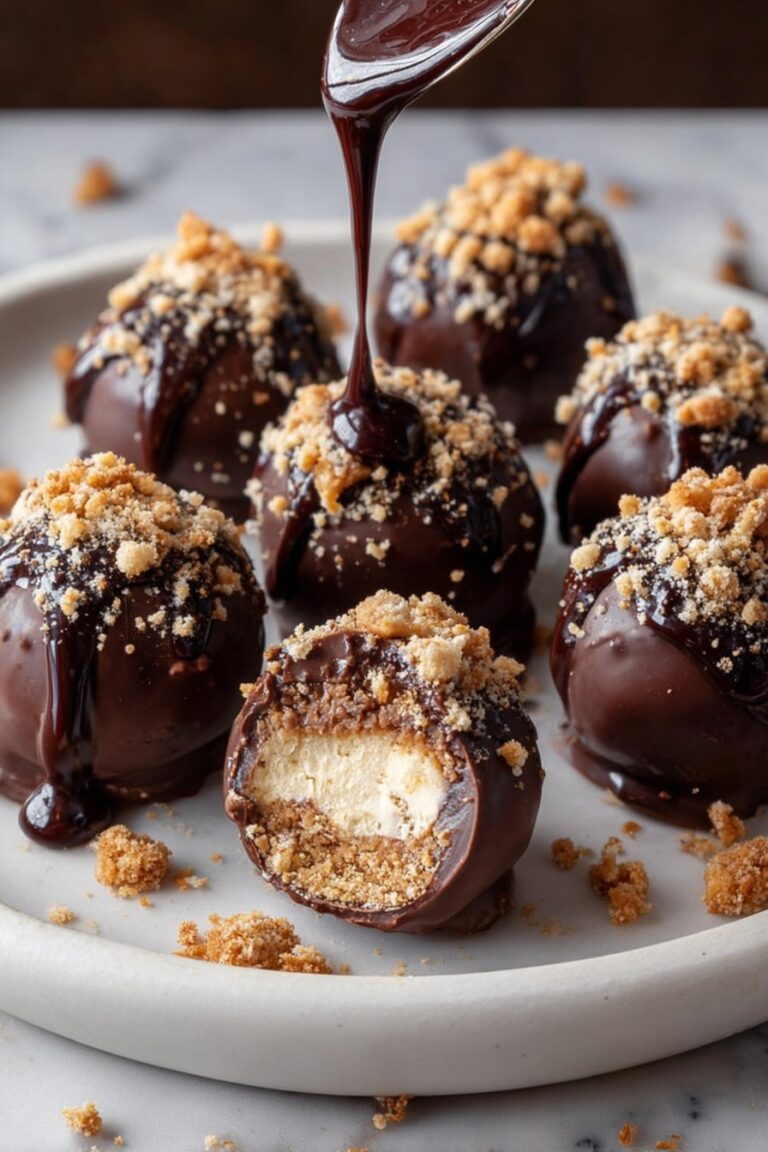
I keep it simple with Reese’s Pieces sprinkled on top—I love the little pops of colorful crunch they add. For a fancier touch, sometimes I drizzle melted chocolate or sprinkle crushed peanuts on top, which adds another depth of flavor and a rustic finish.
Side Dishes
These treats stand beautifully on their own, but I’ve served them alongside fresh fruit or a tall glass of cold milk for a balanced snack. If it’s party time, they pair wonderfully with vanilla ice cream or even a scoop of peanut butter gelato.
Creative Ways to Present
For birthdays or festive occasions, I’ve lined a platter with decorative cupcake liners and set individual treat squares inside each one—it’s so cute and keeps things tidy. I’ve also cut some into fun shapes using cookie cutters to spice up a dessert platter.
Make Ahead and Storage
Storing Leftovers
Your Chocolate Peanut Butter Rice Krispie Treats keep wonderfully in an airtight container at room temperature. I like to layer them between sheets of parchment paper to prevent sticking. They stay fresh and chewy for about 3-4 days, though they rarely last that long at my house!
Freezing
I’ve frozen these treats wrapped tightly in plastic wrap and placed inside a freezer bag with good results. They keep well for up to 2 months. To thaw, just leave them at room temperature for a couple of hours or overnight—they come back soft and delicious.
Reheating
If you want to enjoy them warm, I suggest microwaving a single square in 10-second bursts until soft but not melted—it’s perfect for that gooey, melty texture without any mess.
FAQs
-
Can I use natural peanut butter in this recipe?
Natural peanut butter can work, but since it’s thinner and separates, your treats might be slightly less firm and a bit oily. I personally prefer creamy processed peanut butter for the best texture and stability.
-
What’s the best way to melt marshmallows without burning?
The key is to melt over low or medium-low heat and stir constantly. Using a heavy-bottomed saucepan helps distribute the heat evenly and prevents scorching.
-
Can I make these gluten-free?
Yes! Use gluten-free rice cereal and check that your peanut butter cups and cookies are gluten-free or omit them. There are some great allergen-friendly versions of these ingredients available.
-
Why add extra marshmallows after mixing the cereal?
This step adds chewiness and helps hold the treats together with a bit more texture variety. It also boosts the marshmallow flavor without melting completely, giving little pockets of fluff.
Final Thoughts
This Chocolate Peanut Butter Rice Krispie Treats Recipe is one of those easy, crowd-pleasing desserts that always brings smiles. I love how it combines simple pantry ingredients into a fun, indulgent snack with layers of peanut buttery and chocolaty goodness. Whether you’re making it for a family celebration, school treat, or just a sweet craving fix, I promise these treats won’t disappoint. Go ahead—make a batch and share the joy with your favorite people. You’ll thank me later!
Print
Chocolate Peanut Butter Rice Krispie Treats Recipe
- Prep Time: 5 minutes
- Cook Time: 10 minutes
- Total Time: 1 hour 15 minutes
- Yield: 12 servings
- Category: Snack
- Method: Stovetop
- Cuisine: American
- Diet: Vegetarian
Description
Delicious Chocolate Peanut Butter Rice Krispie Treats combining crispy rice cereal with creamy peanut butter, melted marshmallows, peanut butter cups, Nutter Butter cookies, and topped with Reese’s Pieces for a delightful crunchy and sweet snack.
Ingredients
Main Ingredients
- 4 Tablespoons unsalted butter
- 10 ounces mini marshmallows
- 1/3 cup creamy peanut butter
- 5 cups rice cereal
- 1 cup marshmallows
Toppings and Garnishes
- 6 peanut butter cups
- 8-12 mini Nutter Butter cookies
- Reese’s Pieces for garnish
Instructions
- Melt Butter and Marshmallows: In a large saucepan, melt the 4 tablespoons unsalted butter over medium low heat. Add the 10 ounces of mini marshmallows and stir continuously until completely melted and smooth.
- Add Peanut Butter: Stir in the 1/3 cup creamy peanut butter until well combined. Then remove the mixture from heat.
- Mix in Cereal and Marshmallows: Add 5 cups of rice cereal to the marshmallow mixture, stirring until the cereal is fully coated. Next, fold in 1 cup of marshmallows and stir again to combine evenly.
- Layer in Baking Dish: Grease a 9×9 inch baking dish. Add half of the cereal mixture into the dish and spread evenly.
- Add Toppings: Arrange 6 peanut butter cups and 8-12 mini Nutter Butter cookies evenly on top of the first cereal layer.
- Top and Press: Add the remaining cereal mixture over the toppings gently pressing down. Scatter Reese’s Pieces on top, pressing lightly to secure.
- Cool and Serve: Allow the treats to cool completely, about 1 hour, before cutting into 12 squares and serving.
Notes
- Use a greased spatula or buttered hands to press the mixture to prevent sticking.
- For a crispier texture, use fresh rice cereal and avoid over-mixing.
- Reese’s Pieces can be substituted with chocolate chips or chopped peanuts for variation.
- Store treats in an airtight container at room temperature for up to 3 days.
- If peanut allergies are a concern, substitute peanut butter and peanut butter cups with sunflower seed butter and allergen-free chocolate cups.
Nutrition
- Serving Size: 1 square
- Calories: 280 kcal
- Sugar: 22 g
- Sodium: 150 mg
- Fat: 15 g
- Saturated Fat: 5 g
- Unsaturated Fat: 9 g
- Trans Fat: 0 g
- Carbohydrates: 30 g
- Fiber: 2 g
- Protein: 5 g
- Cholesterol: 15 mg


