Halloween Fudge Recipe
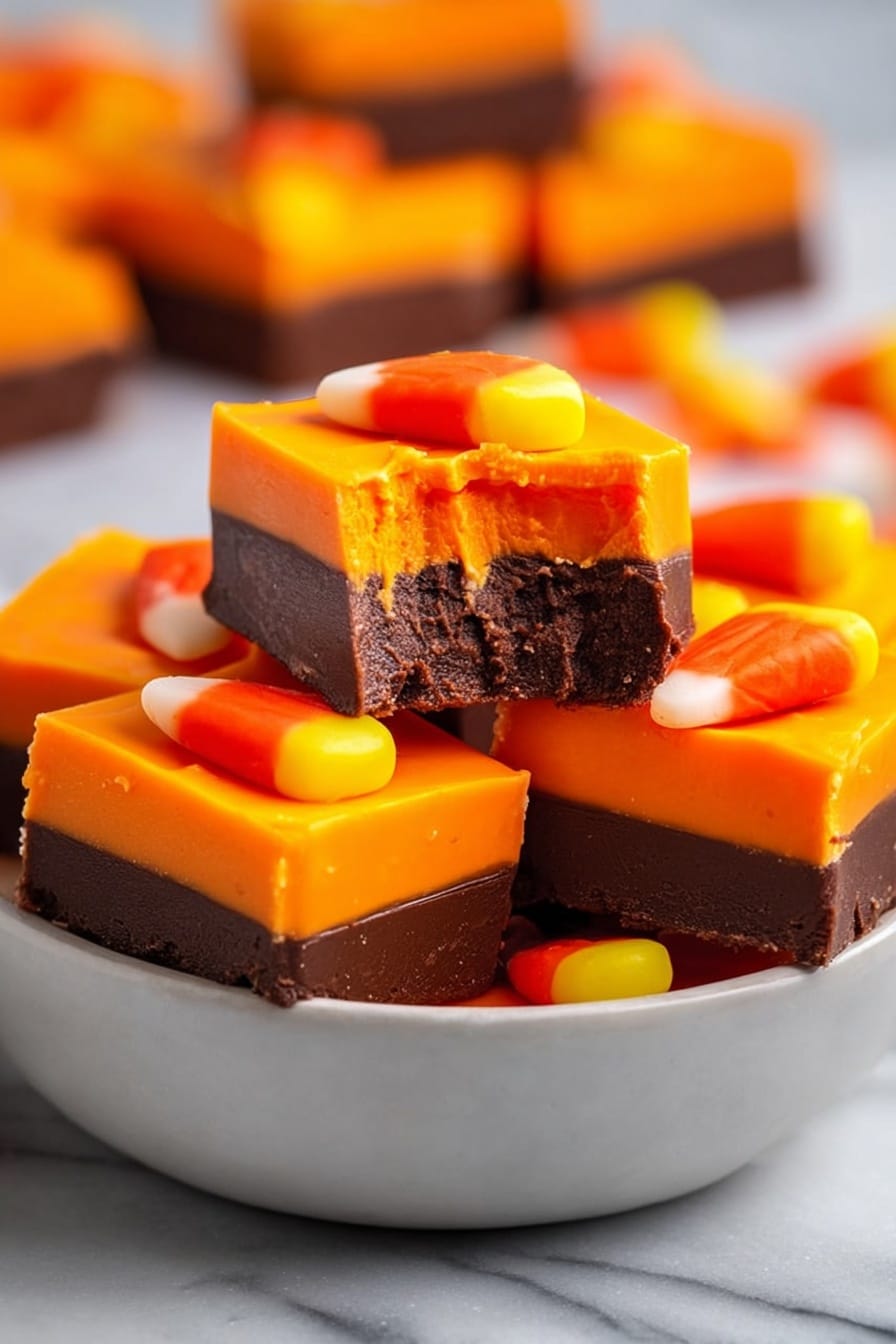
If you’re looking for a show-stopping treat this fall, I’ve got you covered with a super fun and easy Halloween Fudge Recipe that’s not only delicious but also packs all the festive vibes you want. This recipe balances creamy semi-sweet and white chocolate layers with a pop of bright orange and those iconic candy corn pieces. I love how quick it is to make and how it brightens up any Halloween party or cozy night in. Stick around—I’m sharing all my best tips to make sure your fudge turns out perfectly smooth, colorful, and irresistibly tasty.
Why This Recipe Works
- Perfect Chocolate Balance: Combining semi-sweet and white chocolate creates a visually striking and balanced flavor profile.
- Easy Microwave Melting: Melting the chocolate with sweetened condensed milk in the microwave saves time and avoids scorching common with stovetop methods.
- Vibrant Halloween Colors: Using gel food coloring gives a bright, rich orange layer that really pops and stays smooth, unlike liquid coloring which can break chocolate.
- Candy Corn Topping: Pressing candy corn on top adds that quintessential Halloween touch with an inviting crunch—everyone loves it.
Ingredients & Why They Work
This Halloween fudge recipe uses simple ingredients that work together beautifully to create creamy, rich fudge with festive colors and fun texture. Picking good-quality chocolate chips and the right kind of food coloring makes all the difference, so I’ll share my little ingredient hacks below.
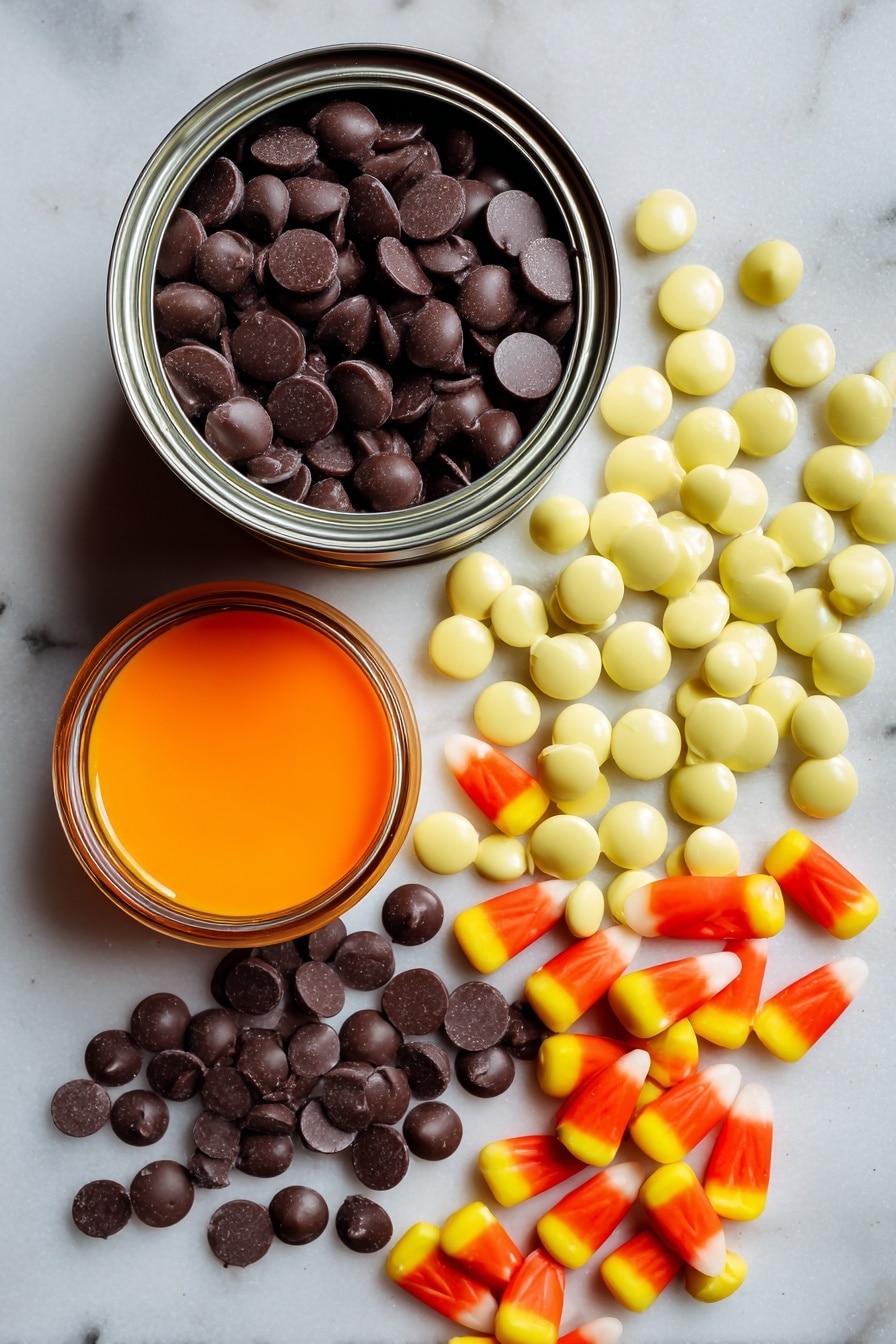
- Semi-sweet chocolate chips: These lend a deep, classic chocolate flavor and a nice contrast to the sweet white chocolate layer.
- White chocolate chips: Use good-quality chips for smooth melting; these add creaminess and are a perfect canvas for the orange hue.
- Sweetened condensed milk: This is key for the fudge’s creamy texture—it melts the chocolate perfectly and helps the fudge set nicely.
- Vanilla extract: Adds a subtle warmth and brings out the chocolate’s natural flavors.
- Orange gel food coloring: Gel is a must because it won’t break your white chocolate while adding vibrant color; liquid colors tend to separate chocolate.
- Candy corn: The classic Halloween candy adds crunch and seasonal fun—feel free to use more or fewer pieces based on your preferred fudge size.
Make It Your Way
One of the things I really love about this Halloween fudge recipe is how easy it is to adapt. Whether you want to swap out candy toppings or add other flavors, it’s a forgiving canvas to customize. Don’t be shy to make it your own and add in touches that make you smile!
- Variation: Sometimes, I stir in a handful of chopped nuts or mini marshmallows in the semi-sweet layer for extra texture—which my family goes crazy for.
- Dietary swaps: You can use dairy-free chocolate chips and sweetened condensed coconut milk to make it vegan-friendly.
- Seasonal twist: Swap candy corn for Halloween-themed sprinkles or colored sugar for a different look.
- Extra flavor: A pinch of cinnamon or pumpkin pie spice in the white chocolate layer adds cozy fall notes.
Step-by-Step: How I Make Halloween Fudge Recipe
Step 1: Prep Your Pan and Ingredients
First things first, line an 8-inch square pan with foil and give it a quick spray of cooking oil. This step saves you from sticky fudge headaches later when it’s time to slice. Measure out your chocolate chips and sweetened condensed milk beforehand for a smooth workflow—you don’t want to be scrambling once you start melting.
Step 2: Melt the Semi-Sweet Chocolate Mixture
Put the semi-sweet chocolate chips and 5 ounces of sweetened condensed milk in a microwave-safe bowl. Microwave on 50% power for 1 minute, then stir well. Heat in 30-second increments, stirring after each, until the mixture is silky smooth. Be patient—rushing this can cause your chocolate to seize. Once melted, stir in half a teaspoon of vanilla.
Step 3: Spread and Chill the First Layer
Pour this smooth chocolate mixture into your prepared pan and spread evenly using an offset spatula or the back of a spoon. Pop it in the fridge for about 10 minutes to firm up before you add the next layer. This little chill helps keep layers distinct and neat!
Step 4: Melt the White Chocolate Layer & Color It
Same method as before: combine white chocolate chips and 5 ounces of sweetened condensed milk in a bowl and microwave in 30- to 60-second bursts at 50% power, stirring each time until smooth. Add the remaining half teaspoon of vanilla along with a few drops of orange gel food coloring—this is where your Halloween magic starts to shine!
Step 5: Assemble and Add Candy Corn
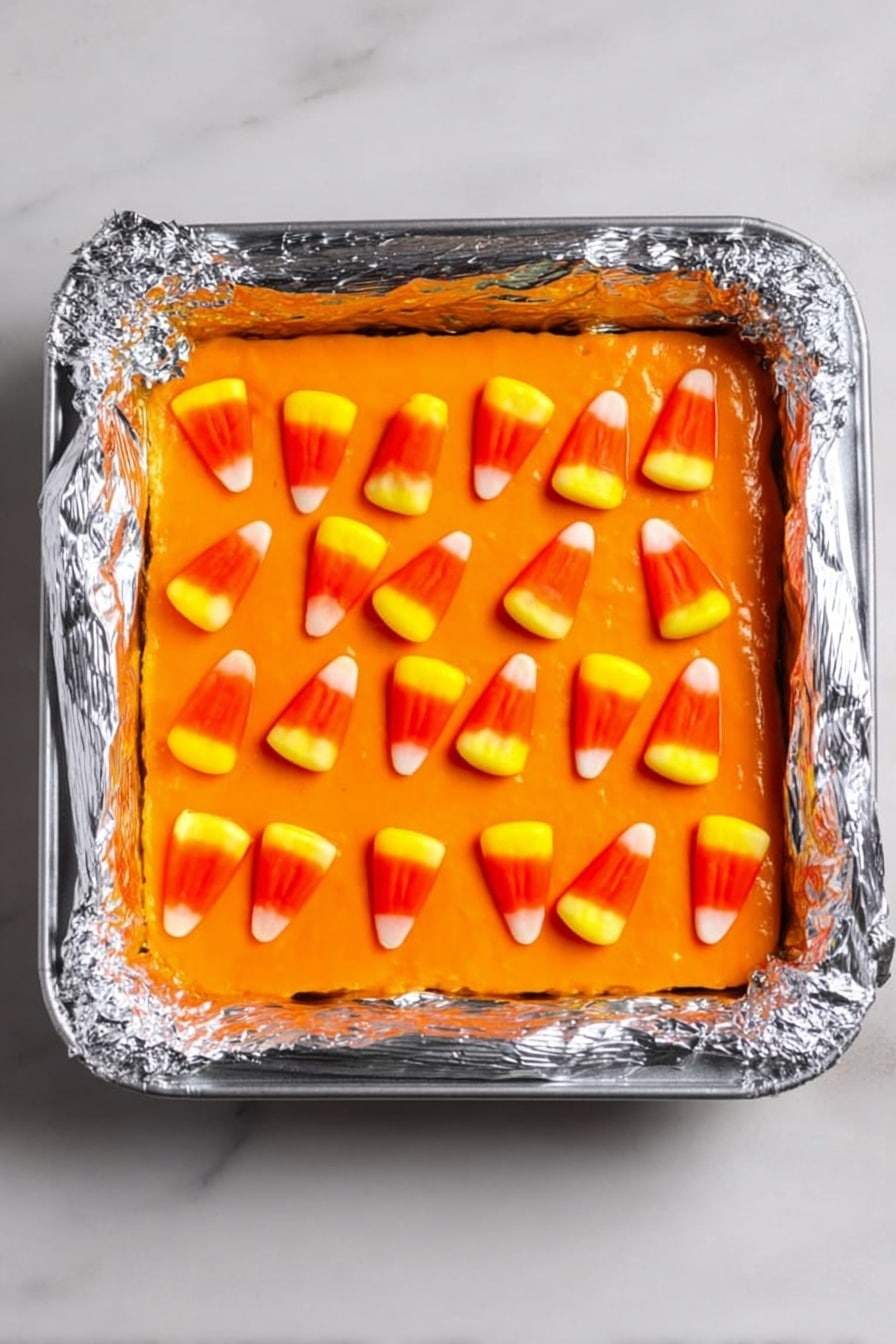
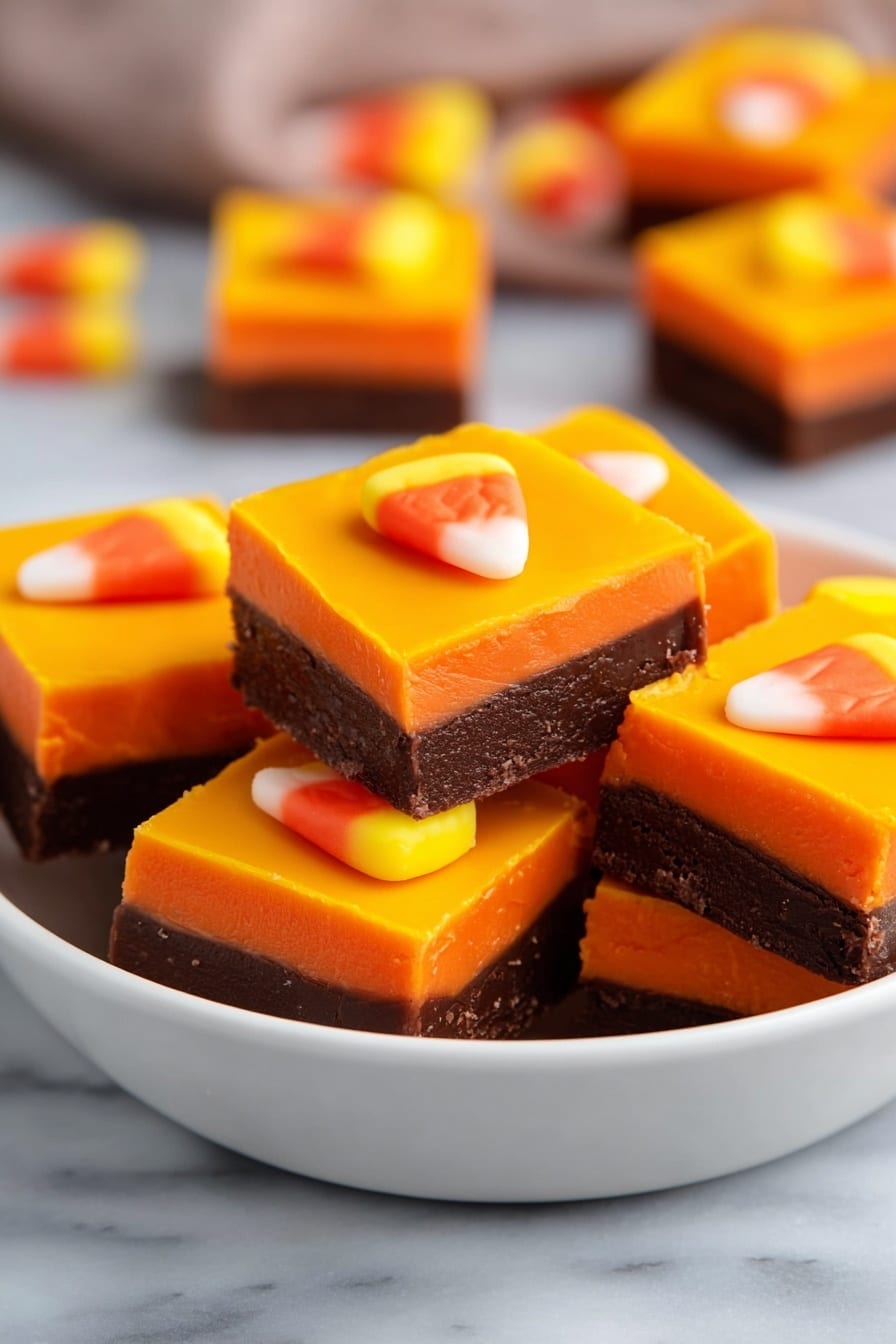
Spread the vibrant orange white chocolate mixture over the chilled semi-sweet layer. Press your candy corn pieces evenly across the top while it’s still soft. This gives each bite a fun surprise of sweetness and crunch, plus that unmistakable Halloween look.
Step 6: Chill Until Set and Slice
Refrigerate the pan for at least an hour to let your fudge harden properly. When ready, lift the foil out of the pan and slice into squares. I find letting the fudge warm up to room temperature before serving gives the best texture—soft but firm enough to hold its shape.
Tips from My Kitchen
- Microwave in Intervals: Heating chocolate too fast causes it to grain or burn; short bursts and stirring helps avoid that.
- Use Gel Food Coloring: It keeps your chocolate texture silky and colors vibrant without the risk of seizing chocolate.
- Chill Between Layers: Allowing the first layer to firm up prevents colors mixing and messy edges, so your fudge looks neat and professional.
- Cut with a Warm Knife: Running your knife under hot water and drying it before slicing makes clean cuts without cracking.
How to Serve Halloween Fudge Recipe
Garnishes
I love sprinkling a few extra candy corn or festive Halloween sprinkles around the serving plate for that final pop of color. Sometimes I add a light dusting of edible gold glitter or edible eyes for a fun spooky vibe that kids adore. Keep it simple but festive!
Side Dishes
Pair your Halloween fudge with warm spiced apple cider or a rich cup of hot chocolate for an indulgent fall snack. It also works great alongside pumpkin cookies or a light fruit platter to balance the sweetness.
Creative Ways to Present
For Halloween parties, I like to serve this fudge on tiered trays decorated with mini pumpkins, fake spider webs, and rustic fall leaves. You can also wrap individual squares in clear bags tied with orange or black ribbon for cute take-home favors.
Make Ahead and Storage
Storing Leftovers
Store your fudge in an airtight container in the fridge where it keeps beautifully for up to two weeks. I like to separate layers with parchment paper to keep pieces from sticking together. Just let the fudge come to room temp before serving for the best texture.
Freezing
If you want to make in advance, fudge freezes well. Wrap individual pieces or the whole block tightly in plastic wrap and then foil to prevent freezer burn. Thaw overnight in the fridge and then bring to room temp before enjoying.
Reheating
Since fudge is best enjoyed as-is, I usually don’t reheat it. But if your fudge gets too firm from the fridge, just leave it on the counter for 20-30 minutes to soften naturally instead of microwaving, which can change texture.
FAQs
-
Can I make this Halloween fudge recipe without a microwave?
Absolutely! You can melt the chocolate chips and sweetened condensed milk using a double boiler on the stove. Stir constantly over gently simmering water until smooth, then proceed with layering and chilling. This method takes a bit longer but gives you great control over the melting process.
-
What if I don’t have orange gel food coloring?
I highly recommend gel food coloring because it won’t break your white chocolate. If you only have liquid coloring, add just a drop or two very carefully and stir quickly, but be prepared for a slightly softer fudge surface. Alternatively, you can skip coloring and just decorate with orange-themed toppings.
-
Can I use other candy instead of candy corn for topping?
Yes! Sprinkles, chopped Halloween candies, or even crushed peanuts work great. Just choose candies that won’t melt or bleed color into the fudge for the best look and texture.
-
How do I keep fudge from sticking when slicing?
Run a sharp knife under hot water, dry it completely, then use it to slice the fudge cleanly. Wiping the blade between cuts also helps keep slices neat.
Final Thoughts
This Halloween fudge recipe has become such a happy tradition in my kitchen because it’s straightforward, festive, and brings smiles to everyone who tries it. I love sharing this kind of easy, colorful treat with friends and family when the season rolls around—it’s just the right mix of sweet nostalgia and approachable indulgence. I hope you enjoy making it as much as I do, and that it brightens your Halloween celebrations with delicious, homemade charm.
Print
Halloween Fudge Recipe
- Prep Time: 20 minutes
- Cook Time: 10 minutes
- Total Time: 1 hour 30 minutes
- Yield: 24 pieces
- Category: Dessert
- Method: No-Cook
- Cuisine: American
Description
This festive Halloween fudge recipe combines rich semi-sweet and creamy white chocolate layers with a pop of orange color and candy corn decoration, perfect for a seasonal treat that’s easy to prepare and delightful to share.
Ingredients
Chocolate Layer
- 1 ½ cups (255g) semi-sweet chocolate chips
- 5 ounces liquid (180g) sweetened condensed milk
- ½ teaspoon vanilla extract
White Chocolate Layer
- 1 ½ cups (255g) white chocolate chips
- 5 ounces liquid (180g) sweetened condensed milk
- ½ teaspoon vanilla extract
- Orange gel food coloring (a few drops)
Decoration
- 24 pieces candy corn
Instructions
- Prepare Pan: Line an 8-inch square pan with foil and spray with cooking spray to ensure easy removal of the fudge.
- Melt Semi-Sweet Chocolate: In a microwave-safe bowl, combine the semi-sweet chocolate chips with 5 ounces liquid sweetened condensed milk. Heat on 50% power for one minute, then stir. Continue heating in 30-second intervals, stirring each time until melted and smooth. Stir in ½ teaspoon vanilla extract.
- Set Semi-Sweet Layer: Using an offset spatula, spread the melted chocolate mixture evenly into the prepared pan. Place the pan in the refrigerator to chill for 10 minutes, allowing the layer to firm up before adding the next.
- Melt White Chocolate: In a separate microwave-safe bowl, combine the white chocolate chips with 5 ounces liquid sweetened condensed milk. Heat on 50% power for one minute, stir, then continue heating in 30-second increments until smooth. Stir in ½ teaspoon vanilla extract and several drops of orange gel food coloring until the color is well blended.
- Set White Chocolate Layer and Decorate: Spread the orange-tinted white chocolate mixture evenly over the semi-sweet layer using an offset spatula. Immediately press candy corn pieces in even rows on top of the white chocolate layer.
- Chill and Serve: Refrigerate the fudge until fully hardened, about 1 hour. Slice into 24 pieces and serve at room temperature for best texture and flavor.
Notes
- Sweetened condensed milk cans in the US are 14 ounces by weight (360g), which equals approximately 10 fluid ounces; measure 5 fluid ounces or weigh out 180g when splitting for the recipe.
- Use gel food coloring for bright, rich color that does not break the chocolate, unlike water-based food colorings.
- Press candy corn firmly but gently into the fudge to avoid breaking the surface.
- If you prefer smaller pieces, increase the candy corn quantity accordingly.
- Allow fudge to come to room temperature before serving for a softer texture and enhanced flavor.
Nutrition
- Serving Size: 1 piece
- Calories: 180 kcal
- Sugar: 22 g
- Sodium: 35 mg
- Fat: 9 g
- Saturated Fat: 5 g
- Unsaturated Fat: 3 g
- Trans Fat: 0 g
- Carbohydrates: 24 g
- Fiber: 1 g
- Protein: 2 g
- Cholesterol: 5 mg

