Nutter Butter Ghosts Recipe
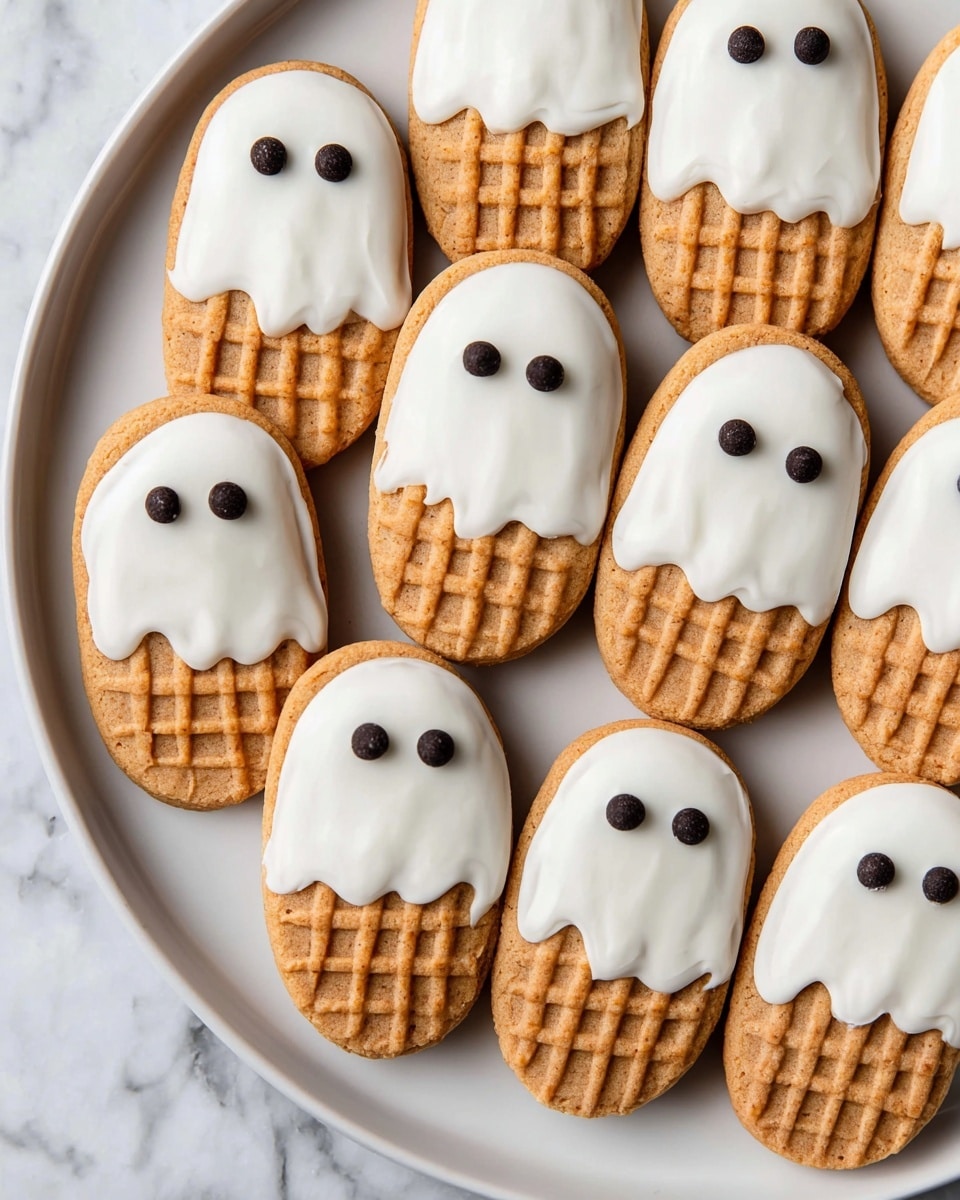
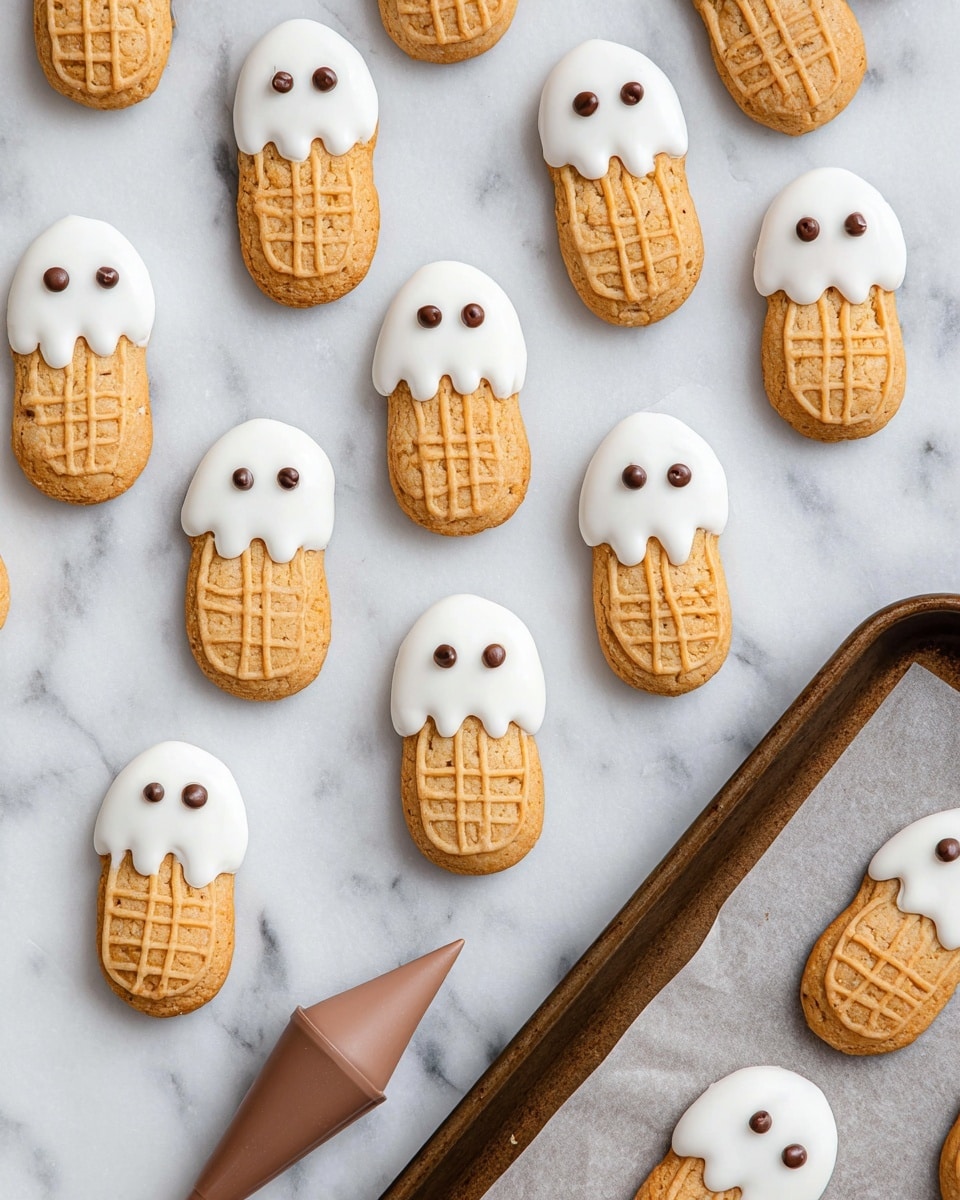
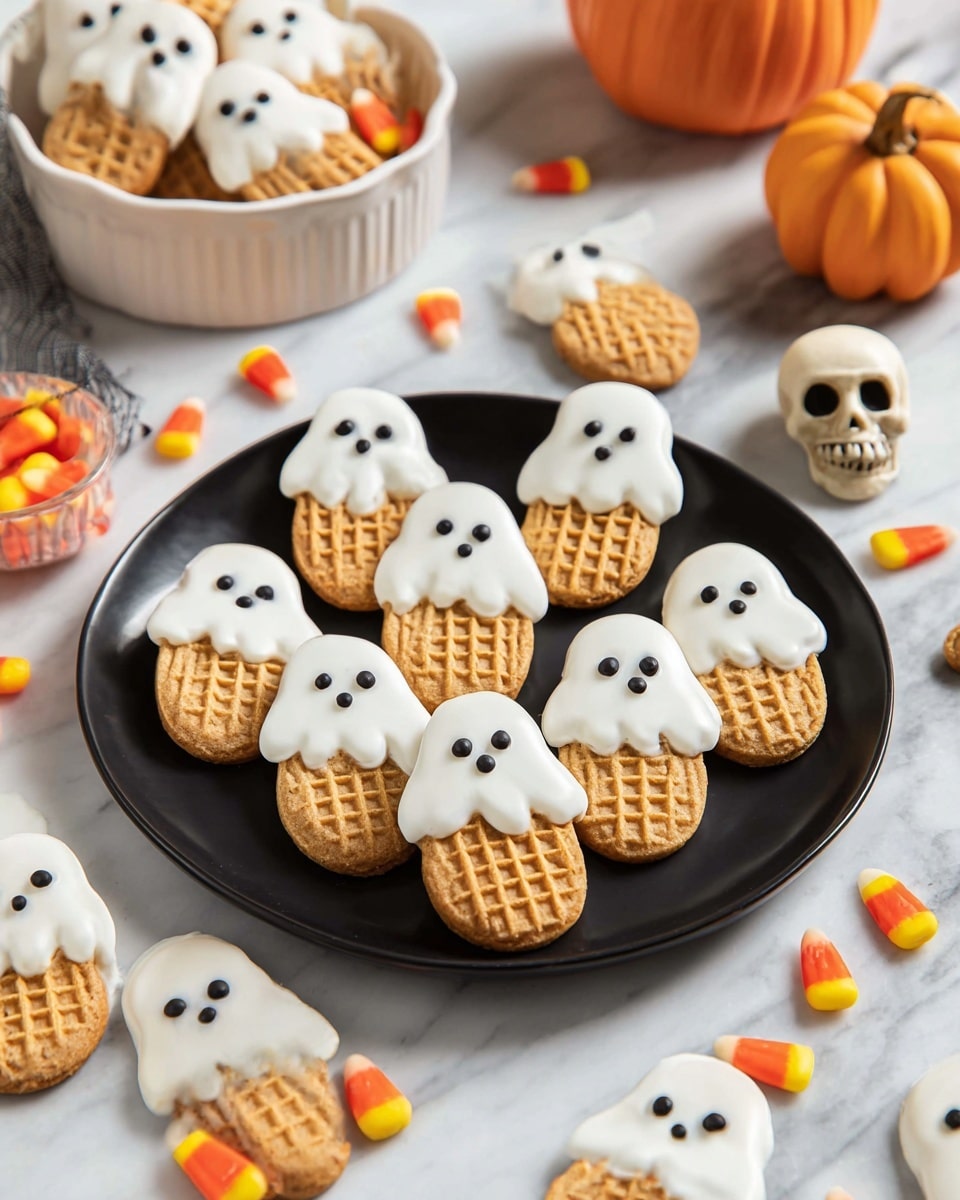
If you’re looking for a quick, adorable, and absolutely crowd-pleasing treat this spooky season, you’ve got to try my Nutter Butter Ghosts Recipe. These little ghostly delights are as simple as dipping Nutter Butter cookies in creamy white chocolate and adding spooky faces with just a touch of melted chocolate. Trust me, once you try making these, they’ll become your go-to Halloween snack that’s as fun to make as it is to eat!
Why This Recipe Works
- Simple Ingredients: Only a few items you probably already have make this recipe easy and accessible.
- Quick Prep: The total time is under 30 minutes, perfect for last-minute party planning or a fun afternoon activity with kids.
- Customizable Faces: You get to play with expressions, making every ghost its own little personality.
- Perfect Texture: The smooth white coating hardens with a nice snap while the cookies stay tasty and soft inside.
Ingredients & Why They Work
The magic of this Nutter Butter Ghosts Recipe lies in using familiar ingredients that transform into something festive and fun with very little fuss. Plus, knowing what to pick and how it impacts the final treat can really up your game.
- Nutter Butter Cookies: They have that classic peanut buttery taste with a perfect shape that looks just right when dipped.
- Melting White Chocolate (Candy Coating or Almond Bark): These melt smoothly and set quickly, giving the ghosts a shiny, firm coat that looks like little white sheets.
- Melting Chocolate (for eyes and mouth): The contrast of dark chocolate helps you create expressive faces that pop against the white coating.
Make It Your Way
One of my favorite things about this Nutter Butter Ghosts Recipe is how easy it is to tweak. I love to mix up the ghost faces, sometimes making some look scared, others surprised, and even goofy — it adds a pop of fun to Halloween gatherings. You can even swap out the chocolate for colored candy melts if you want to get creative with colors.
- Variation: I once tried adding edible glitter to the white chocolate coating before it hardened — it made the ghosts sparkle under the party lights and was a big hit with the kids.
Step-by-Step: How I Make Nutter Butter Ghosts Recipe
Step 1: Prep Your Space and Cookies
Start by lining a cookie sheet with wax paper or parchment paper—that’s your drying station. Then, arrange your Nutter Butter cookies in a single layer; this helps them stay nice and neat when you’re coating them and adding those ghostly faces later. I find it helpful to have everything prepped and ready before melting the chocolate so the process goes smoothly.
Step 2: Melt That White Chocolate
Pop your white chocolate coating or almond bark into a microwave-safe bowl and melt it in 30-second bursts, stirring well after each. This slow and steady approach keeps the chocolate smooth without burning it. Once it’s silky and lump-free, you’re ready for the dipping stage!
Step 3: Create Your Ghosts
Dip each Nutter Butter cookie halfway into the melted white chocolate, or if you prefer, spoon the coating gently over the tops to make that classic ghostly shape. Don’t forget to give each cookie a light tap to shake off any excess chocolate — this helps the coating dry faster and prevents it from pooling too thickly. Pop them onto your lined cookie sheet while you get ready for the fun part: adding faces.
Step 4: Add Those Spooky Faces
While the coating is still wet, grab a piping bag or a small zip-top bag with a tiny corner snipped and pipe out the eyes and mouth using your melted dark chocolate. Don’t worry about perfection — a little asymmetry adds character! Let these set completely on the cookie sheet until firm, which usually takes about 5 minutes.
Tips from My Kitchen
- Chocolate Melting Mastery: I always make sure to stir between each microwave interval to prevent burning and keep my white chocolate smooth.
- Cookie Handling: Handle the dipped cookies gently but promptly—if you wait too long, the coating can harden before you get the faces on.
- Personal Expressions: Getting playful with the ghost faces makes this more than just a recipe; it’s a Halloween activity that brings laughter.
- Storage Success: Stacking these with wax paper between layers in an airtight container helps them stay perfect for several days without sticking together.
How to Serve Nutter Butter Ghosts Recipe
Garnishes
I usually keep garnishes simple so the ghosts stay the star of the show, but sometimes I sprinkle edible glitter or colored sugar on the fresh white chocolate coating right after dipping for a sparkly effect. Sometimes, I even place a tiny edible candy pumpkin or spider nearby to add to the Halloween vibe.
Side Dishes
This treat pairs wonderfully with a warm cup of hot chocolate or spiced apple cider. For a party, I like to balance the sweet with some salty snacks like pretzels or popcorn sprinkled with a touch of cinnamon sugar.
Creative Ways to Present
For Halloween parties, I’ve arranged these Nutter Butter Ghosts on black serving trays lined with fake spiderweb fabric — it really makes the bright white chocolate pop visually. Another idea is to stick them on skewers standing upright in a decorative pumpkin or foam block for a cute “ghost bouquet” centerpiece.
Make Ahead and Storage
Storing Leftovers
Once your Nutter Butter Ghosts are fully set, store them in an airtight container between layers of wax or parchment paper. I usually keep mine in a cool, dry place away from direct sunlight to prevent any melting or blooming on the chocolate surface. They stay fresh and delicious for up to 5 days, so you can make a batch in advance for ease.
Freezing
I’ve frozen these treats a couple of times wrapped tightly in plastic wrap and then stored in a sealed freezer bag. When thawed in the fridge, they retain their shape and taste well, perfect if you want to prepare them weeks ahead of your party.
Reheating
Since these are no-bake treats, reheating isn’t necessary. If you want to remove chill for serving, just let them sit at room temperature for about 10 minutes before enjoying. This softens the cookies slightly while keeping the white chocolate coating firm.
FAQs
-
Can I use regular white chocolate instead of candy melts?
Absolutely! Regular white chocolate works well, but be sure to melt it gently to avoid seizing. Candy melts or almond bark tend to be easier to work with for dipping since they harden faster and have a smoother finish.
-
How do I prevent the chocolate from cracking after it hardens?
Temperatures during melting and cooling are key. Avoid overheating the chocolate and cool your dipped cookies at room temperature rather than the fridge to reduce cracking. Also, tapping off excess coating helps keep the layer thin and less prone to breaks.
-
What’s the best way to pipe the faces if I don’t have a piping bag?
No fancy tools needed! Just use a small Ziploc bag and snip a tiny corner. It works just as well and gives you good control for drawing eyes and mouths.
-
Can I make these gluten-free?
Since Nutter Butter cookies contain gluten, you’d need to find a similar gluten-free peanut butter cookie to substitute. The rest of the recipe is naturally gluten-free depending on your chosen chocolate, but always check labels to be sure.
-
How long do these ghosts stay fresh?
Stored properly in an airtight container between layers of wax paper, these ghosts stay fresh for up to 5 days at room temperature.
Final Thoughts
I genuinely love how the Nutter Butter Ghosts Recipe brings a little magic to my kitchen with so little effort, and I think you will too. They’re perfect for kids, adults, last-minute party snacks, or just to satisfy that sweet tooth craving with a festive twist. So grab that package of Nutter Butters and let’s get ghosting — I can’t wait to hear about all the fun faces you create!
Print
Nutter Butter Ghosts Recipe
- Prep Time: 15 minutes
- Cook Time: 5 minutes
- Total Time: 20 minutes
- Yield: 32 cookies
- Category: Dessert
- Method: No-Cook
- Cuisine: American
Description
Create spooky and delightful Nutter Butter Ghost cookies by dipping Nutter Butter cookies in smooth white chocolate coating and decorating with melted chocolate eyes and mouths for a fun Halloween treat.
Ingredients
Cookies
- 32 Nutter Butter cookies
Chocolate Coating
- 12 ounces melting white chocolates
- 1 ounce melting chocolate
Instructions
- Prepare Surface: Line a cookie sheet with wax paper or parchment paper and arrange the Nutter Butter cookies on it to ensure they are ready for dipping.
- Melt White Chocolate: In a microwave-safe bowl, melt the white candy coating or white chocolate in 30-second intervals, stirring between each interval until the chocolate is completely smooth and ready for dipping.
- Dip Cookies: Dip each Nutter Butter cookie halfway into the melted white chocolate or spoon the coating over the tops to form ghostly shapes. Gently shake off any excess chocolate before placing the cookies on the prepared sheet.
- Add Facial Features: Before the chocolate coating sets, use a piping bag filled with melted dark chocolate to pipe small dots for the eyes and a mouth on each ghost cookie, giving them character and personality.
- Let Set: Allow the coated cookies to fully set and harden on the wax paper-lined cookie sheet or cooling rack until firm and ready to serve or store.
Notes
- Use white almond bark or white candy coating for smooth melting and quick hardening consistency.
- Tap each dipped cookie gently to remove any excess chocolate coating before drying to prevent thick clumps.
- Make a variety of ghost expressions—scared, surprised, silly—for fun and festive cookie personalities.
- Store finished cookies in an airtight container separated by wax paper layers up to 5 days to maintain freshness.
Nutrition
- Serving Size: 1 cookie
- Calories: 90 kcal
- Sugar: 9 g
- Sodium: 65 mg
- Fat: 5 g
- Saturated Fat: 3 g
- Unsaturated Fat: 1 g
- Trans Fat: 0 g
- Carbohydrates: 10 g
- Fiber: 0.5 g
- Protein: 1 g
- Cholesterol: 5 mg

