Halloween Marshmallow Pops Recipe
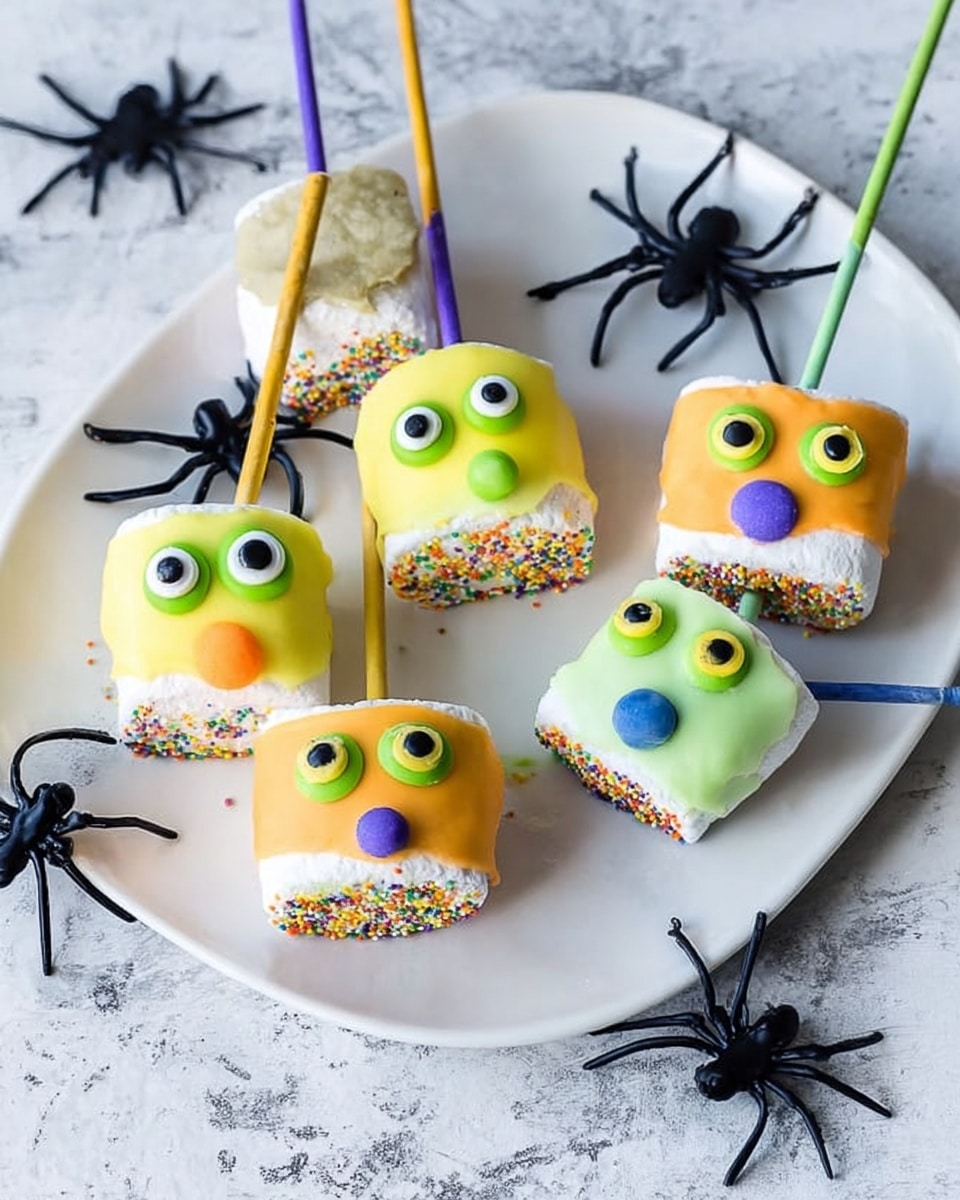
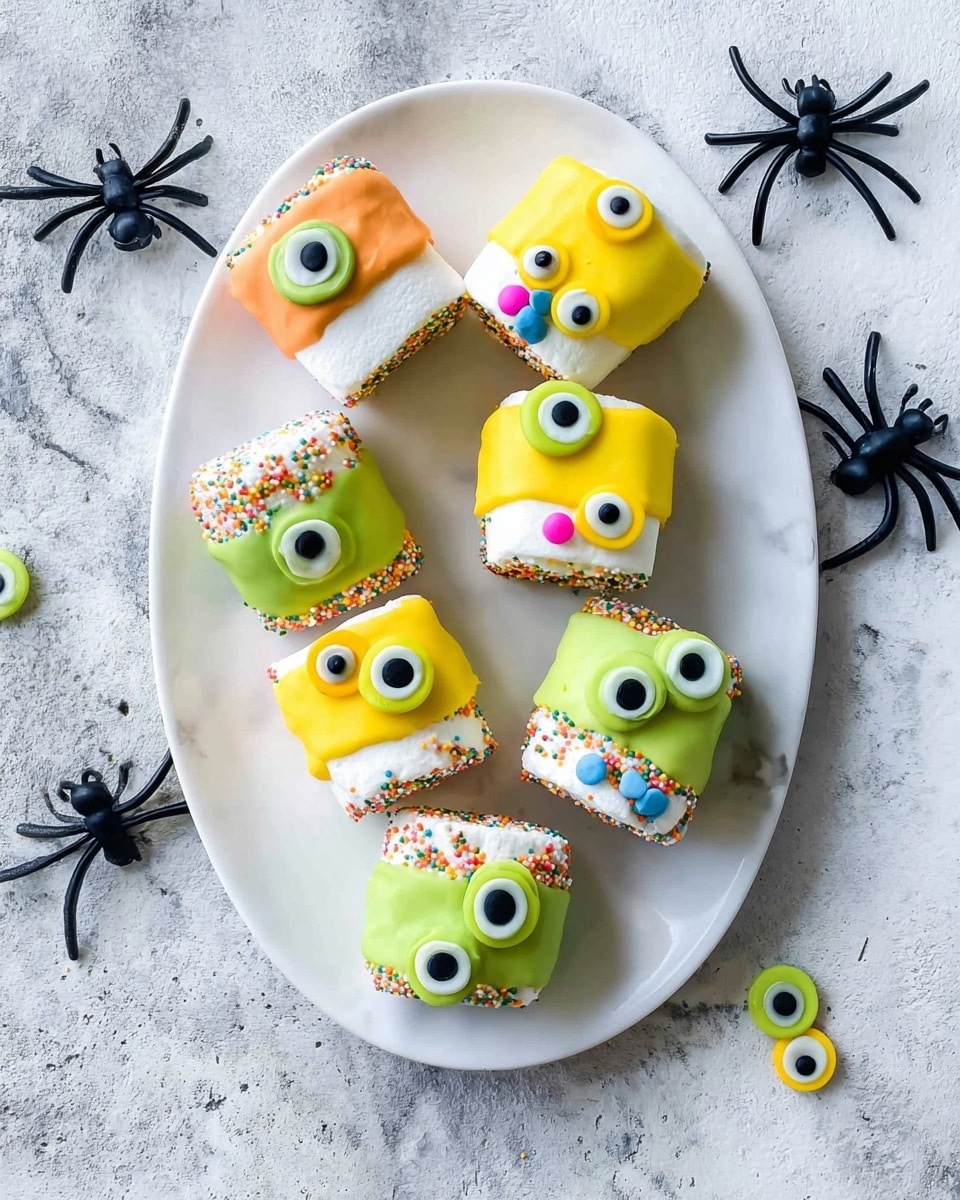
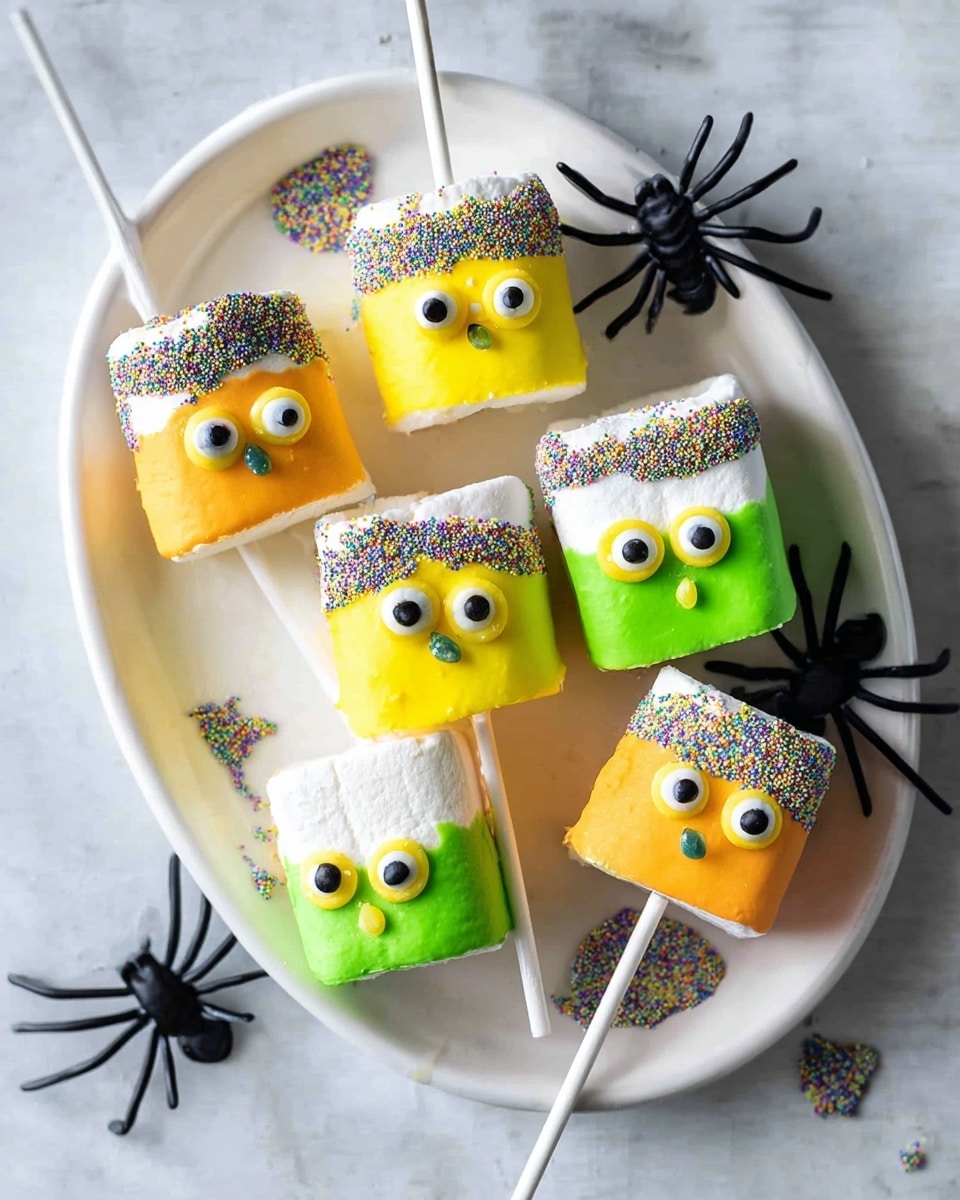
If you’re hunting for a fun, festive, and ridiculously easy treat to whip up this season, you’re going to adore this Halloween Marshmallow Pops Recipe. These pops aren’t just cute — they’re vibrant, playful, and guaranteed to bring out the kid in anyone. Seriously, the way these colorful, candy-coated treats come to life with sprinkles and candy eyes makes Halloween snacking feel like a mini celebration on a stick. Keep reading, and I’ll walk you through all the tips and tricks to nail this recipe like a pro!
Why This Recipe Works
- Perfect Ease: No baking required, so even total beginners can join the fun.
- Delightfully Customizable: Swap in any candy melts or decorations you like to match your style.
- Kid-Friendly Fun: A crafty treat that’s as entertaining to make as it is to eat!
- Quick Prep Time: Ready from start to finish in just 15 minutes – perfect for last-minute parties or spooky snacks.
Ingredients & Why They Work
Let’s quickly dive into the ingredients for this Halloween Marshmallow Pops Recipe – they’re straightforward but come together to create a magical effect. Choosing quality candy melts and fresh, fluffy marshmallows really makes all the difference in that luscious coating and fun festivity.
- Jumbo Marshmallows: The fluffy base — jumbo size gives you plenty of surface for dipping and decorating.
- Cake Pop Sticks: Essential for holding your creation and turning it into a pop everyone can safely enjoy.
- Sprinkles: These add the perfect “hair” texture – choose colors and shapes that pop for Halloween vibes.
- Candy Eyes: They bring personality and charm, making each pop a little character of its own.
- Sweets for Mouth: Tiny candies or mini chocolate chips give you endless creative freedom here.
- Orange, Green, and Yellow Candy Melts: These melt smoothly for that glossy, colorful coating and hold decorations perfectly once set.
Make It Your Way
I love mixing up this Halloween Marshmallow Pops Recipe depending on the occasion. Sometimes I switch up the candy melt colors, or even swap candy eyes for edible markers when I’m out of supplies. The best part? You can personalize these pops endlessly to fit your Halloween mood or what’s in your pantry!
- Variation: Sprinkling crushed chocolate cookies on the candy coating adds a spooky “spider web” texture — I tried this for a Halloween party and it was a hit!
- Dietary Options: Using gluten-free marshmallows means these treats work for guests with gluten sensitivities, and vegan candy melts make them even more inclusive.
- Seasonal Adjustments: Switch candy melts to pastel colors for a fun twist at Easter or birthdays — the basic technique stays the same.
Step-by-Step: How I Make Halloween Marshmallow Pops Recipe
Step 1: Prep Your Marshmallows and Sticks
First things first, gently push a cake pop stick into each jumbo marshmallow, about halfway, so it’s secure but the marshmallow won’t split. I’ve found it’s best to rotate the stick slowly as you push it in to avoid tearing. Once all your marshmallows are ready, line them up on a tray or baking sheet, standing up, to get ready for dipping.
Step 2: Get Your Decorating Station Ready
Set out all your sprinkles, candy eyes, and sweets in small bowls or plates where you can reach them easily. It helps to have everything organized because once your candy melts are warm, it’s a race against the clock to decorate before the coating hardens!
Step 3: Melt the Candy Melts Perfectly
Melt your candy melts in separate microwave-safe bowls according to the package instructions – usually short bursts of 20 seconds stirring in between works great. The key is to get smooth, silky candy without overheating or burning it. If the melts seem too thick, add a tiny bit of vegetable oil and stir to loosen up the texture.
Step 4: Dip and Decorate Your Pops
Here comes the fun part: Dip each marshmallow fully into one of the melted candy colors, letting the excess drip off. Immediately after, dip just the top of the marshmallow into the sprinkles to create “hair.” While the candy coating is still wet, press on the candy eyes and sweets for the mouth. I usually press gently and hold for a couple of seconds so they stick just right. Place the pops upright on parchment paper and let them set – this usually takes around 10 minutes.
Step 5: Repeat and Enjoy!
Keep going with the rest of your marshmallows, swapping colors and decorating as creatively as you like. Once fully hardened, they’re ready to wow your Halloween guests or make a cute addition to any party spread.
Tips from My Kitchen
- Stick Stability: For extra hold, dip the tip of the stick in melted candy before inserting it into the marshmallow.
- Avoid Clumps: Use a fork or dipping tool to lift marshmallows so excess candy melts drip off evenly.
- Fast Decorating: Work quickly once dipped, because candy melts harden fast — prepping your station beforehand saves stress.
- No Sticky Fingers: Dust your hands lightly with cornstarch if handling decorated pops too soon to avoid sticky messes.
How to Serve Halloween Marshmallow Pops Recipe
Garnishes
I genuinely love using colorful sprinkles and candy eyes as garnishes because they add character and make each pop feel like a little art project. For a spookier touch, you can sprinkle edible glitter or use black and white candy melts to draw creepy little details with a toothpick after dipping.
Side Dishes
These pops pair wonderfully with other simple Halloween treats like pumpkin muffins or graveyard pudding cups. For a party, placing them alongside savory finger foods like mini sandwiches or popcorn adds a fun sweet-and-savory balance that guests appreciate.
Creative Ways to Present
I like to display my Halloween Marshmallow Pops Recipe by sticking them upright into a decorated foam block inside a festive basket or bucket — it makes them look like a ghostly bouquet! Adding shredded colored paper or fake cobwebs enhances the Halloween vibe and keeps everything upright and easy to grab.
Make Ahead and Storage
Storing Leftovers
Once your marshmallow pops have fully hardened, you can keep leftovers in an airtight container at room temperature for up to 3 days. I recommend layering them with parchment paper in between to avoid sticking or smudging. They maintain their shape and crisp coating surprisingly well at room temp.
Freezing
I’ve frozen these pops wrapped individually in plastic wrap and stored in freezer bags with good results. When you’re ready to enjoy, just thaw them at room temperature for about 10-15 minutes before serving. Note that sprinkles may soften slightly after freezing, but the candy coating stays pretty solid.
Reheating
Though these treats aren’t really meant to be reheated, if you find the candy coating has dulled or softened after storage, a quick 5-second zap in the microwave (watch it closely!) can refresh their glossy look. Just be careful not to melt them completely.
FAQs
-
Can I use regular chocolate instead of candy melts for the Halloween Marshmallow Pops Recipe?
Regular chocolate isn’t ideal because it’s thicker and less stable at room temperature, so it might not coat or harden well on the marshmallows. Candy melts are specifically designed to melt smoothly and set hard, which gives you that perfect pop look and feel.
-
What’s the best way to attach candy eyes and other decorations?
Press them gently into the candy melts while the coating is still wet. If it’s drying too fast, you can lightly dab a tiny bit of melted candy on the back of the decorations like glue before placing them.
-
How do I keep my marshmallow pops from getting sticky after decorating?
Let them set fully at room temperature without covering them. Storing in an airtight container too soon can trap moisture and cause stickiness, so give the candy melts plenty of time to harden completely before packing away.
-
Is this Halloween Marshmallow Pops Recipe safe for kids to make?
Absolutely! It’s a fun, hands-on activity for kids with supervision during the melting step. Setting up the dipping and decorating station is a favorite craft-time in my house — just be mindful with the hot candy melts and help little hands as needed.
Final Thoughts
This Halloween Marshmallow Pops Recipe is one of those simple joys I keep coming back to every October. They’re bright, fun, and full of whimsy — a perfect way to get hands-on with Halloween treats without a ton of fuss or mess. Whenever I make these, they bring out smiles across all ages, and honestly, it feels like a little bit of festive magic. I can’t wait for you to try these and add your own flair — just get creative and have fun with it. Happy Halloween crafting!
Print
Halloween Marshmallow Pops Recipe
- Prep Time: 5 minutes
- Cook Time: 10 minutes
- Total Time: 15 minutes
- Yield: 12 servings
- Category: Snack
- Method: No-Cook
- Cuisine: American
- Diet: Gluten Free
Description
These Halloween Marshmallow Pops are fun, colorful treats perfect for kids and festive celebrations. Jumbo marshmallows are dipped in vibrant candy melts, decorated with candy eyes, sprinkles, and sweets to create spooky and playful faces. Easy to prepare and perfect for Halloween parties or themed snacks.
Ingredients
Marshmallow Pops
- 12 jumbo marshmallows (gluten-free)
- 12 cake pop sticks
- Sprinkles for hair
- Candy eyes
- Sweets for mouth
- 170 g (1 cup) orange candy melts
- 170 g (1 cup) green candy melts
- 170 g (1 cup) yellow candy melts
Instructions
- Prepare the sticks Place the cake pop sticks into each marshmallow securely and set them aside on a clean surface.
- Arrange decorations Lay out all sprinkles, candy eyes, and sweets within easy reach for decorating.
- Melt candy melts In separate bowls, melt the orange, green, and yellow candy melts according to the instructions on the packet until smooth and ready for dipping.
- Dip marshmallows Dip each marshmallow into a bowl of melted candy melt, covering it completely. Then quickly dip the top of the marshmallow into sprinkles to create hair.
- Decorate faces While the coating is still wet, place candy eyes and sweets onto the marshmallow to form mouths and faces.
- Set to harden Place the decorated marshmallows upright on a baking sheet or tray and allow them to harden completely at room temperature.
- Repeat process Continue dipping and decorating until all marshmallows are coated and set.
Notes
- Use gluten-free marshmallows to keep the recipe gluten-free.
- If candy melts are too thick, stir in a small amount of vegetable oil to thin before dipping.
- For a faster hardening process, place pops in the refrigerator for 10 minutes.
- Substitute different colored candy melts or decorations to customize themes.
- Store finished pops in an airtight container at room temperature for up to 2 days.
- Perfect for Halloween parties, kids’ snacks, or festive treats.
Nutrition
- Serving Size: 1 pop
- Calories: 150 kcal
- Sugar: 25 g
- Sodium: 15 mg
- Fat: 4 g
- Saturated Fat: 3 g
- Unsaturated Fat: 1 g
- Trans Fat: 0 g
- Carbohydrates: 30 g
- Fiber: 0 g
- Protein: 1 g
- Cholesterol: 0 mg

