Halloween Cake Pops Recipe
If you’re looking to wow your friends and family this fall with a sweet and spooky treat, you’re in the right place. This Halloween Cake Pops Recipe is fan-freaking-tastic — from rich red velvet cake balls to fun ghost and mummy decorations, it’s the perfect combo of easy and impressive. Whether you’re a seasoned baker or just getting your hands sticky for the first time, I’ll walk you through everything so you can nail these spooky little bites with confidence.
Why This Recipe Works
- Balanced Flavor Profile: The red velvet cake base is rich and moist, perfectly complemented by cream cheese frosting.
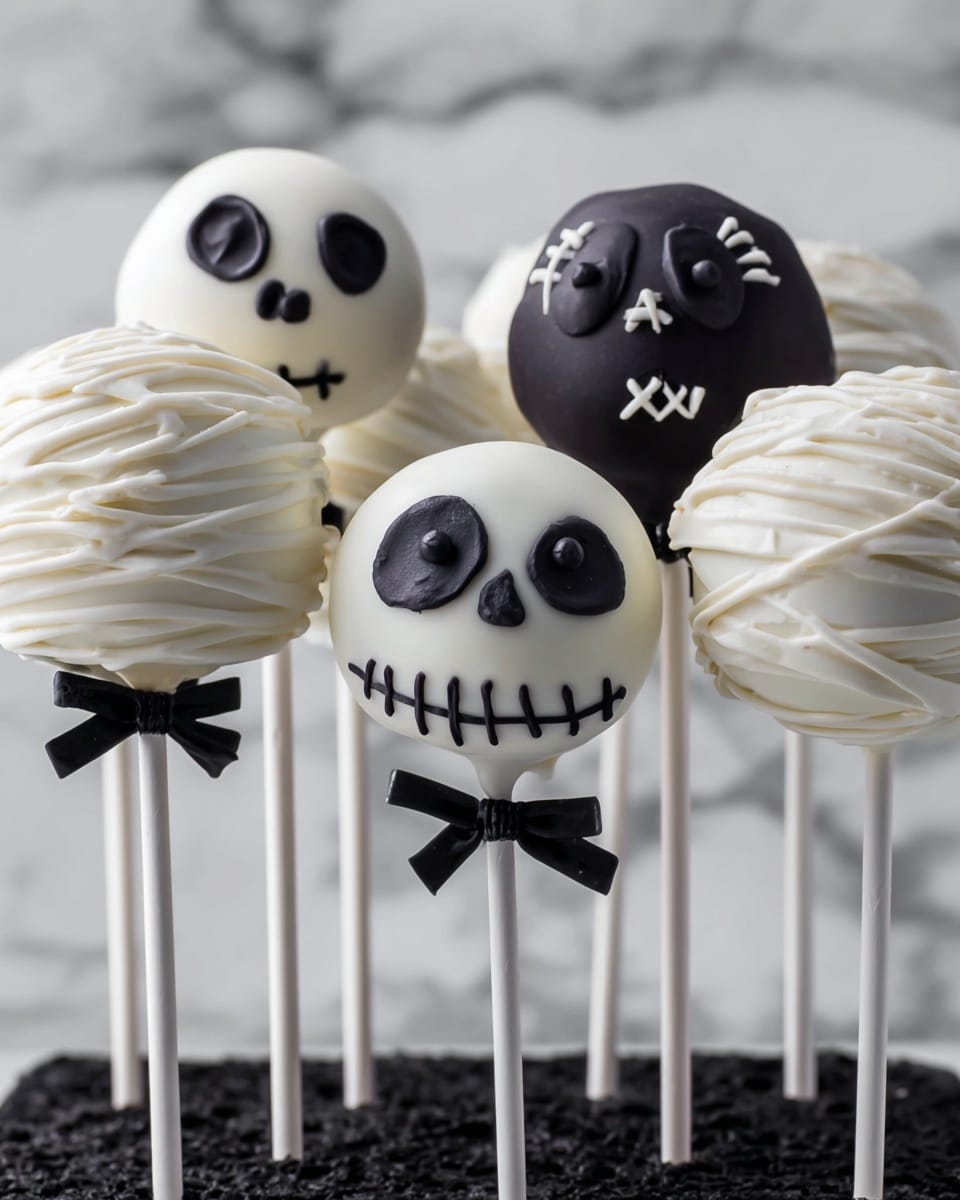
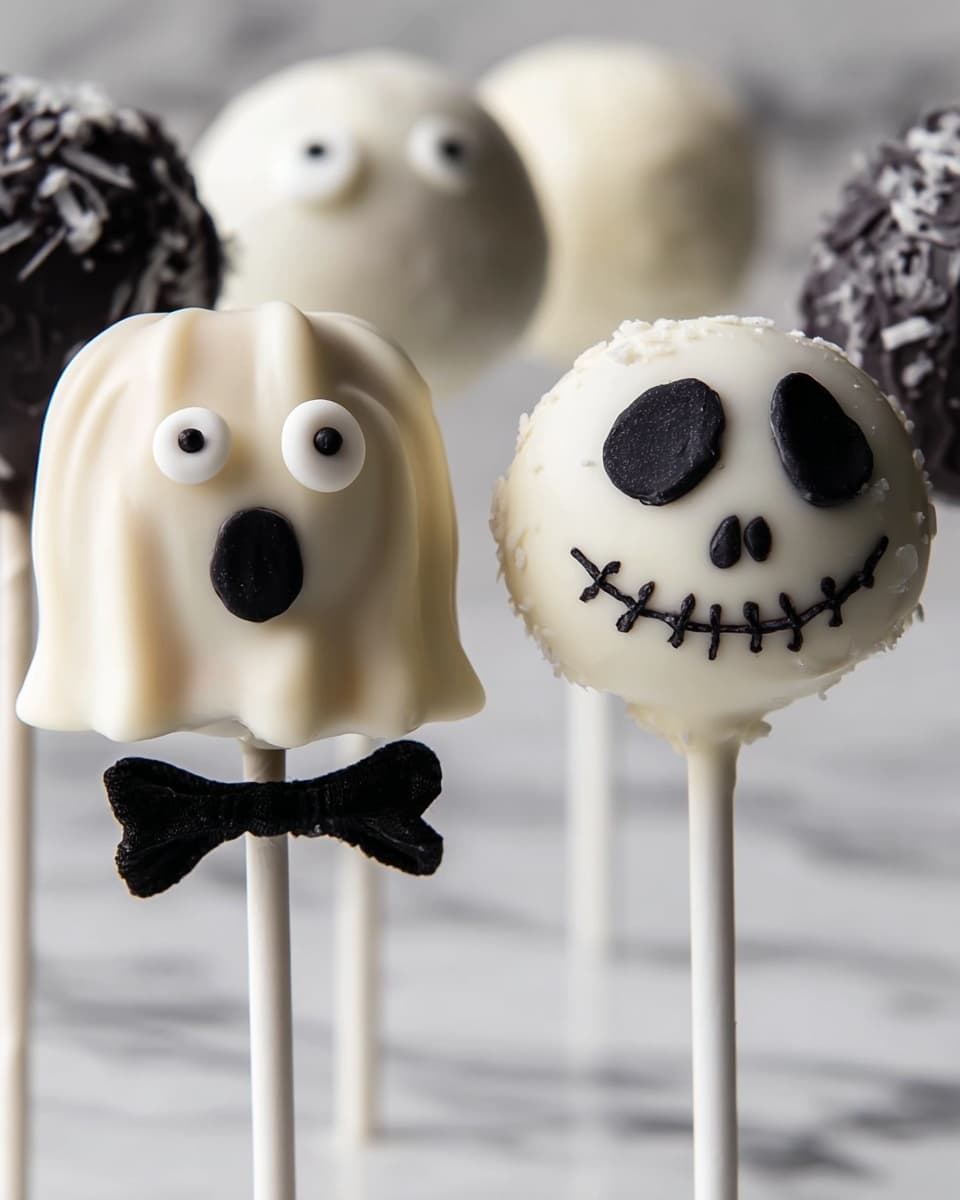
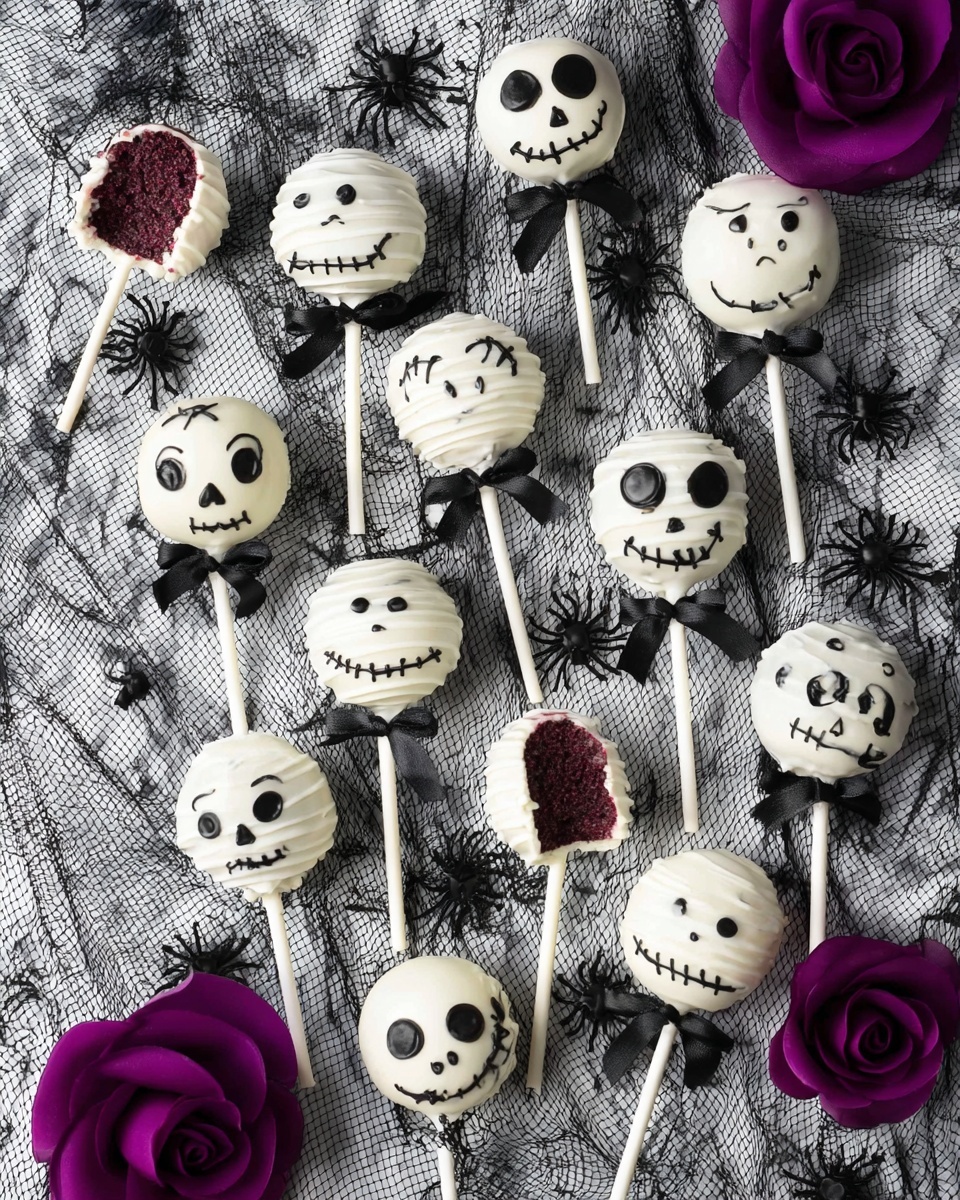
- Fun & Festive Designs: Mummies, ghosts, and Jack Skellington faces make these pops irresistibly cute and spooky.
- Simple to Customize: You can easily swap colors and decorations to fit your own Halloween style.
- Perfect for Parties: These cake pops are portable and mess-free, making them a hit at any Halloween gathering.
Ingredients & Why They Work
All the ingredients in this Halloween Cake Pops Recipe come together to create a super moist, flavorful cake ball that holds its shape and tastes delicious with a smooth coating. I always recommend grabbing good-quality white chocolate wafers — they melt beautifully and give a nice, even finish.
- Red Velvet Cake Mix: The base of the cake pops; quick and reliable for consistent flavor and texture every time.
- Eggs: Help bind the cake mixture together when baking.
- Oil: Adds moisture and keeps the cake tender.
- Water: Hydrates the cake mix — simple but necessary.
- Cream Cheese Frosting: Adds tangy richness and moisture to the cake crumbs, crucial for easy shaping.
- White Chocolate Candy Melting Wafers: These form that glossy, smooth coating around each cake pop.
- Black Gel Food Color: For spooky decorations — gel works better than liquid for vivid colors.
- Vegetable Shortening: Helps thin the coating, giving you a smooth dip and shiny finish.
- Candy Eyeballs: Super convenient to add a bit of eerie character to your mummies and ghosts.
- Black/White Ribbon: For tying cute little bows on your Jack Skellington pops, finishing the look perfectly.
- Cake Pop Sticks: Essential for easy dipping and serving.
Make It Your Way
One of my favorite things about this Halloween Cake Pops Recipe is how easy it is to make your own. I usually stick to the classic ghosts and mummies, but sometimes I switch up my colors or add sprinkles for a little extra flair. You can totally personalize these to match your party theme or whatever spooky vibe you’re going for.
- Variation: I love making pumpkin-shaped cake pops by adding a little orange food coloring and a pretzel stem — it’s an easy switch with a fun payoff!
- Dietary Modifications: For gluten-free, use a gluten-free red velvet mix and verify your coatings are allergen-free.
- Extra Flavor: Stir in a teaspoon of espresso powder into the cake mix for a subtle mocha twist — it adds depth that pairs well with the cream cheese frosting.
Step-by-Step: How I Make Halloween Cake Pops Recipe
Step 1: Bake Your Red Velvet Cake
Start by preheating your oven to 350°F. In a large mixing bowl, beat the cake mix along with eggs, oil, and water at medium speed for about two minutes until smooth. Pour this batter into a greased 9×13 inch pan and bake for 25-30 minutes. Keep an eye out by inserting a toothpick—when it comes out clean, your cake is ready. Let it cool for 10 minutes in the pan, then flip it out onto a cooling rack to cool completely. Trust me, letting the cake cool fully makes shaping the cake balls way easier!
Step 2: Crumble and Mix
Once your cake is fully cooled, break it into chunks and pulse it in a food processor to get fine crumbs. If you don’t have a food processor, you can crumble it up by hand—just aim for small, even pieces. Pour the crumbs into a big bowl and add the cream cheese frosting. Mix thoroughly with your hands or a spoon until it’s all evenly combined and holds together. This is what lets you mold your cake balls that won’t fall apart.
Step 3: Shape Your Spooky Cake Pops
Roll the mixture into 2-inch balls for the regular pops. For ghost shapes, roll four balls a bit more cylindrical and fan out one end to create that ghostly sheet look — I love how cute these turn out! Place these shaped balls on a tray to prep for the stick and coating step.
Step 4: Attach the Sticks
Melt about 15 white chocolate wafers in small microwaving intervals until smooth. Dip one end of each cake pop stick about an inch deep into this melted chocolate. Then quickly insert the dipped stick into a cake pop, about two-thirds of the way in. This acts like glue, securing the stick so your pops don’t slide off during dipping. Wipe any excess chocolate off your fingers to keep things tidy and pop them into the fridge for 15 minutes to set.
Step 5: Dip in White Chocolate Coating
Next, grab a narrow jar or cup that’s just wide enough to fit your cake pop without wasting lots of coating. Melt half of the wafers along with half your shortening until smooth—it thins the coating for easier dipping. Dip each cake pop gently, holding it steady to avoid loosening the stick. Hold the pop upright to let excess drip off, tapping the stick lightly, then place it carefully into a holder (like a cake pop stand or foam). This part requires some patience, but it’s worth it for a smooth finish! Let them set for about 15 minutes.
Step 6: Decorate Your Mummies and Ghosts
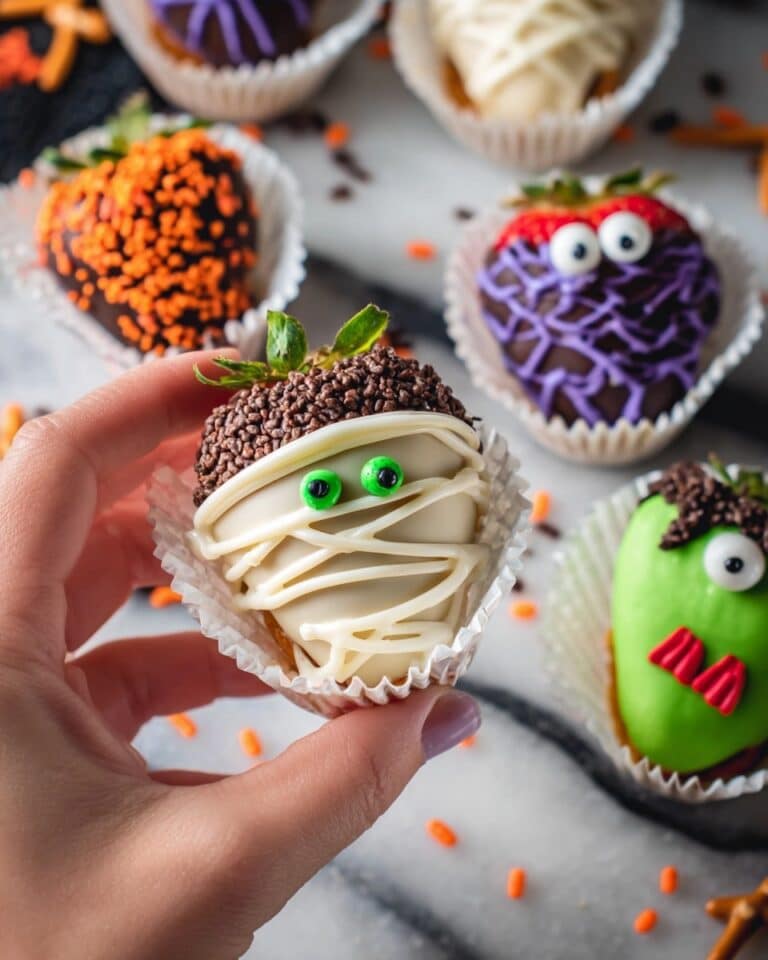
Warm the remaining coating again, adding a bit more shortening if needed for a piping consistency. Put it into a piping bag with a #3 tip. For mummy pops, pipe straight lines back and forth to look like bandages, then flip and repeat on the back—hold the pop carefully to avoid smudging. Add little dots of icing for the eyes and press candy eyeballs on top quickly before the icing sets. For ghosts, use some black icing to spot where the eyes go, then add a big round mouth. These small details make your pops come alive with personality!
Step 7: Add Final Touches for Jack Skellington
Mix the rest of the candy wafers with shortening and black food coloring for the dark decorations. Using a piping bag or bottle, create Jack Skellington’s face on some round cake pops. Cut some ribbon into 10-inch pieces and tie bows around these pops’ sticks — it’s a little flourish that really ties the design together. Display all your creations on your cake pop stand and get ready for lots of compliments!
Tips from My Kitchen
- Chill Your Cake Balls: Don’t skip the 15-minute fridge rest after inserting sticks—it helps them hold together and dip smoothly.
- Use a Narrow Jar for Dipping: It saves you from wasting lots of coating and gives more control when dipping.
- Work with Small Batches: Melt only half the coating at a time to prevent it from getting too thick or grainy.
- Gentle Handling: Hold cake pops steady when dipping and decorating to avoid stick wobble or smudging your designs.
How to Serve Halloween Cake Pops Recipe
Garnishes
I always add candy eyeballs for instant creepiness and character. Sometimes I sprinkle edible glitter or use colored sugar to add shimmer. The ribbon bows on the Jack Skellington pops are a personal favorite — they add a classy Halloween touch that really impresses guests.
Side Dishes
Pair these cake pops with some hot apple cider or a spooky punch. For a bigger spread, I like adding pumpkin cookies and caramel popcorn for complementary fall flavors. It makes the treat table feel complete and festive!
Creative Ways to Present
I enjoy creating little “graveyard” displays using crushed cookie “dirt” in trays or jars filled with dry beans to hold the cake pops upright. You can also use small Halloween-themed foam blocks or cake pop stands decorated with spider webs and miniature pumpkins. It’s a fun way to add atmosphere and make the cake pops truly the centerpiece of your party.
Make Ahead and Storage
Storing Leftovers
I keep leftover cake pops in an airtight container at room temperature for up to 3-4 days. If you want to stretch that, storing them in the fridge works great and keeps them fresh for up to a week — just bring them to room temp before serving for the best texture.
Freezing
I’ve frozen these cake pops wrapped individually in plastic wrap, then placed them in a freezer-safe container layered with wax paper. They hold up well for 6-8 weeks! Thaw slowly in the fridge overnight and avoid refreezing to keep them tasting fresh.
Reheating
Since these are cake pops, reheating isn’t really necessary — just bring frozen or chilled cake pops to room temperature before serving. If the coating loses some shine, a quick blast from a hairdryer on low, held at a good distance, can gently revive the gloss without melting the cake inside.
FAQs
-
Can I make Halloween Cake Pops Recipe without a food processor?
Yes! You can crumble the cake by hand using your fingers or a fork until the texture is fine enough to mix well with the frosting. It might take a few extra minutes, but the end result will still be delicious.
-
What’s the best way to prevent cake pops from falling off the sticks?
Dipping the sticks in melted chocolate before inserting them into the cake balls acts as glue, securing the pops firmly. Also, chilling the pops in the fridge after this step helps set everything solid for dipping.
-
Can I use other cake flavors for this recipe?
Absolutely! While red velvet is classic and looks great for Halloween, you can substitute with chocolate, pumpkin spice, or even a vanilla mix to suit your tastes and party theme.
-
How do I get the smoothest coating on my cake pops?
Using a narrow container for dipping and adding vegetable shortening to your melted wafers helps thin the coating, creating a smoother finish. Also, avoid swirling the pop around in the coating; instead, dip and gently tap off the excess while holding the pop still.
Final Thoughts
This Halloween Cake Pops Recipe is one of my go-to festive treats. It’s fun to make, looks adorable, and tastes just like a bite of fall happiness. I always get a kick out of customizing the spooky faces and watching them disappear at parties. Give yourself permission to get a little messy and enjoy the process — I promise, you’ll impress everyone with these lusciously moist, perfectly dipped magical cake pops. Ready to bring some Halloween magic to your kitchen? Grab your spoons and sticks and let’s get popping!
Print
Halloween Cake Pops Recipe
- Prep Time: 50 minutes
- Cook Time: 30 minutes
- Total Time: 1 hour 20 minutes
- Yield: 14 servings
- Category: Dessert
- Method: Baking
- Cuisine: American
Description
Create festive Halloween Cake Pops with red velvet cake, cream cheese frosting, and white chocolate coating. Decorated as mummies, ghosts, and Jack Skellington faces, these treats are perfect for Halloween parties and celebrations.
Ingredients
Cake
- 1 box red velvet cake mix
- 3 large eggs
- ½ cup oil
- 1¼ cup water
Frosting and Coating
- 5 tbsp cream cheese frosting
- 20 oz white chocolate candy melting wafers
- ⅓ cup vegetable shortening
Decoration
- 1½ tbsp black gel food color
- candy eyeballs for decorating
- 50 inch black/white ribbon for decorating
- cake pop sticks
Instructions
- Preheat and Mix: Preheat your oven to 350°F. In a large mixing bowl, beat the red velvet cake mix, eggs, oil, and water at medium speed for two minutes until smooth.
- Bake the Cake: Pour the batter into a greased 9×13 baking dish. Bake for 30 minutes or until a toothpick inserted in the center comes out clean. Cool in the dish for 10 minutes, then transfer to a rack to cool completely.
- Prepare Cake Crumbs: Break the cooled cake into pieces and pulse in a food processor until fine crumbs form. Transfer crumbs to a large bowl and mix in the cream cheese frosting until fully combined.
- Shape Cake Pops: Roll the mixture into 2-inch balls with your hands. For ghosts, roll four balls into cylindrical shapes and fan out one end to create the ghost shape.
- Attach Sticks: Melt about 15 white candy wafers. Dip one end of each cake pop stick about 1 inch into the melted coating, then insert the stick into each cake ball about 2/3 of the way through. Clean off excess coating and refrigerate pops for 15 minutes to set.
- Prepare Coating: In a narrow jar or cup, melt half the remaining white chocolate wafers with half of the vegetable shortening, stirring every 30 seconds in the microwave until smooth and dip-ready.
- Dip Cake Pops: Dip each cake pop into the melted coating, submerging fully without moving side to side. Hold upright and tap the stick gently to let excess drip off. Place pops upright in a stand or foam and set for 15 minutes.
- Decorate Mummies: Remelt the reserved coating if needed and place it in a piping bag with a #3 tip. Pipe straight lines over four cake pops to create mummy ‘bandages’ front and back. Add small dots of coating as glue and place candy eyeballs on top to finish mummy faces. Let set.
- Prepare Black Coating: Melt remaining wafers and shortening, then mix in black gel food color until smooth. Fill a piping bag or dispensing bottle with this black coating for decorating.
- Decorate Jack Skellington: Cut the ribbon into five 10-inch pieces and tie bows around five round cake pops. Use the black icing to pipe Jack Skellington’s facial features. Place in the pop holder.
- Decorate Ghosts: Use the black icing to add two small eyes and a large round mouth on ghost-shaped cake pops. Allow decorations to dry completely in the holder.
- Display and Serve: Arrange all decorated cake pops in a stand or display for your Halloween party.
Notes
- Store cake pops in an airtight container at room temperature for 3-4 days or refrigerate for 5-7 days.
- Freeze cake pops in a freezer-safe container with wax paper between layers for 6-8 weeks.
- Use a cake pop stand, foam, or container filled with beans or rice to hold the cake pops upright during decorating.
- Gently tap the cake pop stick instead of swirling to avoid loosening the stick while dipping.
- You can substitute vegetable shortening with coconut oil if preferred.
Nutrition
- Serving Size: 1 cake pop
- Calories: 220 kcal
- Sugar: 18 g
- Sodium: 150 mg
- Fat: 14 g
- Saturated Fat: 7 g
- Unsaturated Fat: 5 g
- Trans Fat: 0 g
- Carbohydrates: 22 g
- Fiber: 1 g
- Protein: 2 g
- Cholesterol: 35 mg

