Batter-Fried Chicken (Easy & Extra-Crispy) Recipe
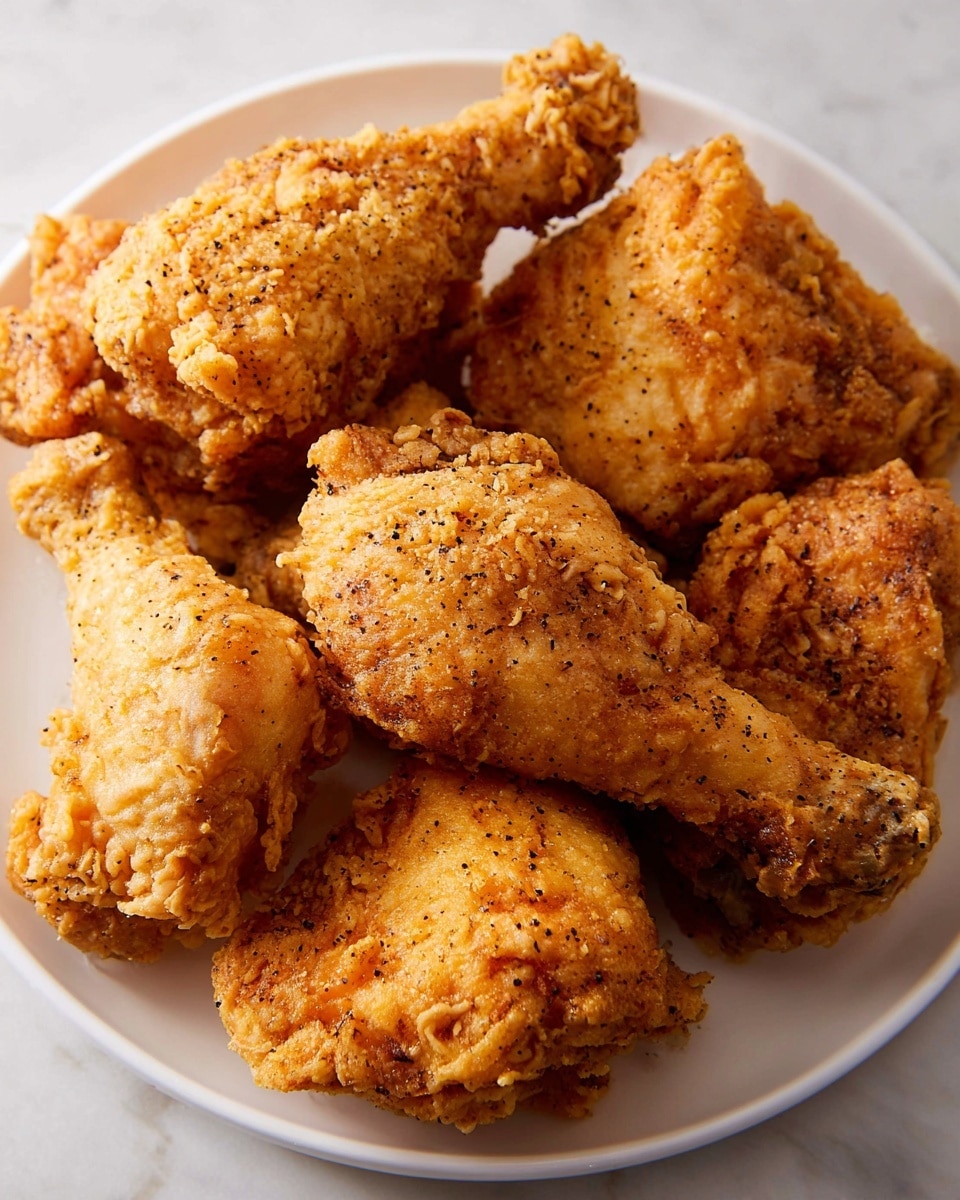
If you’re craving that perfect crunchy, crispy, just-right kind of fried chicken, this Batter-Fried Chicken (Easy & Extra-Crispy) Recipe is legitimately a game-changer. It’s that rare recipe that manages to deliver a super crunchy exterior without drying out the tender, juicy meat inside. Plus, the batter is effortless, and I love that extra touch of heat from the cayenne pepper, which really wakes up the flavor.
This recipe shines anytime you want to wow guests or simply treat yourself on a cozy weekend. I find it especially great for casual dinners when I want something satisfying but don’t want to fuss over complicated steps. Once you nail this batter-fried chicken, trust me, it’s going to be a favorite go-to that you’ll want to make again and again.
Why This Recipe Works
- Crisp & Light Batter: The combination of all-purpose flour and cornstarch creates a perfectly airy but crunchy crust every time.
- Flavorful Brine: Brining the chicken adds juiciness and seasoning deep into the meat, making each bite taste incredible.
- Oil Temperature Control: Maintaining the right frying temperature ensures the coating crisps without absorbing too much oil or burning.
- Simple Ingredients: No need for complicated spice blends or hard-to-find items – just straightforward pantry staples with a twist.
Ingredients & Why They Work
This Batter-Fried Chicken (Easy & Extra-Crispy) Recipe calls for ingredients that not only add flavor but are key to the texture and success of the dish. Every element works together to produce that signature crunchy crust without weighing down the tender chicken inside.
- Kosher Salt: Essential for seasoning both the brine and batter perfectly; it helps enhance the chicken’s natural flavor.
- Granulated Sugar: Balances the salty brine and helps with browning the skin slightly for beautiful color.
- Bone-in, Skin-on Chicken Pieces: Using bone-in skin-on pieces locks in moisture and gives the best flavor and texture.
- All-Purpose Flour: Forms the base of the batter, providing structure to the crust.
- Cornstarch: Key for lightness and extra crispiness in the batter — don’t skip or substitute!
- Black Pepper, Paprika, Cayenne Pepper: These spices add warmth and a subtle kick that lift the flavor profile.
- Baking Powder: Helps the batter puff up and get that wonderfully crispy texture.
- Cold Water: Keeps the batter light, and helps retain crunch when frying.
- Vegetable or Peanut Oil: Neutral-flavored oils with high smoke points are ideal for frying perfectly crispy chicken without burning.
Make It Your Way
I love how flexible this Batter-Fried Chicken (Easy & Extra-Crispy) Recipe is – you can easily tweak the spice level, play with the herbs in the batter, or adjust the brining time to your liking. Your kitchen, your rules! Feel free to experiment with your favorite seasonings or swap sides to suit your mood.
- Variation: I often add a teaspoon of garlic powder or dried thyme to the batter for a little herbal undertone that my family adores.
- Spicy Kick: If you like heat, bump up the cayenne pepper or add some smoked paprika – it makes the flavor pop beautifully.
- Gluten-Free: Try using a gluten-free all-purpose blend to keep it crispy and safe for gluten-sensitive eaters.
- Dairy-Free: This recipe is already dairy-free, making it a perfect option for those avoiding milk products.
Step-by-Step: How I Make Batter-Fried Chicken (Easy & Extra-Crispy) Recipe
Step 1: Brine the Chicken for Juicy Tenderness
Start by whisking the kosher salt and sugar into cold water to create a brine. Then, submerge your chicken pieces in this flavorful bath and refrigerate for about 60 minutes. I can’t emphasize enough how much this step improves the texture and seasoning inside the meat—don’t skip it! After brining, be sure to pat the chicken completely dry with paper towels; this makes sure the batter will stick perfectly.
Step 2: Whip Up the Crispy Batter
While your chicken is soaking up all that savory goodness, whisk together all your dry batter ingredients: flour, cornstarch, black pepper, paprika, cayenne, baking powder, and salt. Then pour in the cold water and blend until it’s a smooth, slightly thick batter—think pancake batter consistency. I always refrigerate the batter too; it helps keep it cold, which leads to a lighter, crispier coating once fried.
Step 3: Fry with Care for Perfect Crunch
Heat your oil to 350°F in a deep pot—using a thermometer here is a game-changer. Coat the chicken pieces by dunking them in the batter, letting excess drip off, and gently placing them in the hot oil. Keep the oil temperature steady between 300°F and 325°F during frying to avoid greasy or burnt chicken. Cooking times will vary—you’re looking for a deep golden brown and an internal temperature of 160°F for white meat, 175°F for dark meat. Remember, don’t overcrowd the pot; frying in batches gets you the best result.
Step 4: Drain & Repeat Until All Chicken is Crispy
After frying your batch, set the chicken on a wire rack placed over a baking sheet to drain. This keeps the crust crisp. Bring the oil back up to temperature before starting another batch—this tip really helped me avoid soggy spots on my chicken. Serve hot, warm, or even cold if you have leftovers (which rarely happens in my house!).
Tips from My Kitchen
- Pat Chicken Dry: After brining, drying the chicken thoroughly ensures the batter clings tightly and creates that coveted crunch.
- Keep Batter Cold: Refrigerating the batter before frying keeps it light and prevents it from turning gluey or heavy.
- Use a Thermometer: Watching oil temperature helps you avoid greasy or burnt spots, elevating your results instantly.
- Don’t Crowd the Pan: Cooking in batches might be extra work, but it stops the chicken from sticking together and maintains crispiness.
How to Serve Batter-Fried Chicken (Easy & Extra-Crispy) Recipe
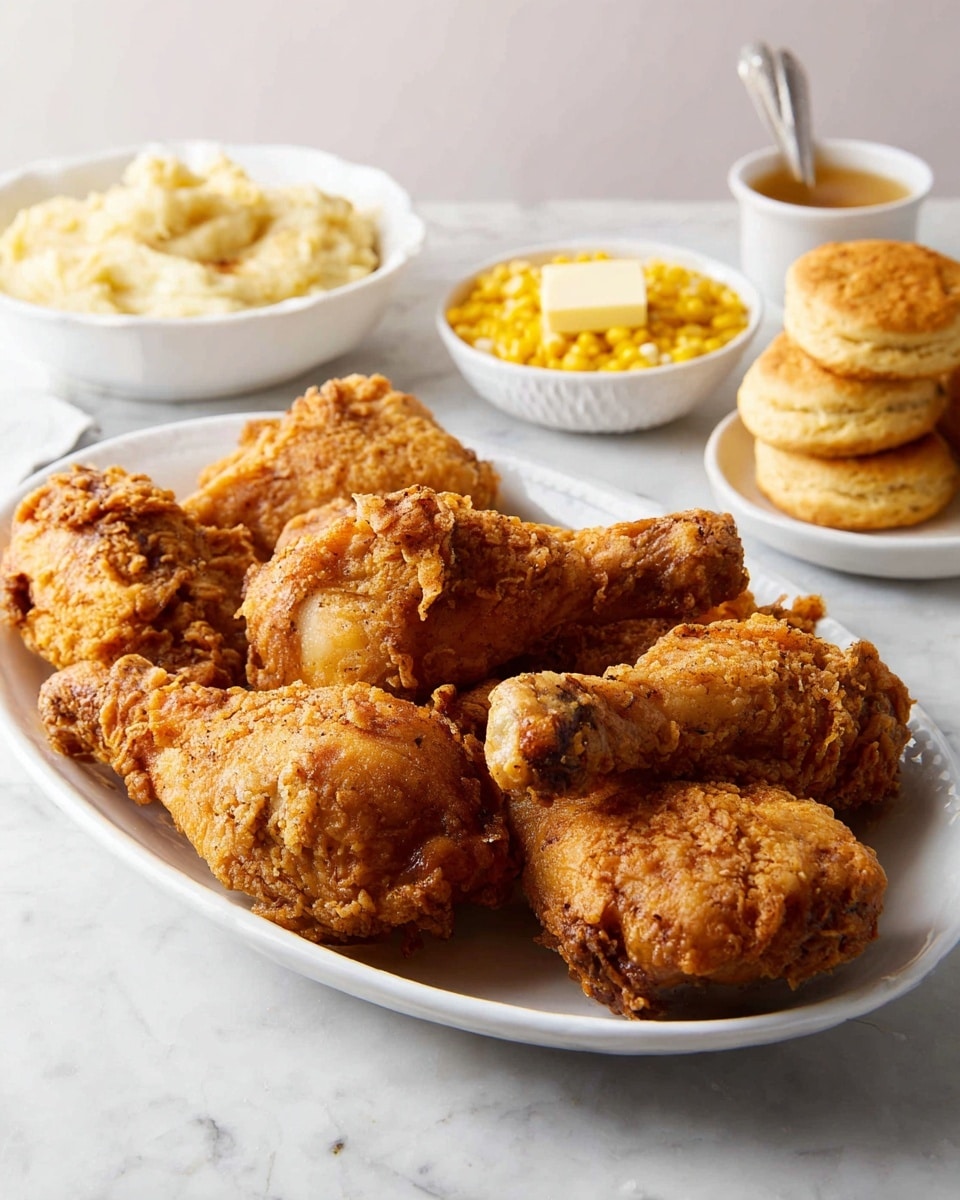
Garnishes
I usually sprinkle some fresh chopped parsley or chives over the chicken just before serving—adds a nice pop of color and fresh flavor. Sometimes a squeeze of lemon brightens things up, especially if you love a contrast to the richness of the fried crust.
Side Dishes
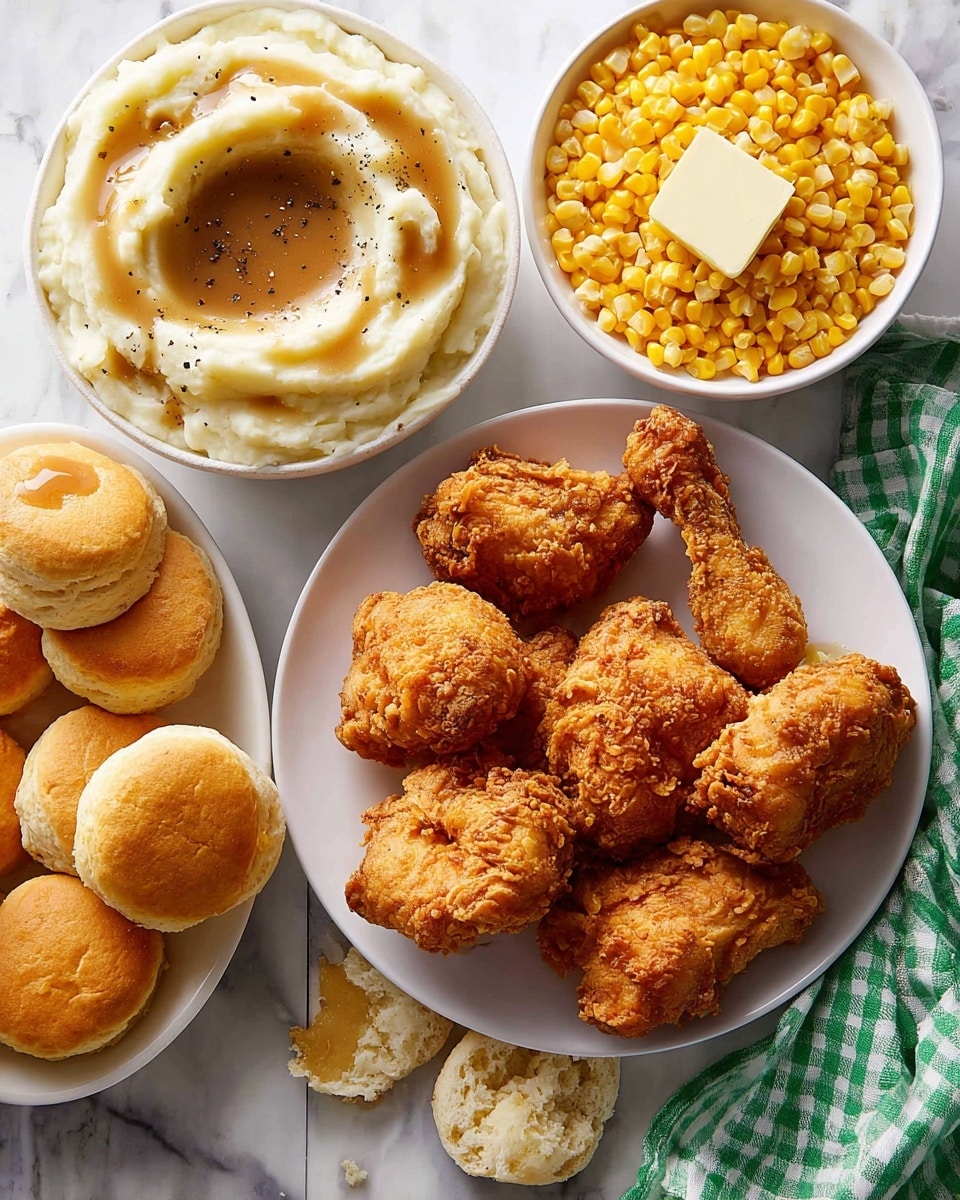
Classic pairings like creamy coleslaw or buttery mashed potatoes are my go-tos. Roasted veggies or even a crisp salad give a lighter balance, especially when you want a meal that feels a bit less heavy. And trust me, some flaky biscuits or cornbread complete the plate like no other!
Creative Ways to Present
For special occasions, I’ve set out a “fried chicken bar” with different dipping sauces—think honey mustard, spicy mayo, and classic BBQ. It turns a simple dinner into a fun, interactive experience. You could also serve the chicken on a big wooden board with pickles, fresh herbs, and lemon wedges for a rustic vibe that gets everyone talking.
Make Ahead and Storage
Storing Leftovers
I like to keep leftover batter-fried chicken in an airtight container in the fridge for up to 3 days. To keep the crust from getting soggy, I place parchment paper between layers. It’s perfect for next-day lunches or snacks.
Freezing
Freezing works great with this recipe. After frying, cool the chicken completely, then wrap each piece individually in plastic wrap and place them in a freezer bag. When you’re ready, thaw overnight in the fridge before reheating.
Reheating
To bring back that fresh-crispy texture, I reheat the chicken in a 375°F oven on a wire rack so the heat circulates all around. About 15-20 minutes does the trick. Avoid microwaving if you want to keep that satisfying crunch!
FAQs
-
Can I use boneless chicken for this Batter-Fried Chicken (Easy & Extra-Crispy) Recipe?
Yes, but keep in mind that bone-in, skin-on chicken tends to stay juicier and flavor-rich during frying. Boneless pieces cook faster, so you’ll want to adjust the frying time accordingly to avoid drying them out.
-
Why is the batter cold, and does it really matter?
Keeping the batter cold helps create a lighter, crispier coating because it slows down gluten development in the flour. Cold batter hitting hot oil leads to that beautifully puffy and crunchy texture we’re after.
-
How do I prevent the batter from falling off during frying?
Make sure to thoroughly dry the chicken after the brining step and allow the excess batter to drip off before frying. Also, avoid flipping the chicken too frequently once it’s in the oil to keep the crust intact.
-
Can I bake instead of fry this chicken?
This batter-fried chicken relies on hot oil for its signature crunch. Baking won’t produce quite the same texture but if you want a lighter alternative, you might try baking with a spray of oil and turning halfway through, though it won’t be as crispy.
Final Thoughts
This Batter-Fried Chicken (Easy & Extra-Crispy) Recipe really holds a special spot in my kitchen because it brings together simplicity and incredible flavor without any fuss. It’s a recipe I confidently recommend to friends who want that crave-worthy fried chicken experience at home. Once you try it, I bet you’ll find yourself making it over and over—just like me!
Print
Batter-Fried Chicken (Easy & Extra-Crispy) Recipe
- Prep Time: 30 minutes
- Cook Time: 30 minutes
- Total Time: 1 hour 30 minutes
- Yield: 6 servings
- Category: Main Course
- Method: Frying
- Cuisine: Southern American
- Diet: Low Lactose
Description
This easy and extra-crispy Batter-Fried Chicken recipe features juicy bone-in, skin-on chicken pieces brined for flavor and coated in a light, crispy batter made from a blend of all-purpose flour and cornstarch. Fried to golden perfection, this classic Southern-style fried chicken is perfect for any meal.
Ingredients
For the fried chicken brine
- 1 quart (4 cups) cold water
- 1/4 cup kosher salt
- 1/4 cup granulated sugar
- 4 pounds bone-in, skin-on chicken pieces (halve each chicken breast crosswise and separate leg quarters into thighs and drumsticks)
For the fried chicken batter
- 1 cup all-purpose flour
- 1 cup cornstarch
- 5 teaspoons freshly ground black pepper
- 1 teaspoon paprika
- 1/2 teaspoon cayenne pepper
- 2 teaspoons baking powder
- 1 teaspoon kosher salt, plus more to taste
- 1 3/4 cups cold water
- 3 quarts (12 cups) vegetable oil or peanut oil, for frying
Instructions
- Make the chicken brine: In a large bowl, whisk together 1 quart (4 cups) cold water, 1/4 cup kosher salt, and 1/4 cup granulated sugar until fully dissolved. Add 4 pounds bone-in, skin-on chicken pieces, cover the bowl, and refrigerate for 60 minutes to brine.
- Make the fried chicken batter: While the chicken is brining, combine 1 cup all-purpose flour, 1 cup cornstarch, 5 teaspoons freshly ground black pepper, 1 teaspoon paprika, 1/2 teaspoon cayenne pepper, 2 teaspoons baking powder, and 1 teaspoon kosher salt in a large bowl. Pour in 1 3/4 cups cold water and whisk until smooth. Cover and refrigerate the batter during the brining process.
- Heat the oil: Heat 3 quarts (12 cups) vegetable or peanut oil in a large Dutch oven or deep pot over medium-high heat until it reaches 350°F (176°C). Place a wire rack on a rimmed baking sheet to drain fried chicken later.
- Prepare the chicken for frying: Discard the brine and thoroughly pat the chicken pieces dry with paper towels to ensure the batter sticks well. Whisk the chilled batter to recombine; if it is too thick, add cold water one tablespoon at a time until the consistency resembles pancake batter.
- Batter and fry the chicken: Dip half the chicken pieces into the batter, turning to coat fully. Let excess batter drip back into the bowl, then carefully place the battered chicken into the hot oil. Maintain oil temperature between 300°F and 325°F (149°C and 163°C) by adjusting heat as needed.
- Cook the chicken: Fry chicken pieces until deeply golden brown and cooked through, reaching an internal temperature of 160°F (71°C) for white meat and 175°F (79°C) for dark meat, which takes 12 to 25 minutes depending on piece size and oil temperature.
- Drain the chicken: Transfer fried chicken to the wire rack to drain excess oil. Allow the oil to return to 350°F (176°C) before frying the remaining chicken pieces using the same process.
- Serve: Serve the fried chicken hot, warm, at room temperature, or cold if there are leftovers. Enjoy!
Notes
- To thin the batter: If the batter is too thick after resting in the fridge, whisk in cold water a tablespoon at a time until it reaches pancake batter consistency.
- Dry the chicken thoroughly after brining; this is crucial for batter adhesion and crispiness.
- Maintain the flour-to-cornstarch ratio to achieve a light and crispy crust—do not substitute these ingredients.
- Do not overcrowd the frying pot to avoid chicken pieces sticking together; fry in batches if necessary.
- Use hot oil and ensure it returns to 350°F between batches; frying in cooler oil leads to soggy coating.
- This recipe is dairy-free and can be made gluten-free by substituting regular flour with gluten-free all-purpose flour.
Nutrition
- Serving Size: 1 piece (approx. 150g)
- Calories: 450 kcal
- Sugar: 2 g
- Sodium: 800 mg
- Fat: 25 g
- Saturated Fat: 4 g
- Unsaturated Fat: 20 g
- Trans Fat: 0 g
- Carbohydrates: 30 g
- Fiber: 1 g
- Protein: 28 g
- Cholesterol: 85 mg

