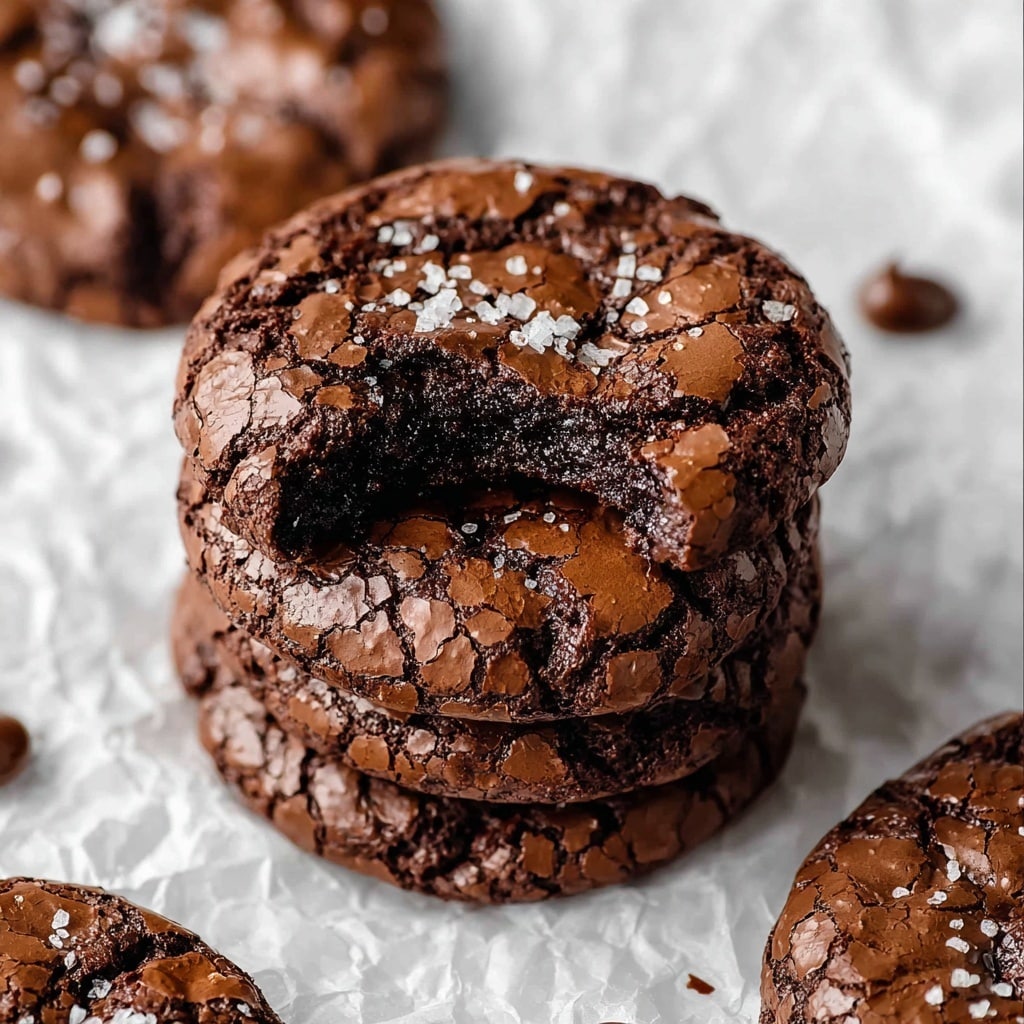
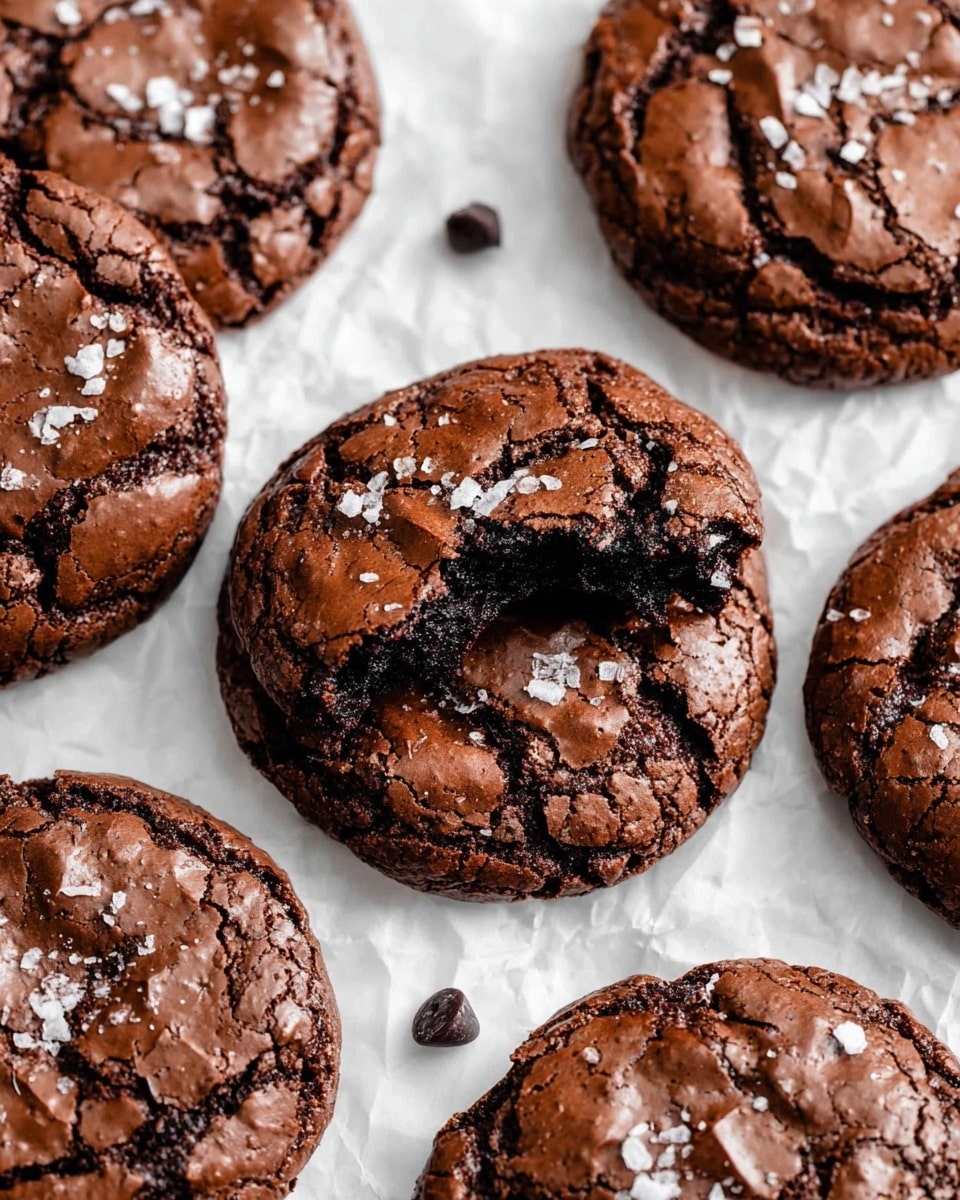
Fudgy Chewy Browkies (Brookies) Recipe
If you love a dish that feels like a warm, comforting hug on your plate, then this Garlic Parmesan Chicken and Pasta Recipe is going to be your new go-to. I remember the first time I made it — the creamy sauce, that punch of garlic, and the perfectly cooked chicken blended together in such a simple yet irresistible way. It’s definitely one of those meals that feels fancy but takes less than 40 minutes to whip up, making it perfect for busy weeknights or casual weekend dinners.
What really makes this Garlic Parmesan Chicken and Pasta Recipe stand out is how effortlessly the flavors balance: the nuttiness of freshly grated parmesan, the subtle heat from paprika, and the fresh garlic aroma filling your kitchen. Plus, the pasta cooks right in the flavorful broth, so it’s extra tender and infused with all those delicious tastes. Trust me, once you try it, this recipe will become one you’ll want to make again and again — and I’ll share all my little tips to help you nail it every time.
Why This Recipe Works
- Simple, One-Pan Cooking: Everything cooks in one skillet, saving you time on both prep and cleanup.
- Rich, Creamy Sauce: The combination of parmesan and heavy cream gives a luscious, velvety texture the whole family will love.
- Balanced Flavors: Garlic, Italian herbs, and paprika create a perfect flavor punch without being overpowering.
- Versatile and Adaptable: You can easily swap pasta types or tweak seasoning to suit your taste or dietary needs.
Ingredients & Why They Work
Each ingredient in this Garlic Parmesan Chicken and Pasta Recipe brings something special to the table, and together they create the kind of dish that tastes way more complicated than it really is. Choosing fresh, quality ingredients helps make all the difference — especially when it comes to the parmesan and garlic!
- Boneless, skinless chicken breast: Butterflied or pounded thin for even cooking and juicy results.
- Italian seasoning: A blend of herbs that adds depth and familiar Mediterranean flavor.
- Paprika: Adds a subtle earthiness and beautiful color without heat.
- Avocado or olive oil: Perfect for searing the chicken and sautéing aromatics without overwhelming flavors.
- Yellow onion: Brings sweetness and a gentle pungency when softened.
- Garlic cloves: The aromatic star that gives the dish its signature bold and fragrant kick.
- Penne pasta: Holds onto sauce well and cooks evenly; gluten-free or protein-packed options work great too.
- Chicken broth: Cooks the pasta and infuses it with savory richness.
- Unsalted butter: Adds creaminess and a slight richness when cooking the aromatics.
- Freshly grated parmesan cheese: Melts beautifully into the sauce and gives that unmistakable nutty, cheesy flavor.
- Heavy cream: Gives the sauce a silky smooth finish that coats every bite.
- Chopped parsley: Adds fresh color and brightness when sprinkled on top.
Make It Your Way
I like to think of this Garlic Parmesan Chicken and Pasta Recipe as a blank canvas — you can easily adjust it to fit your mood or pantry. I often swap out parsley for basil or add a pinch of red pepper flakes if I’m craving a little heat. Don’t be afraid to make it yours!
- Variation: Sometimes I swap Italian seasoning with fresh herbs like rosemary and thyme for a brighter popped flavor.
- Dietary tweak: For a lower-carb version, try it with zucchini noodles or shirataki pasta instead of penne — it works surprisingly well.
- Extra veggies: Throw in some spinach or mushrooms during the sauce step to sneak in greens effortlessly.
Step-by-Step: How I Make Garlic Parmesan Chicken and Pasta Recipe
Step 1: Season and Sear the Chicken
First things first: pat your chicken dry with paper towels—this helps get a nice golden crust. Mix your Italian seasoning, paprika, salt, and pepper, then rub it all over the chicken on both sides. Heat your pan over medium and add the avocado oil until shimmering, then place your chicken in. Cook it 3-5 minutes per side—don’t rush this! The key is a good sear without burning. Use a meat thermometer to check for 165°F, then transfer the chicken to a plate and let it rest while you move on to the pasta base.
Step 2: Build the Flavor with Onion and Garlic
Lower the heat to medium-low and add a bit more oil plus the butter. Toss in the diced onion and season lightly with salt; cooking for about 3 minutes softens and sweetens it just right. Then add the minced garlic and stir for another minute until fragrant — be careful not to let it brown, or it can get bitter. This step lays the aromatic foundation for the sauce.
Step 3: Deglaze and Cook the Pasta
Pour in the chicken broth and scrape the bottom of the pan with a wooden spoon to lift all those tasty browned bits — that’s where the magic is! Bring the broth to a gentle boil, then add your dry penne, stirring to make sure it’s submerged. Cover your pan and simmer for about 10 minutes or until the pasta reaches a perfect al dente. This method means you don’t have to boil pasta separately — one less pot to clean!
Step 4: Finish with Parmesan, Cream & Parsley
Turn off the heat, sprinkle in your freshly grated parmesan, add the heavy cream, and stir gently. The parmesan melts into the sauce, thickening it up and adding that signature cheesy richness. Toss in the chopped parsley for a fresh, herbaceous note. Give it a taste and adjust the seasoning with salt and pepper as needed.
Step 5: Slice and Add the Chicken
Slice your rested chicken into strips and fold them into the creamy pasta. Toss gently to combine everything evenly. And just like that, you’re ready to serve a comforting plate of creamy, garlicky goodness.
Tips from My Kitchen
- Butterfly for Even Cooking: I always pound the chicken to about half an inch thick so it cooks evenly and stays juicy.
- Fresh Parmesan Matters: Using freshly grated parmesan on the smallest grater holes prevents clumping and makes the sauce extra smooth.
- Don’t Overcook Pasta: Keep an eye on the pasta to ensure it stays al dente since it will continue softening a bit after you add the cream and cheese.
- Rest Your Chicken: Letting the chicken rest after cooking helps keep the juices sealed in, making every bite tender.
How to Serve Garlic Parmesan Chicken and Pasta Recipe
Garnishes
I always love a sprinkle of extra freshly chopped parsley on top — it brightens the whole dish and adds that fresh pop of green that just looks inviting. Sometimes a little cracked black pepper or even a pinch of chili flakes works great for an extra kick if you’re into it.
Side Dishes
This recipe is hearty on its own, but I like to serve it alongside a crisp green salad or simple steamed veggies like broccoli or green beans to balance the richness. Garlic bread or a crusty baguette also pairs perfectly if you want to soak up every last bit of sauce.
Creative Ways to Present
For special occasions, I’ve served this in individual skillet dishes right at the table — it keeps things warm and feels cozy and special. Another fun twist is adding a few cherry tomatoes on top for color or swapping the parsley for fresh basil for a more aromatic experience.
Make Ahead and Storage
Storing Leftovers
I store leftovers in an airtight container in the fridge and they typically keep beautifully for up to 3 days. I find the flavors actually get better the next day when everything has had time to mingle.
Freezing
While cream-based pasta can be tricky to freeze, I’ve had success freezing just the cooked chicken and pasta separately without the cream sauce. Then, when you’re ready, reheat gently and add fresh cream and parmesan to revive the sauce.
Reheating
Reheat leftovers gently in a saucepan over low heat, adding a splash of chicken broth or cream to loosen the sauce if it tightens too much. Microwaving works too, but stirring halfway through helps maintain that creamy consistency.
FAQs
-
Can I use other types of chicken for this Garlic Parmesan Chicken and Pasta Recipe?
Absolutely! While boneless skinless chicken breasts are recommended for quick even cooking, you can also try boneless thighs if you prefer a juicier, slightly richer flavor. Just adjust cooking time accordingly, as thighs may take a little longer.
-
What type of parmesan cheese is best for this recipe?
Freshly grated Parmigiano-Reggiano is the gold standard here—it melts beautifully and gives the rich, nutty flavor that truly elevates the sauce. Avoid pre-shredded or powdered parmesan, which often contain anti-caking agents that can make the sauce grainy or clumpy.
-
Can I make this recipe gluten-free?
Yes! Simply swap the penne pasta for a gluten-free variety. Just keep an eye on cooking times as some gluten-free pastas can cook faster or slower. The rest of the recipe stays exactly the same and just as delicious.
-
Is it possible to make this Garlic Parmesan Chicken and Pasta Recipe dairy-free?
You can substitute the heavy cream with full-fat coconut milk and use a dairy-free cheese alternative, though it will alter the flavor slightly. Nutritional yeast can offer a cheesy taste if you want a completely dairy-free sauce.
-
How can I make the garlic flavor more subtle or stronger?
For a milder garlic flavor, reduce the cloves used or mince them finely and cook gently so they don’t burn. If you love garlic, try roasting the cloves first before adding—they add a sweeter, deeper flavor that’s amazing in this pasta.
Final Thoughts
This Garlic Parmesan Chicken and Pasta Recipe has become a staple in my kitchen because it’s both comforting and incredibly easy to make. It hits all the right notes — creamy, cheesy, garlicky, and perfectly seasoned — and always brings smiles around the table. If you’re looking for a recipe that feels like a home-cooked hug but doesn’t keep you in the kitchen forever, you’ll really enjoy this one. Give it a try soon, I promise you won’t regret it!
Print
Fudgy Chewy Browkies (Brookies) Recipe
- Prep Time: 15 minutes
- Cook Time: 14 minutes
- Total Time: 29 minutes
- Yield: 15 cookies
- Category: Dessert
- Method: Baking
- Cuisine: American
Description
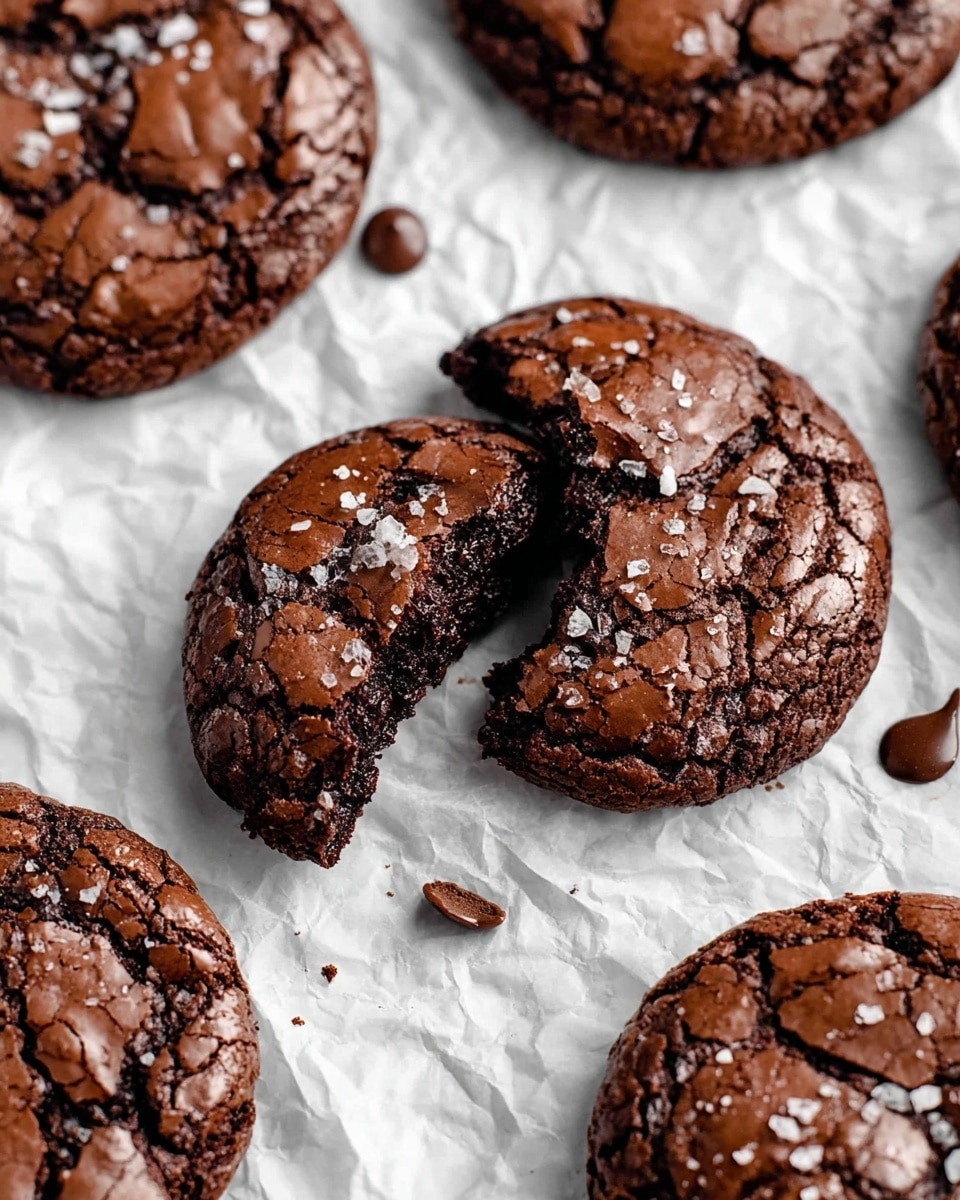
Delight in these fudgy chewy brookies, a perfect hybrid of brownies and cookies, featuring a rich dark chocolate base combined with melty chocolate chips. This recipe yields irresistibly soft treats with a crackly top, ideal for chocolate lovers and easy to make at home.
Ingredients
Dry Ingredients
- 95 g (¾ cups) plain (all-purpose) flour
- 2 tablespoons cocoa powder
- 1 teaspoon baking powder
- ¼ teaspoon salt
- 85 g (½ cups) dark or milk chocolate chips
Wet Ingredients
- 225 g (1 ¼ cups) dark chocolate, chopped
- 56 g (¼ cups) butter, salted or unsalted
- 2 eggs, room temperature
- 100 g (¾ cups) caster or granulated sugar
- 90 g (½ cups) Demerara or raw sugar
- 1 teaspoon vanilla extract
Instructions
- Preheat the Oven: Set your oven to 160ºC (320ºF) with fan or 170ºC (338ºF) for conventional heat. Line a baking tray with parchment paper to prevent sticking.
- Melt Chocolate and Butter: Place chopped dark chocolate and butter in a heatproof bowl over simmering water, ensuring the bowl bottom does not touch the water. Stir occasionally until fully melted and combined. Stir in vanilla extract.
- Whip Eggs and Sugars: In a medium bowl, beat the eggs, caster sugar, and Demerara sugar on high speed using an electric hand whisk until the mixture is thick, light, and fluffy, about 5 minutes.
- Combine Dry Ingredients: Sift flour, cocoa powder, baking powder, and salt together in another bowl, then mix in chocolate chips for even distribution.
- Integrate Chocolate Mixture: Gradually fold the melted chocolate and butter into the whipped eggs and sugars, stirring gently to retain air and fluffiness.
- Fold in Dry Ingredients: Carefully fold the dry ingredients into the wet mixture with a spatula, mixing just until combined to preserve batter lightness.
- Bake the Brookies: Using a tablespoon or cookie scoop, place rounded scoops of batter on the prepared tray spaced apart. Bake for 14 minutes or until set with a crackly top.
- Cool and Finish: Remove from oven and sprinkle with sea salt immediately if desired. Let brookies cool on the tray for 10 minutes before transferring to a wire rack to cool completely.
Notes
- Watch chocolate carefully while melting to avoid overheating or burning; microwave time should be adjusted per your microwave’s power.
- Whip eggs and sugars until thick enough to leave a ribbon trail from your whisk for best texture.
- Use a cookie scoop for consistent-sized brookies to ensure even baking.
- Cooling on the tray before moving helps brookies firm up without breaking.
- Demerara sugar provides a crunchy texture and caramel flavor; substitute with turbinado or raw sugar if unavailable.
Nutrition
- Serving Size: 1 cookie
- Calories: 180 kcal
- Sugar: 15 g
- Sodium: 55 mg
- Fat: 10 g
- Saturated Fat: 6 g
- Unsaturated Fat: 3 g
- Trans Fat: 0 g
- Carbohydrates: 20 g
- Fiber: 2 g
- Protein: 3 g
- Cholesterol: 40 mg

